This is intended to be everything you could possibly want or need to know about our Christmas light display. The hope is that this information will inspire and aid you to create a light display of your own and help add a bit more wonder to an already wonderful time of year.
We would also like to give a major shout out to Matt Johnson from San Antonio. His light show on YouTube inspired us to get into pixel lighting and gave us a standard of excellence and precision to strive for. He also has several how-to videos that were immensely helpful in understanding some of the parts required for putting together a legit Christmas light display.
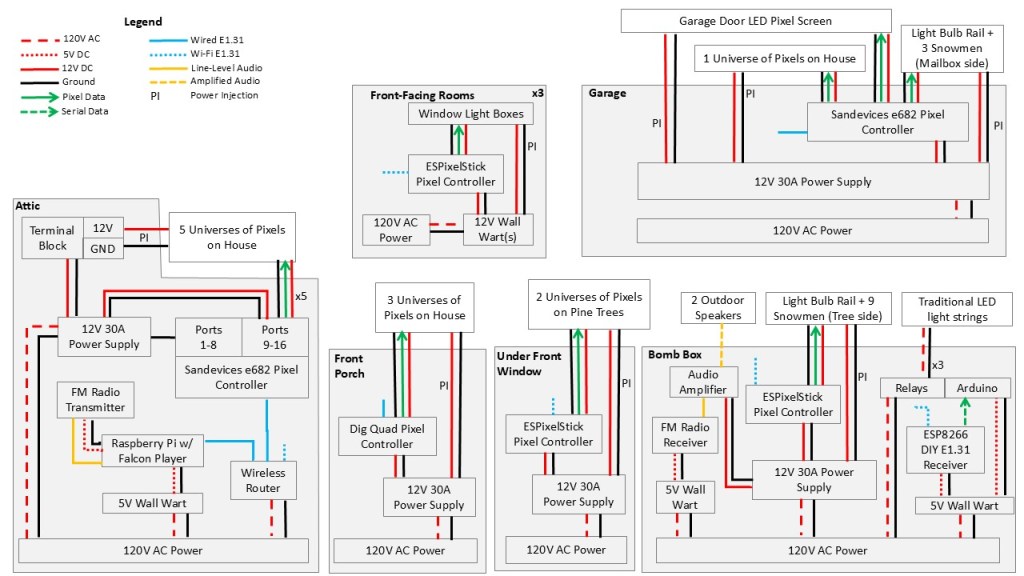
Below is an overview of our system showing how it is all hooked together, along with dedicated pages for each component. There are also other miscellaneous pages dedicated to specific issues we encountered and the lessons we learned from them.
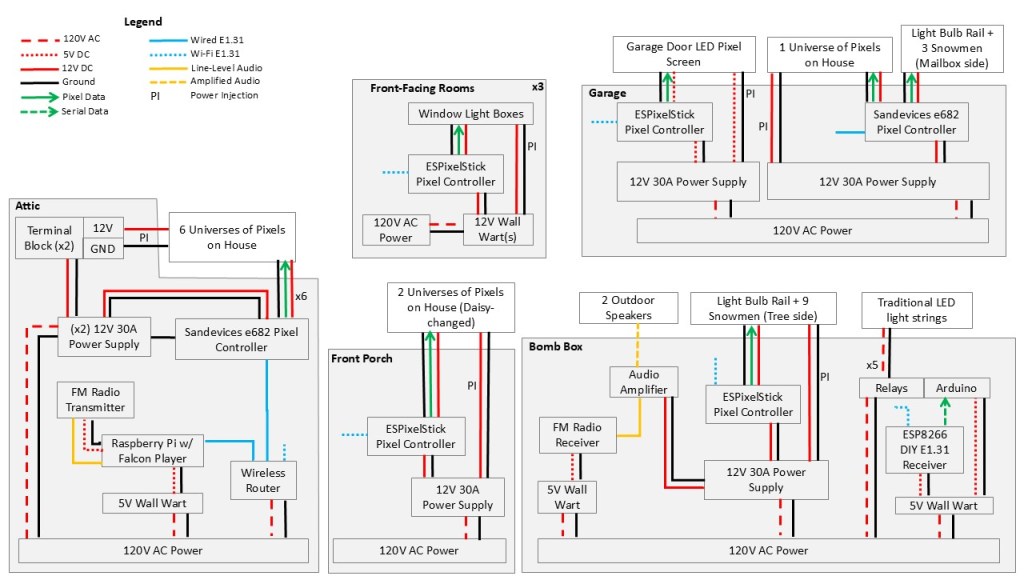
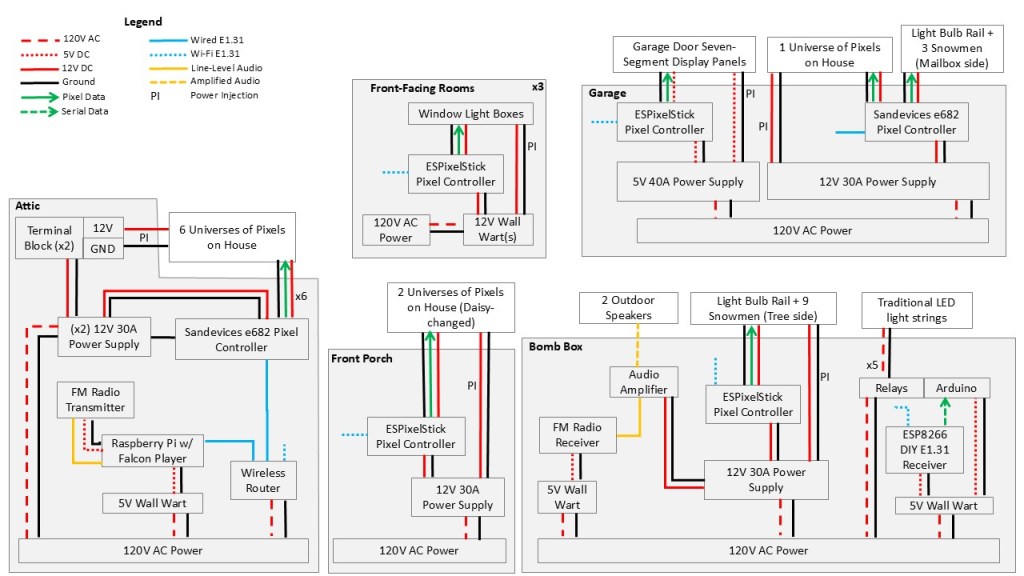
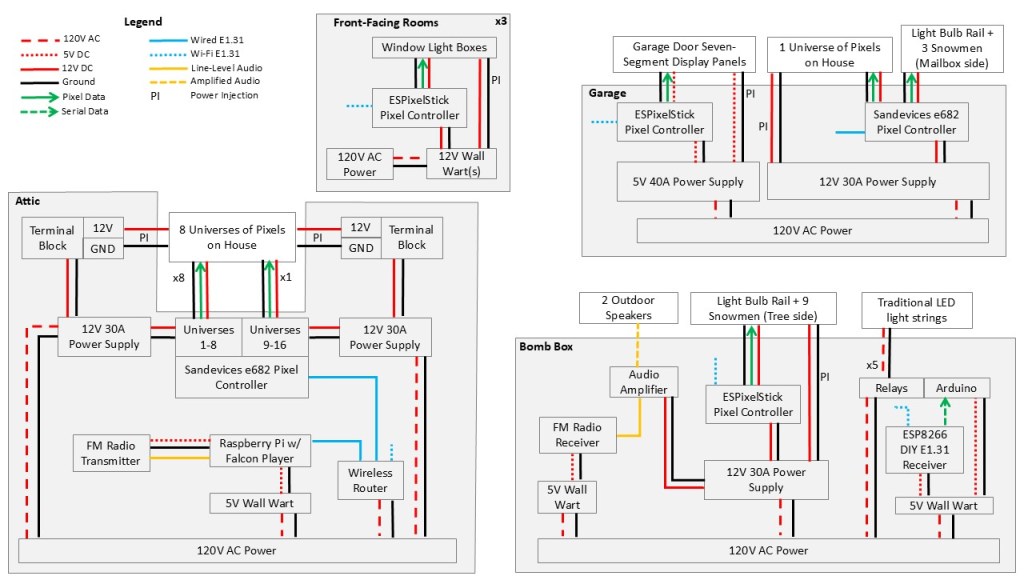
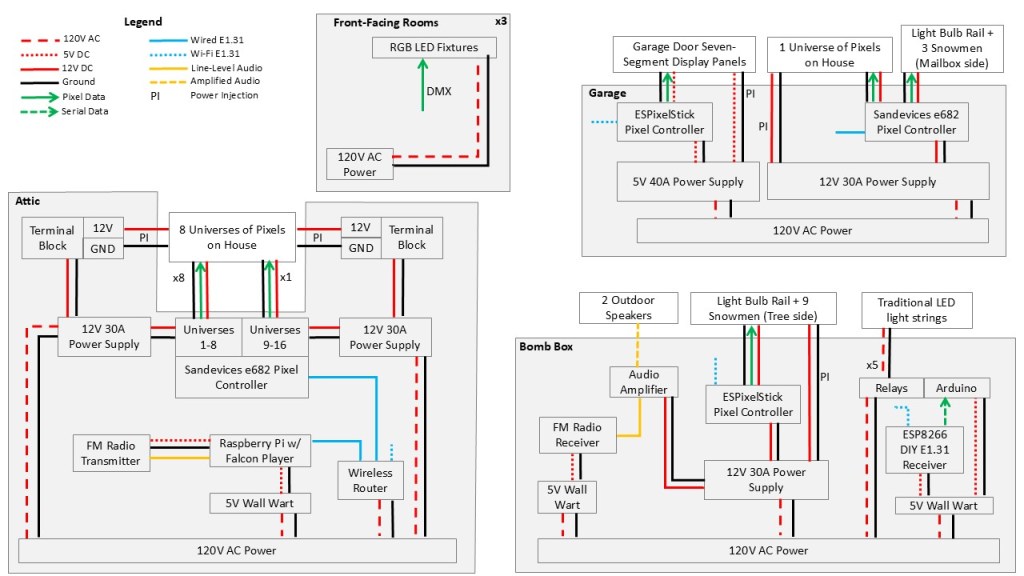
Master Wiring Diagram
Starting the Process
Understanding Pixel Lighting
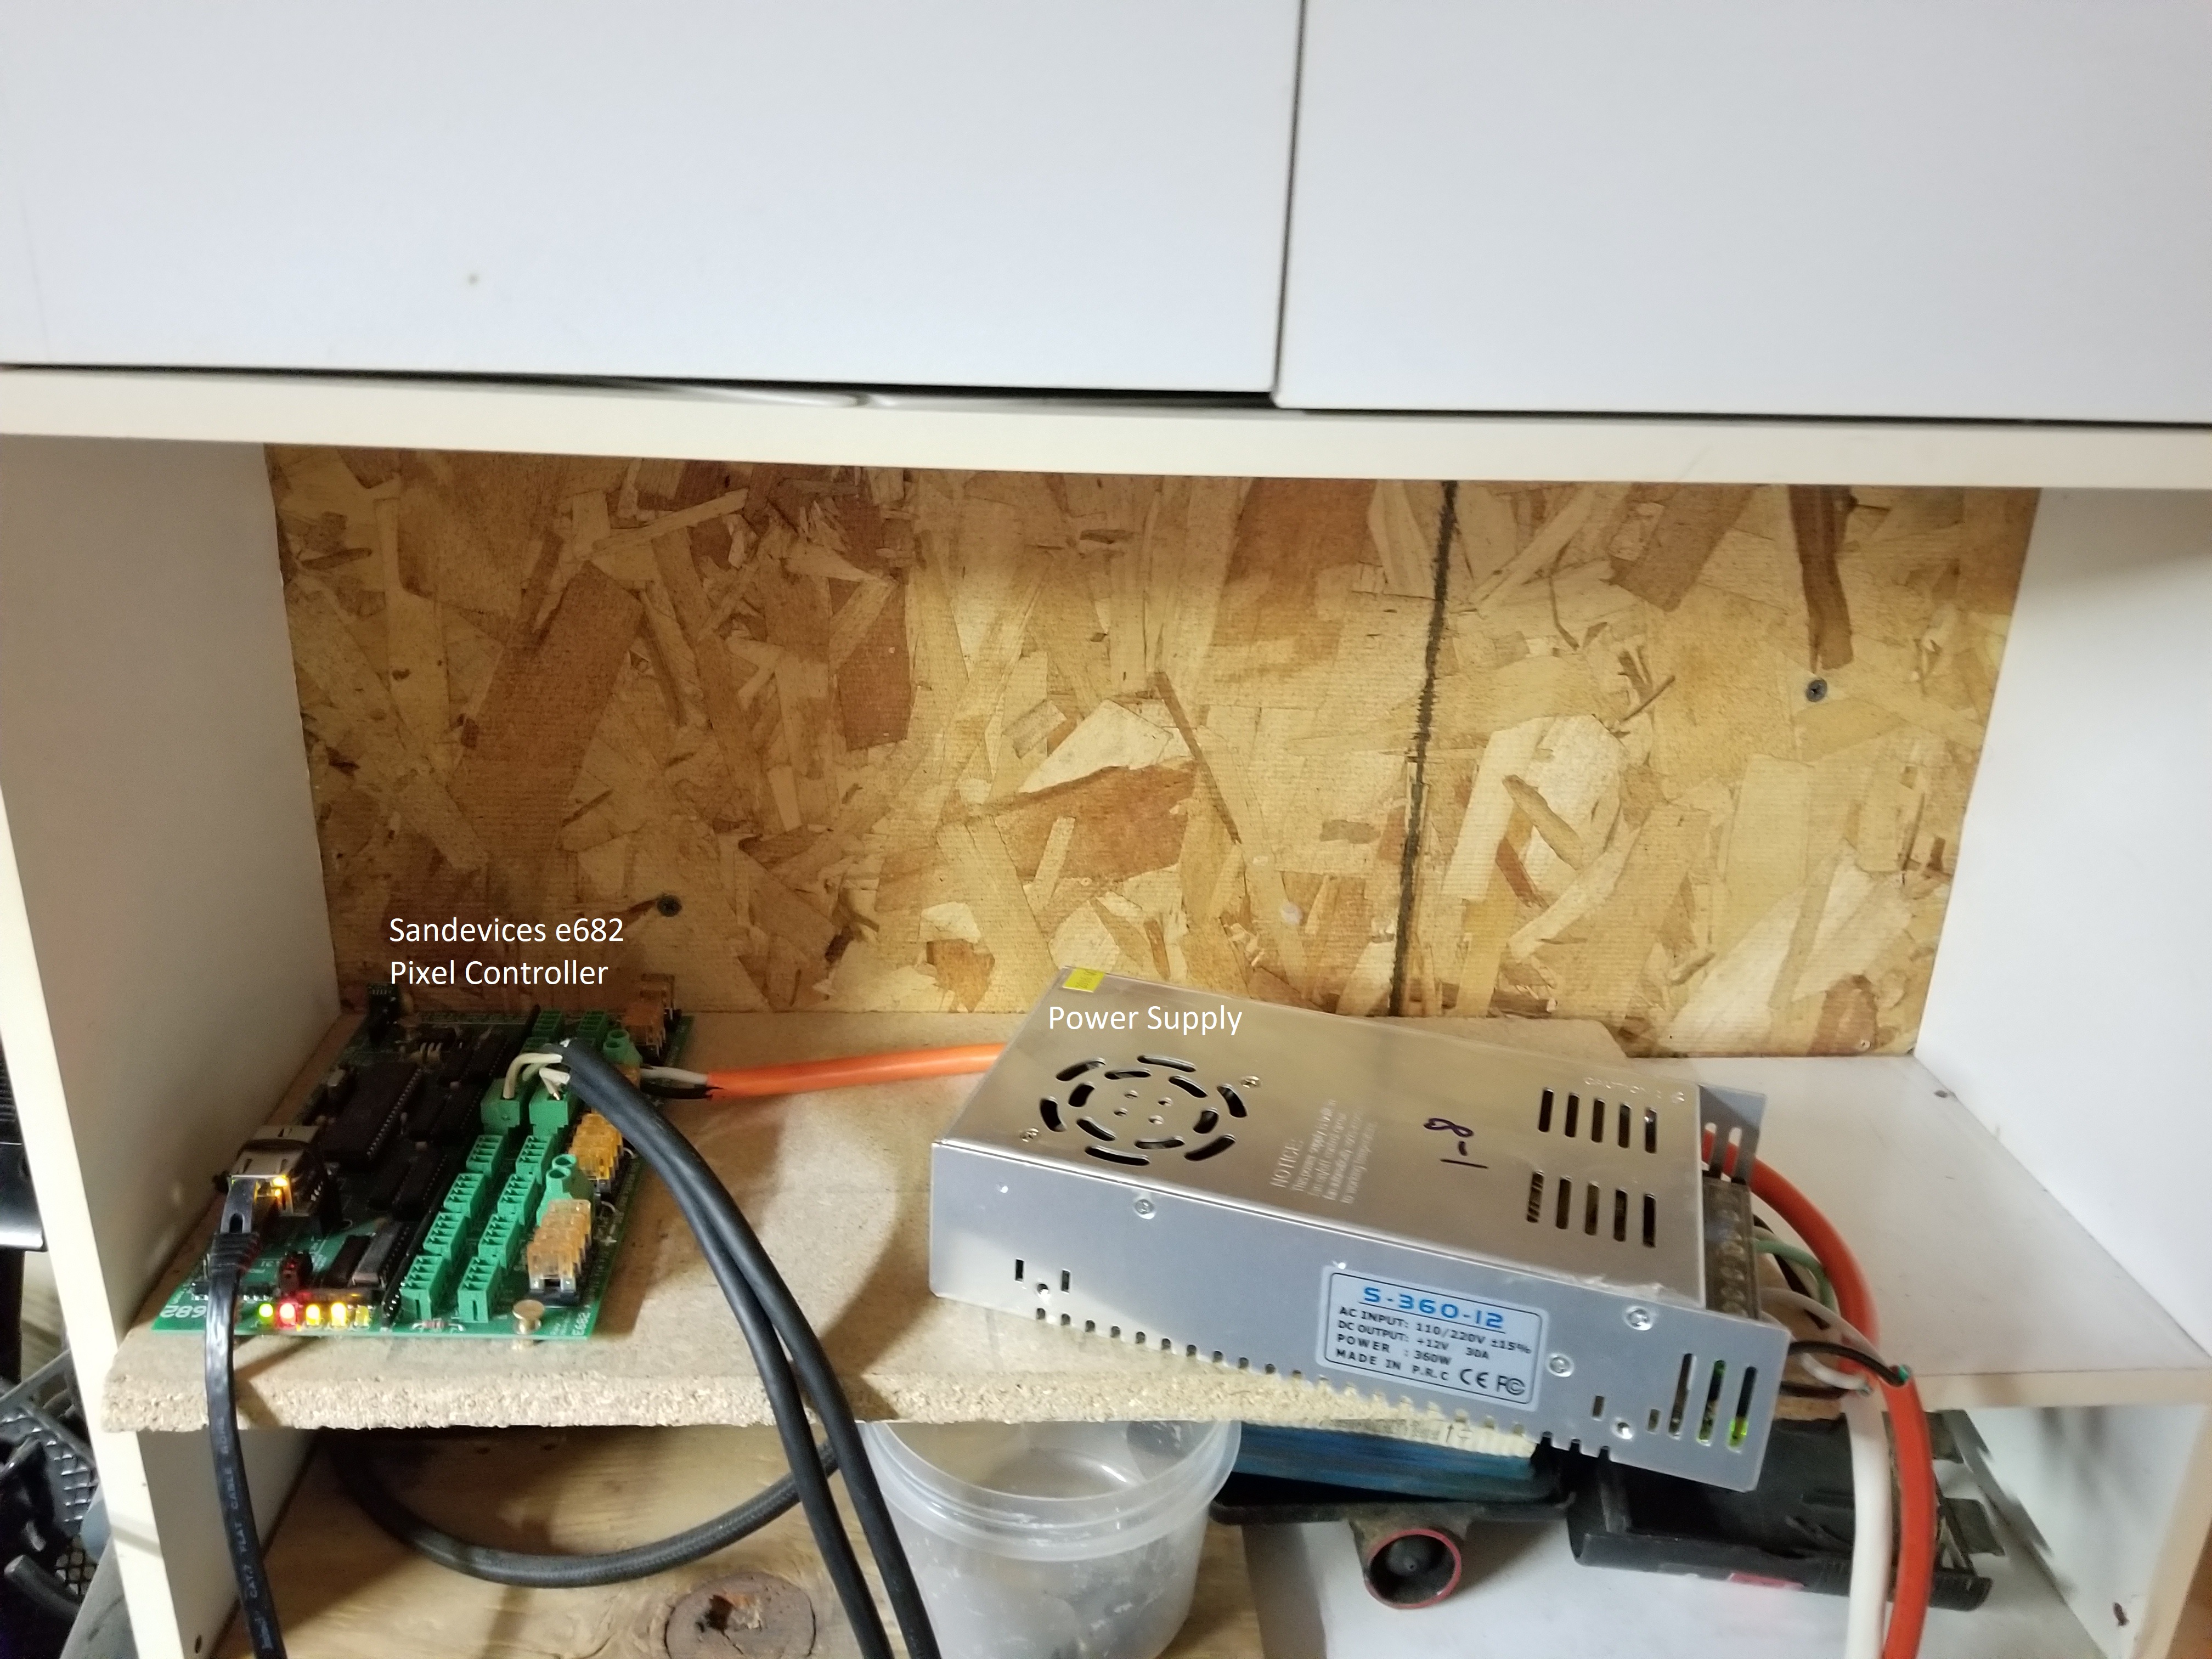
The Attic Control Center
As we laid out the system, we quickly determined that the attic was the most logical location to house most of our Christmas light electronics. While not the most convenient to access, it is the best option for shortening our cable runs and getting the best audio performance out of our FM transmitter, while also being 100% weatherproof. As an added benefit , we can mostly just leave the equipment there in the off season.
Philip built a shelf for holding the electronics at the front of the attic right next to front-facing air vent through which we run all of our cables. One helpful thing we did was to wire in a power outlet right next to the shelf and put it on a light switch that lives in the laundry room (that’s where our attic access is). Having a switch in easy reach means we can hard reboot the system if needed without having to get a ladder and climb into the attic to cycle power there.

The attic houses the following equipment:
Sandevices E682 Pixel Controller
Car Counting and Associated Equipment
The Garage Shelf Mini Control Center
We also have a mini control center in the front corner of the garage for controlling Universe 1 of pixels (the front of the garage) and the yard elements on the mailbox-side of the driveway.
This houses the following equipment:
Sandevices E682 Pixel Controller
Front Porch
Starting in 2018, we decided to run universes 6 and 7 from their own power supply and wireless pixel controller, primarily to avoid stringing multiple extension cords across the roof. These two universes are on the left side of the house and pretty far from the attic control center. Instead, we mounted a power supply and controller to the underside of the porch ceiling where it is protected from the elements.
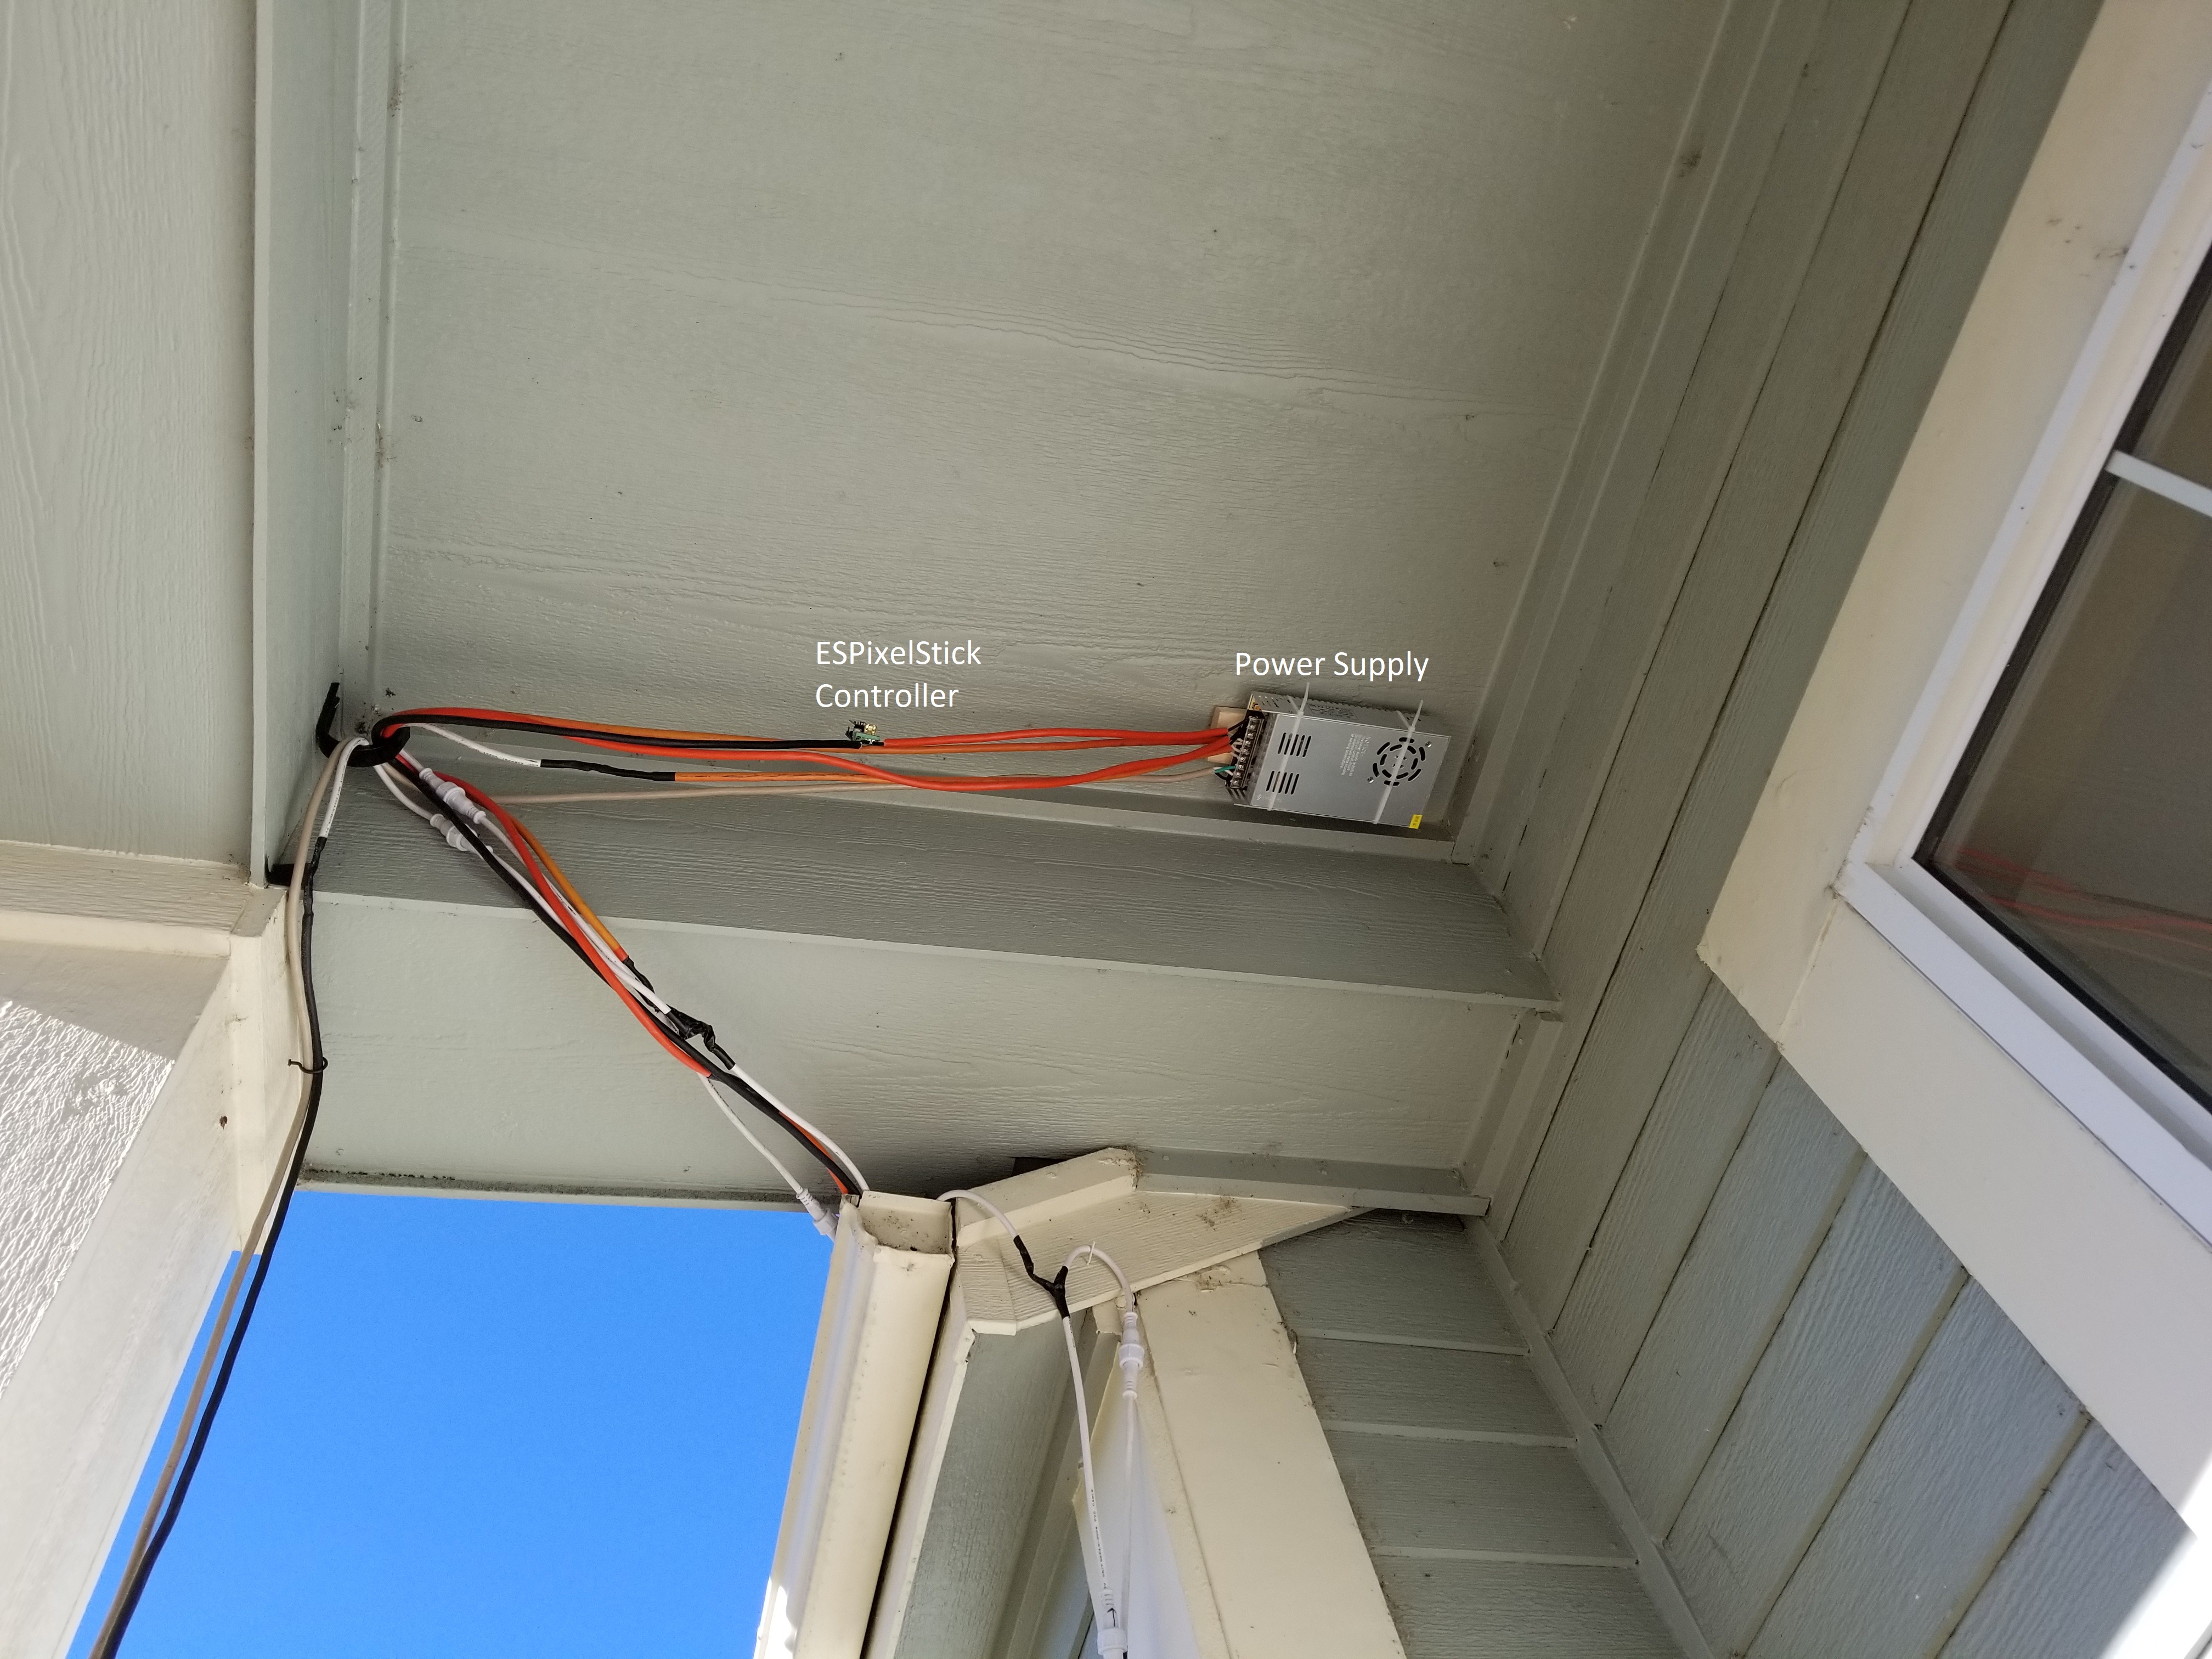
The front porch “control center” contains the following equipment:
Backlighting the Front Windows
One of the unique features of our Christmas light display is the backlighting of our three front windows. Prior to 2017, we achieved this effect through the use of LED Par Cans. From 2017 on, we have used window light boxes to achieve a similar effect but better.
Turning the Garage Door into a Canvas
In 2020, we replaced the 4 seven-segment displays on the garage door with a full LED pixel screen. As with the old elements, the pixel screen presented several interesting challenges due to the need for the garage door to remain operational.
Bringing the Lights to the Sidewalk
Our 2016 show was limited mostly to the house itself and thus was fairly two dimensional. In 2017, we introduced two new lighting elements in the yard to add a third dimension to our show: LED Snowmen along the sidewalk and Light Bulb Rails lining the driveway. In 2021, we introduced a new interactive display (in the neighbor’s yard) to give people the chance to interact with lights using various controllers.
The Bomb Box, the Trees, and the Sign
The nerve center of our yard elements is our “bomb box”, so named because of all the flashing lights, clicking sounds, and wires contained within. It contains equipment for controlling our handful of traditional strings of Christmas lights as well as the audio speakers for the front yard.
Front Yard Relays (aka Bomb Box)
The Creative Aspects
A good Christmas light show is not just about the technology. There is also a lot of creativity that goes into preparing the music and sequencing the lights.
Crafting the Music for a Christmas Light Show
Sequencing the Lighting Effects with Vixen
Filming a Christmas Light Show
Bringing the Vision to Life
Other Miscellaneous Items
The Other 11 Months…How to Store All These Lights
Old Master Wiring Diagrams