Overview
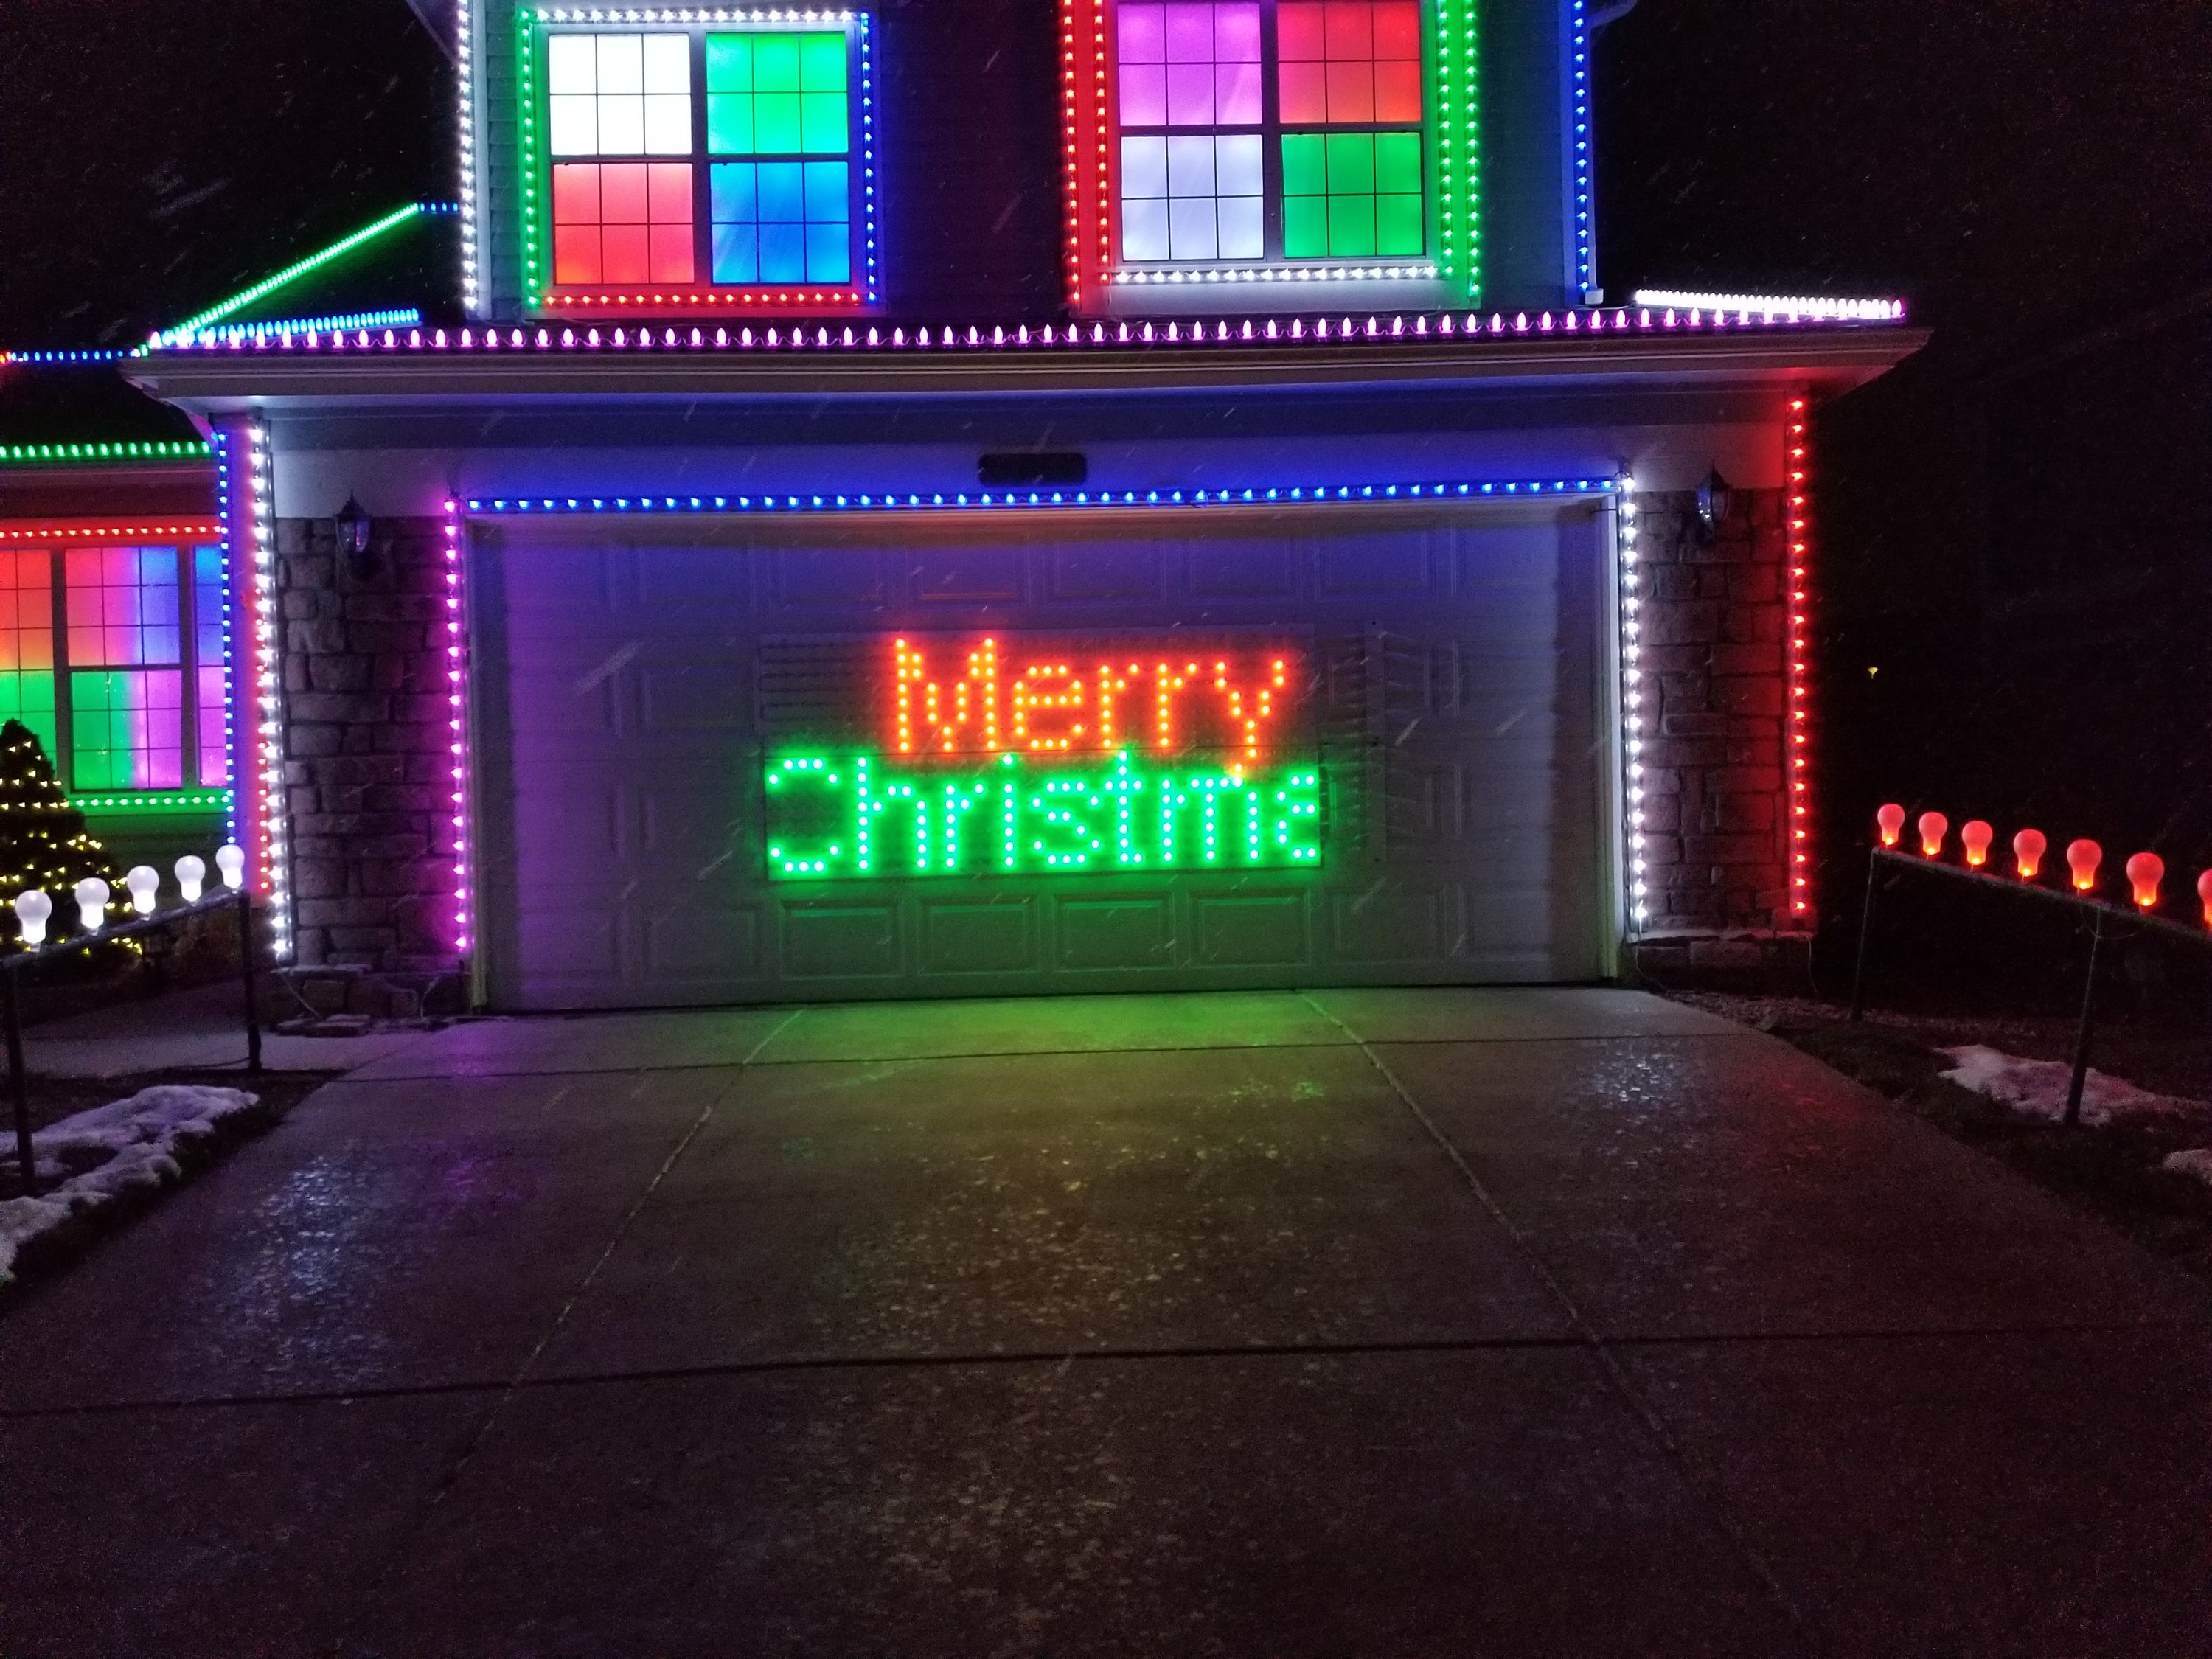
We created the pixel screen in 2020 to replace the Garage Door Seven-Segment Display we originally built in 2017. The pixel screen is a significant improvement in both functionality and (we believe) in durability over our original attempts at garage door illumination. The pixel screen consists of 608 pixels in a 38 x 16 grid that spans roughly 8 feet wide by 3.5 feet tall.

The Pixels
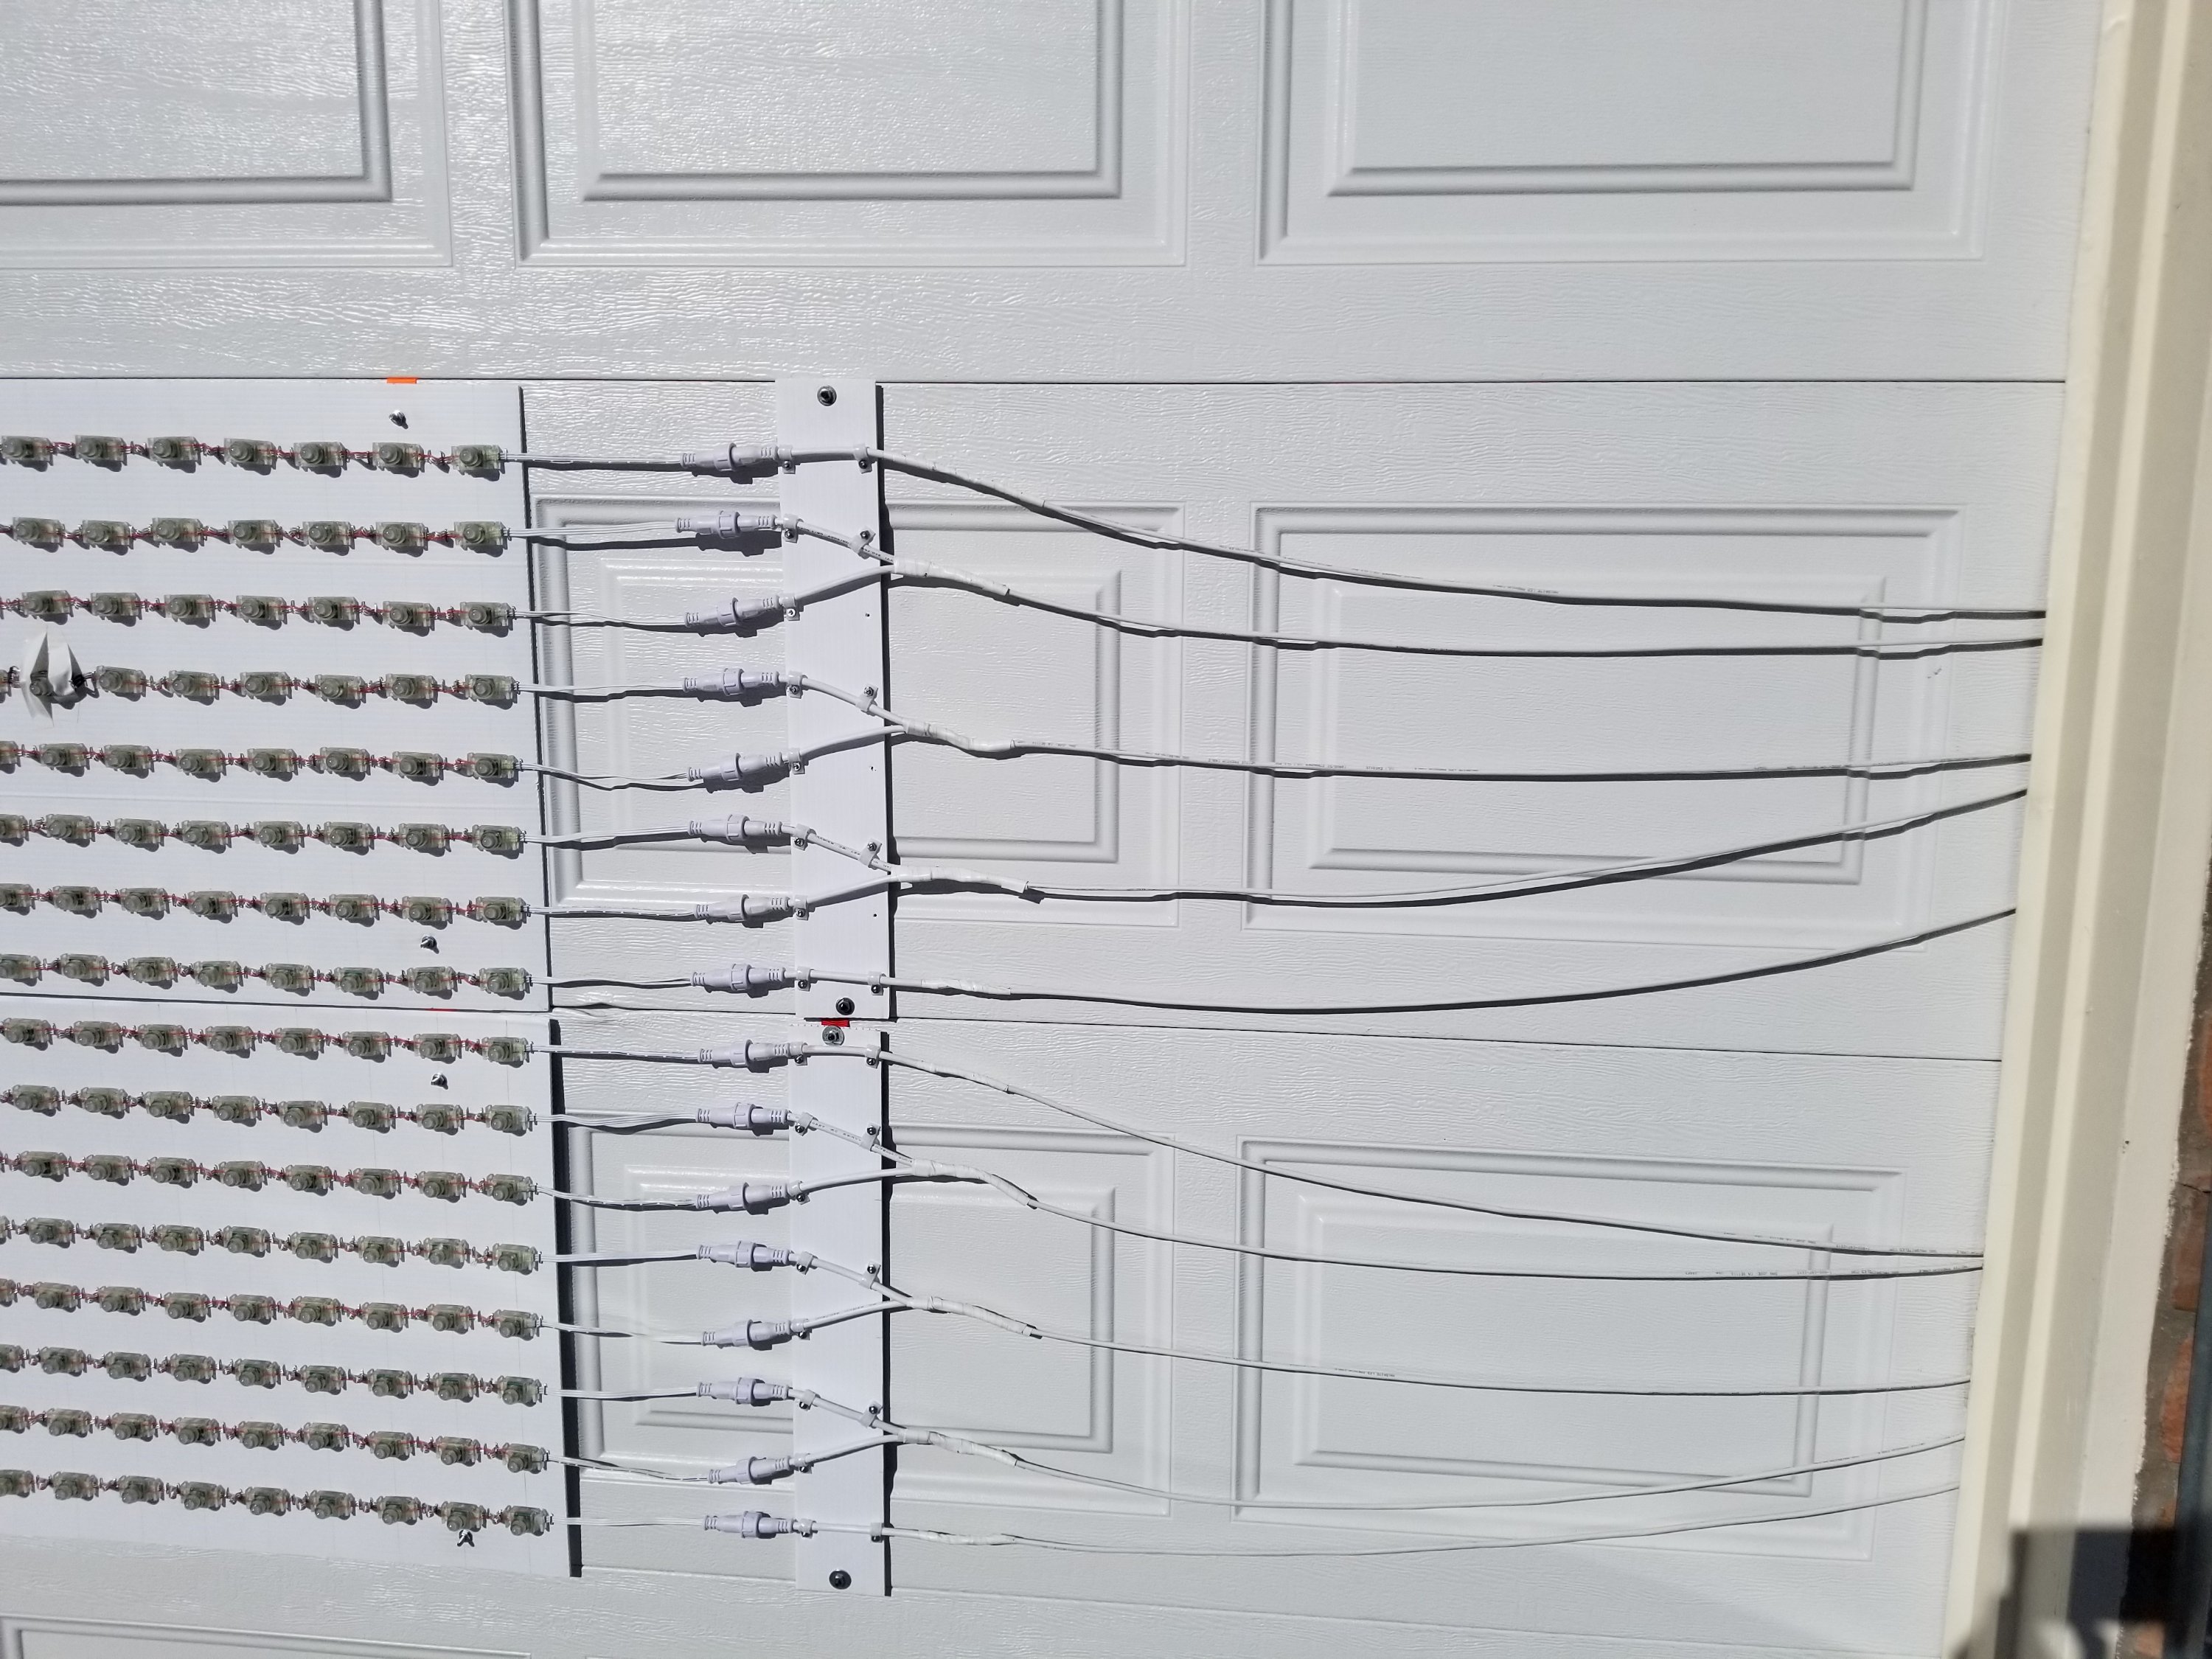
Due to the low clearance between the garage door and the upper door jamb, we knew that our solution had to be pretty thin. However, there was still enough room for the square bodies of the technicolor pixels that we use all over the house façade and roof and we know that these pixels are much more robust and reliable than the pixel strips we tried for the seven-segment displays. We ordered 12V ws2811 technicolor pixels and had them built with a smaller-than-standard wire length since they would be mounted close together. We ended up with 1 7/8 inch long wires (pixels 3 3/8 inches apart on center), but would have preferred 1 inch long wires instead as it would have made mounting the pixels much, much easier. Unfortunately, ~2 inches was the shortest length that could be manufactured and so we made it work.
See LED Pixels for more details on all of the LEDs used in our show.
Laying Out and Mounting the Pixels
In keeping with the lightweight and thin requirements, we picked up some relatively inexpensive corrugated plastic sheeting from Home Depot. This stuff is strong, thin, and very lightweight and serves as a good backer material for attaching the pixels.
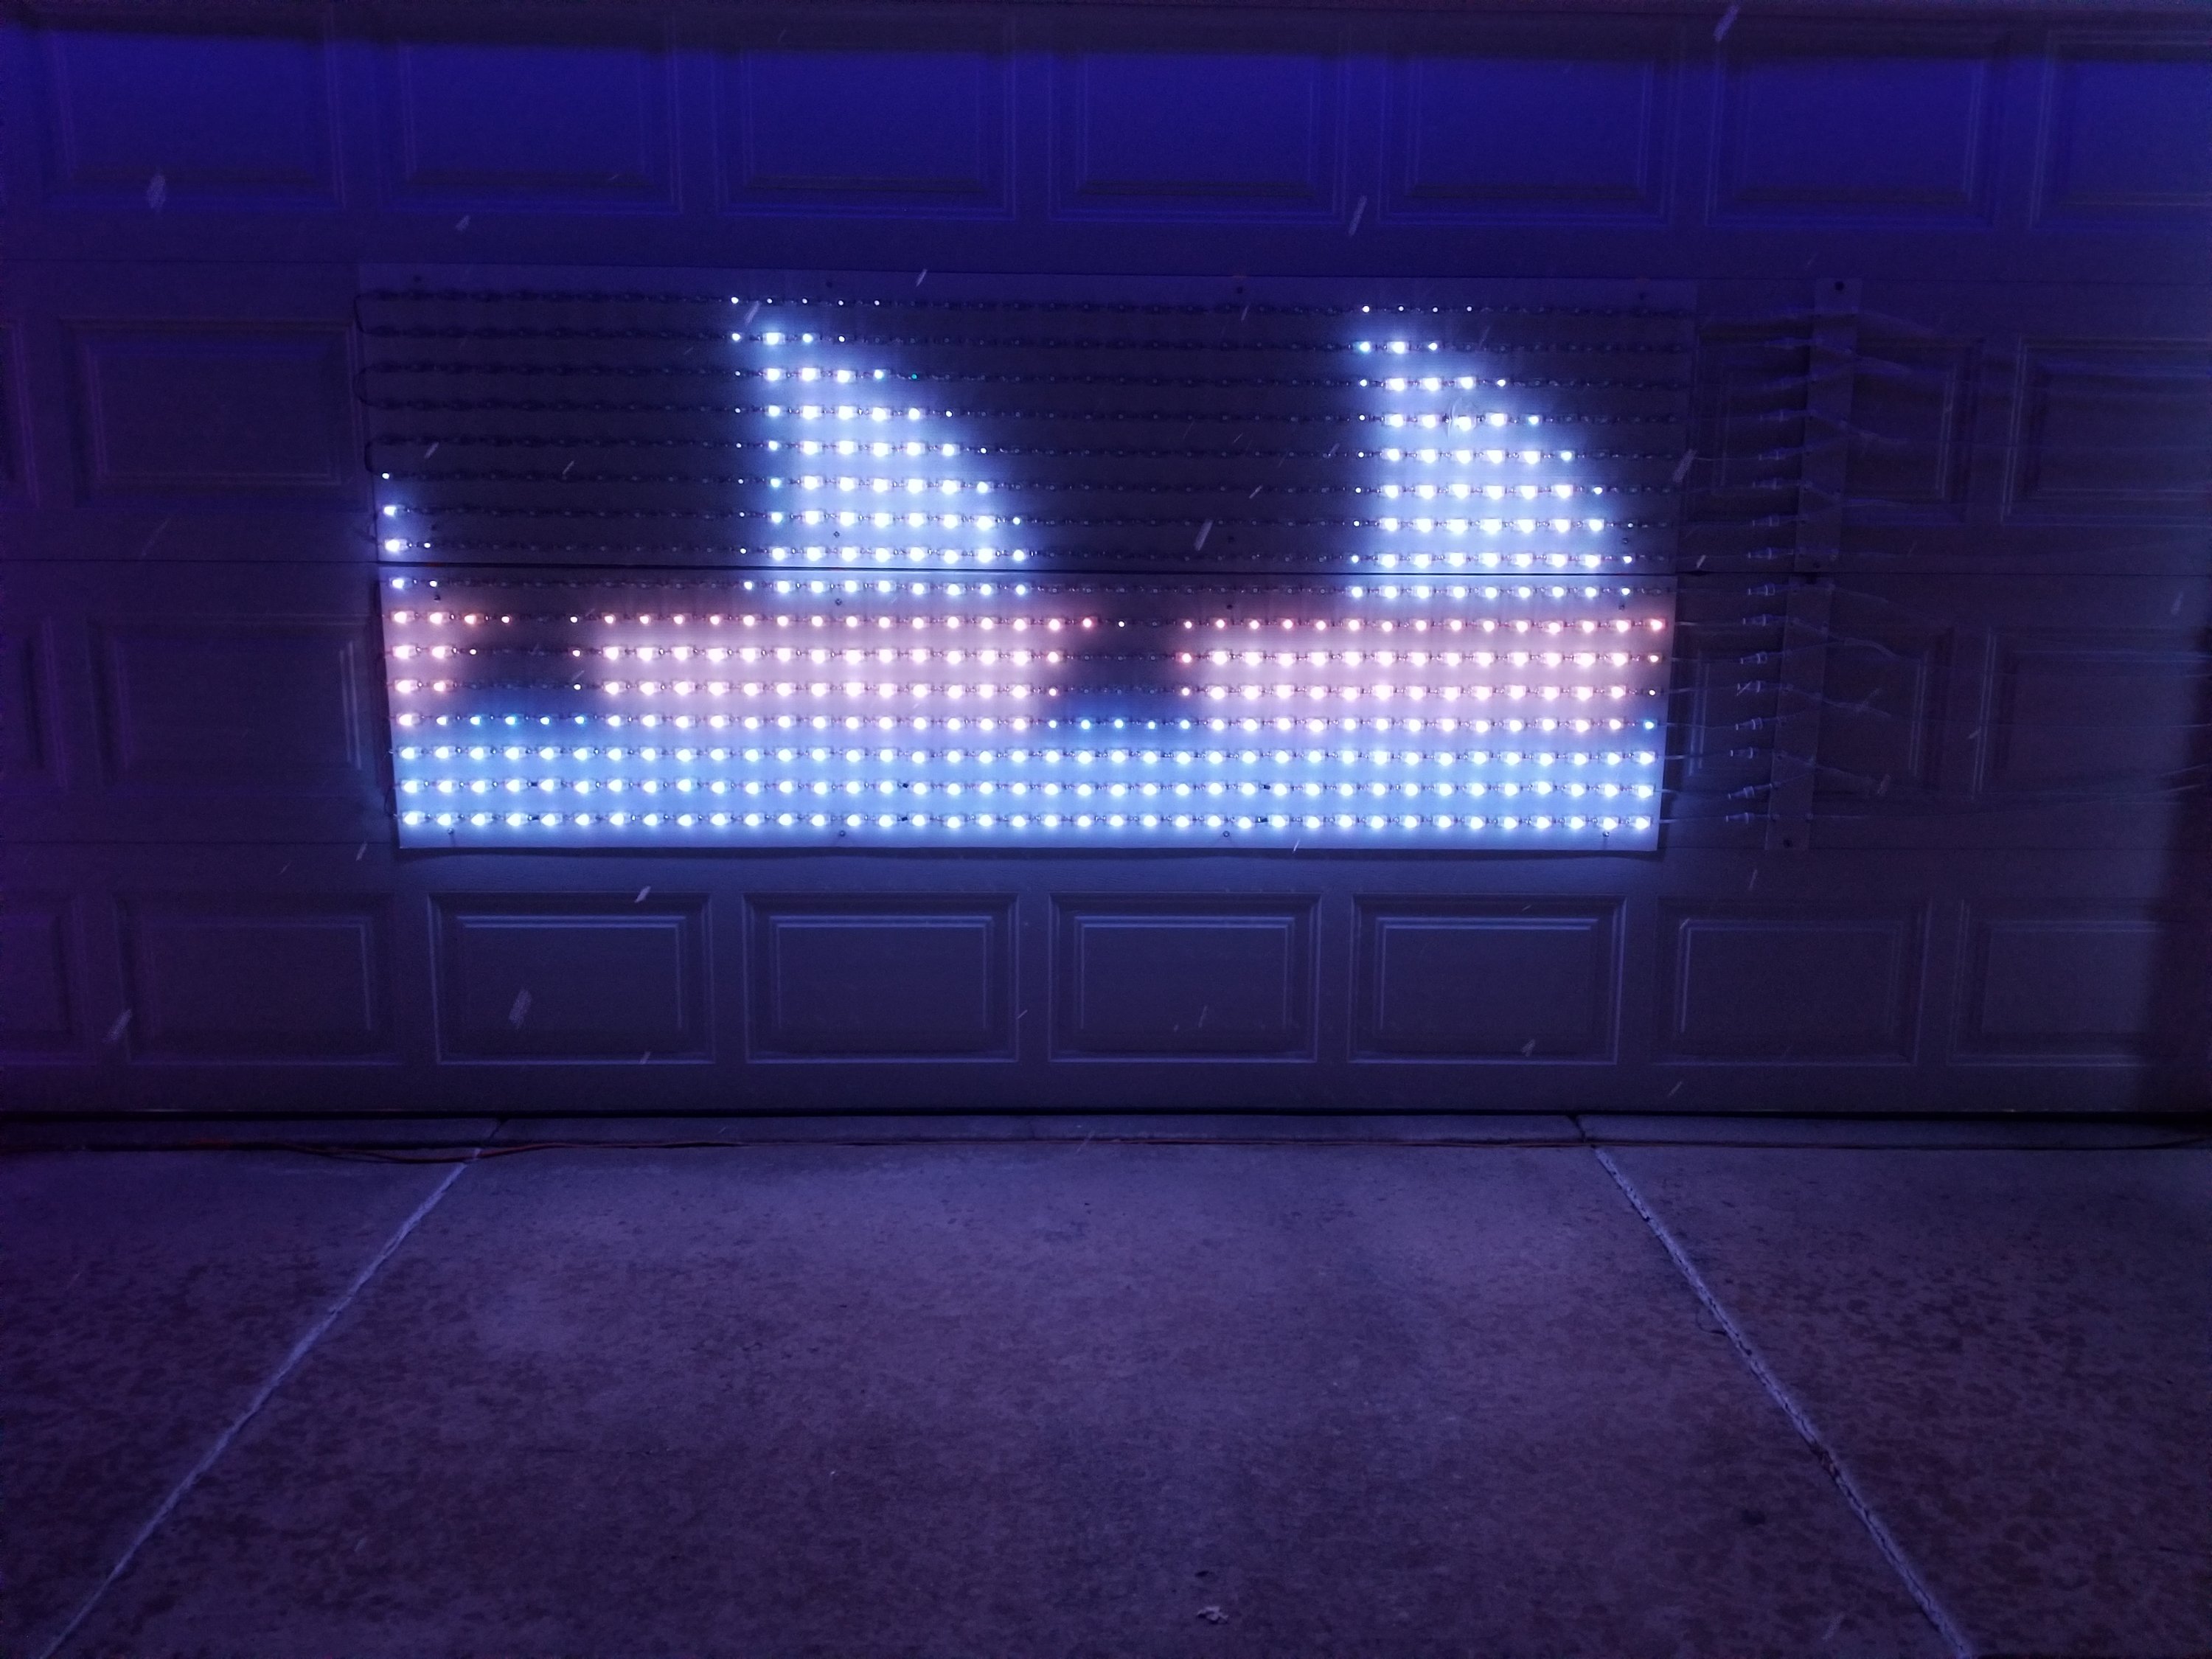
The overall pixel grid is 38 pixels wide by 16 pixels high and the pixels are spaced at 2.5 inches on center in both horizontal and vertical directions. Each panel contains 8 rows of pixels and all connectors for control or power injection come off the right side side of the panel.
Every pixel is held in place by 2 staples across the wires, one on each side of the pixel body. We used an electric staple gun with 1/2″ deep staples and then bent over the back of each staple by hand (using a small block of wood to get leverage). To be honest, this process was fairly miserable but it did work well and the pixels are securely attached to the panel. If we had been able to get the exact wire lengths we needed (or something very close), this process would have been easier. Dealing with the extra wire between pixels and the forces it produced on the pixels when it was bunched up definitely increased the challenge of assembling the panels. That said, the staples are more than sufficient to hold everything in place and are relatively easy to remove if needed to swap out bad pixels in the future. We also made sure to use a few strips of electrical tape across the rows of staples on the back of each panel to add some slight padding and hopefully prevent the staples from scratching the garage door once mounted.

Attaching to the Garage Door
We installed a brand new garage door in the fall of 2020 so our previous solution of just bolting the light panels directly to the garage door was no longer an option. Instead, we used E6000 glue to attach lengths of 1″ strapping from an old set of ratchet straps to the back of each panel. We also added 2 bolts with larger washers per strap as a safety feature to ensure the straps couldn’t let loose of the panels. The straps wrap around the garage door panel and are cinched down with buckles we mounted on the backside of the garage door panel. So far, the system seems to be very secure and is working as intended with no shifting or slippage of the panels.

We did learn (the hard way) some very important information about modern steel-encased garage doors compared to old wooden doors. Namely, the modern door is far more fragile. While setting up the first light panel and working out the attachments, we accidentally pinched one of the wire connectors in the gap between two garage door panels. With the old wooden door, the connector would have been crushed and the door no worse for wear. However, with the new door, the connector mostly survived the interaction and caused a dent in the two garage door panels instead. We will hopefully be able to fix it in Spring with some Bondo and paint, but learned a hard lesson on our brand new garage door and will be very careful in the future when putting up or taking down the light panels.
Next to the main light panels, we also have a small wiring harness panel made out of a narrow strip of the corrugated plastic and held onto the garage door panel with a single strap. This small panel gives a mounting point for the wires coming around the edge of the garage door from the power supply and controller mounted inside the garage. Because the wires are too thick for staples to hold in place, we used small cable holders from Home Depot and attached them to the corrugated plastic with small bolts.
Wiring It All Together
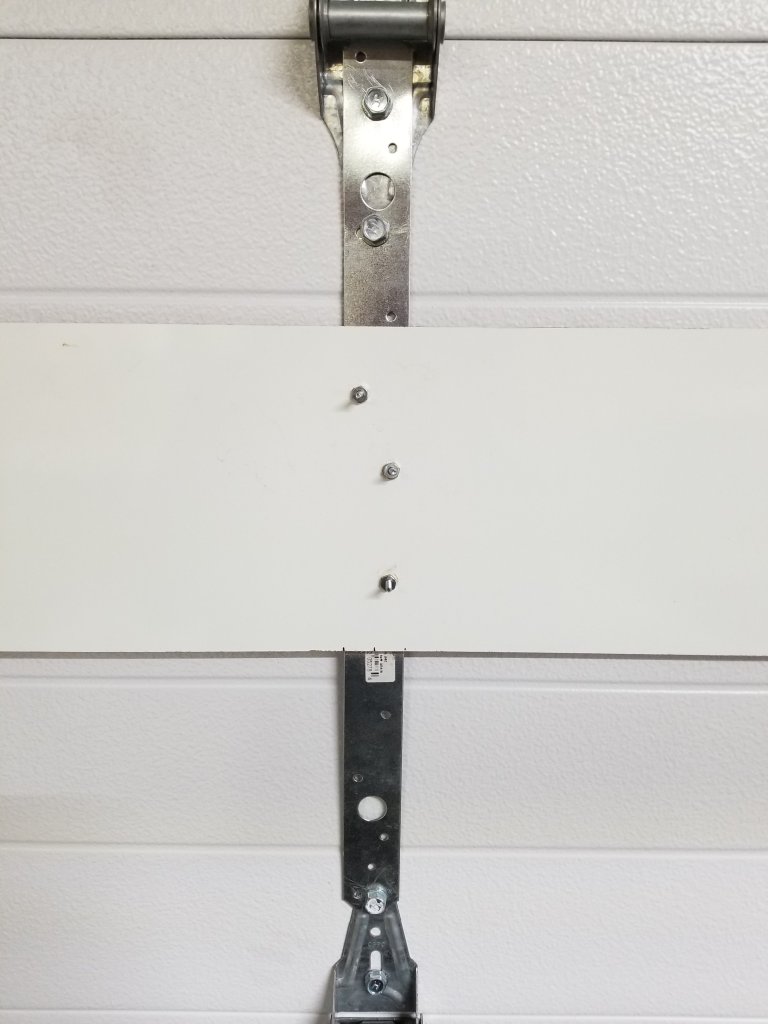
As with the seven-segment displays we had previously on the garage door, all of the controlling hardware and wiring is mounted inside the garage and attached to the garage door panels so it can move up and down. We permanently mounted a few thin metal brackets to the inside of the garage door panels, using the same screws that attach the hinges. We can then use bolts to attach a strip of masonite between the brackets and it is to this masonite that we attach the buckles for securing the light panel as well as the power supply, pixel controller, and other wiring elements.
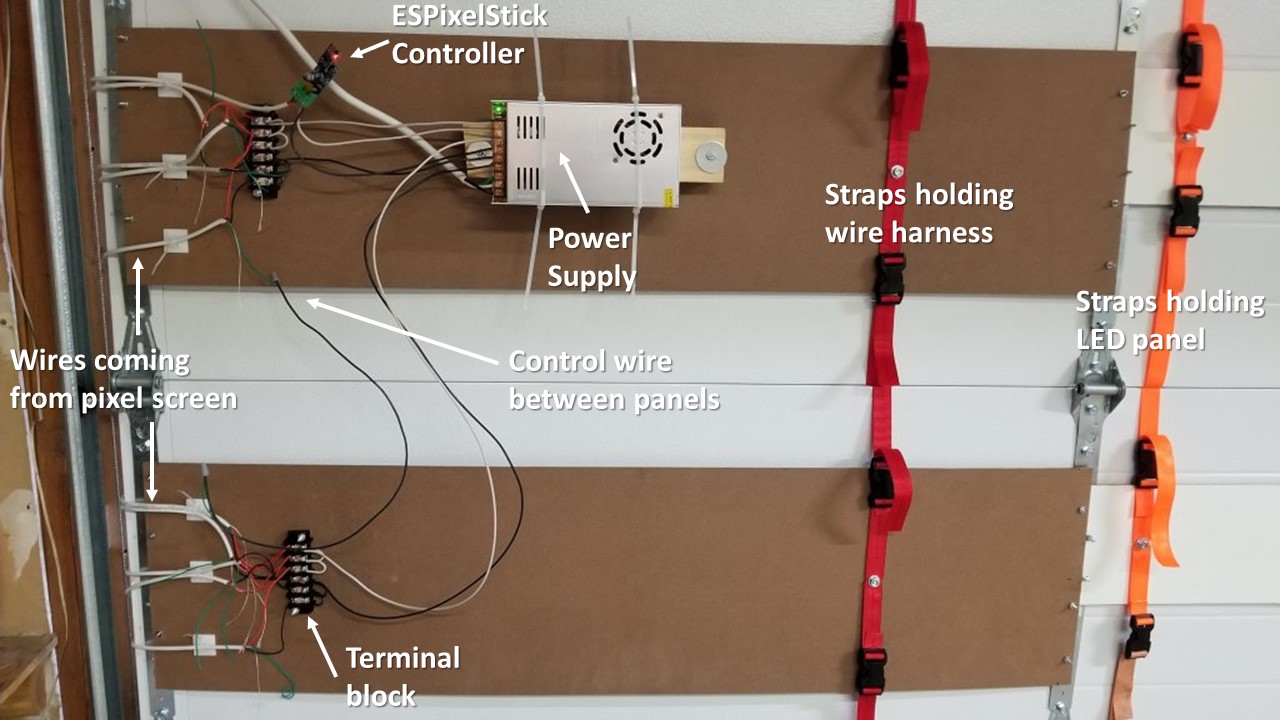
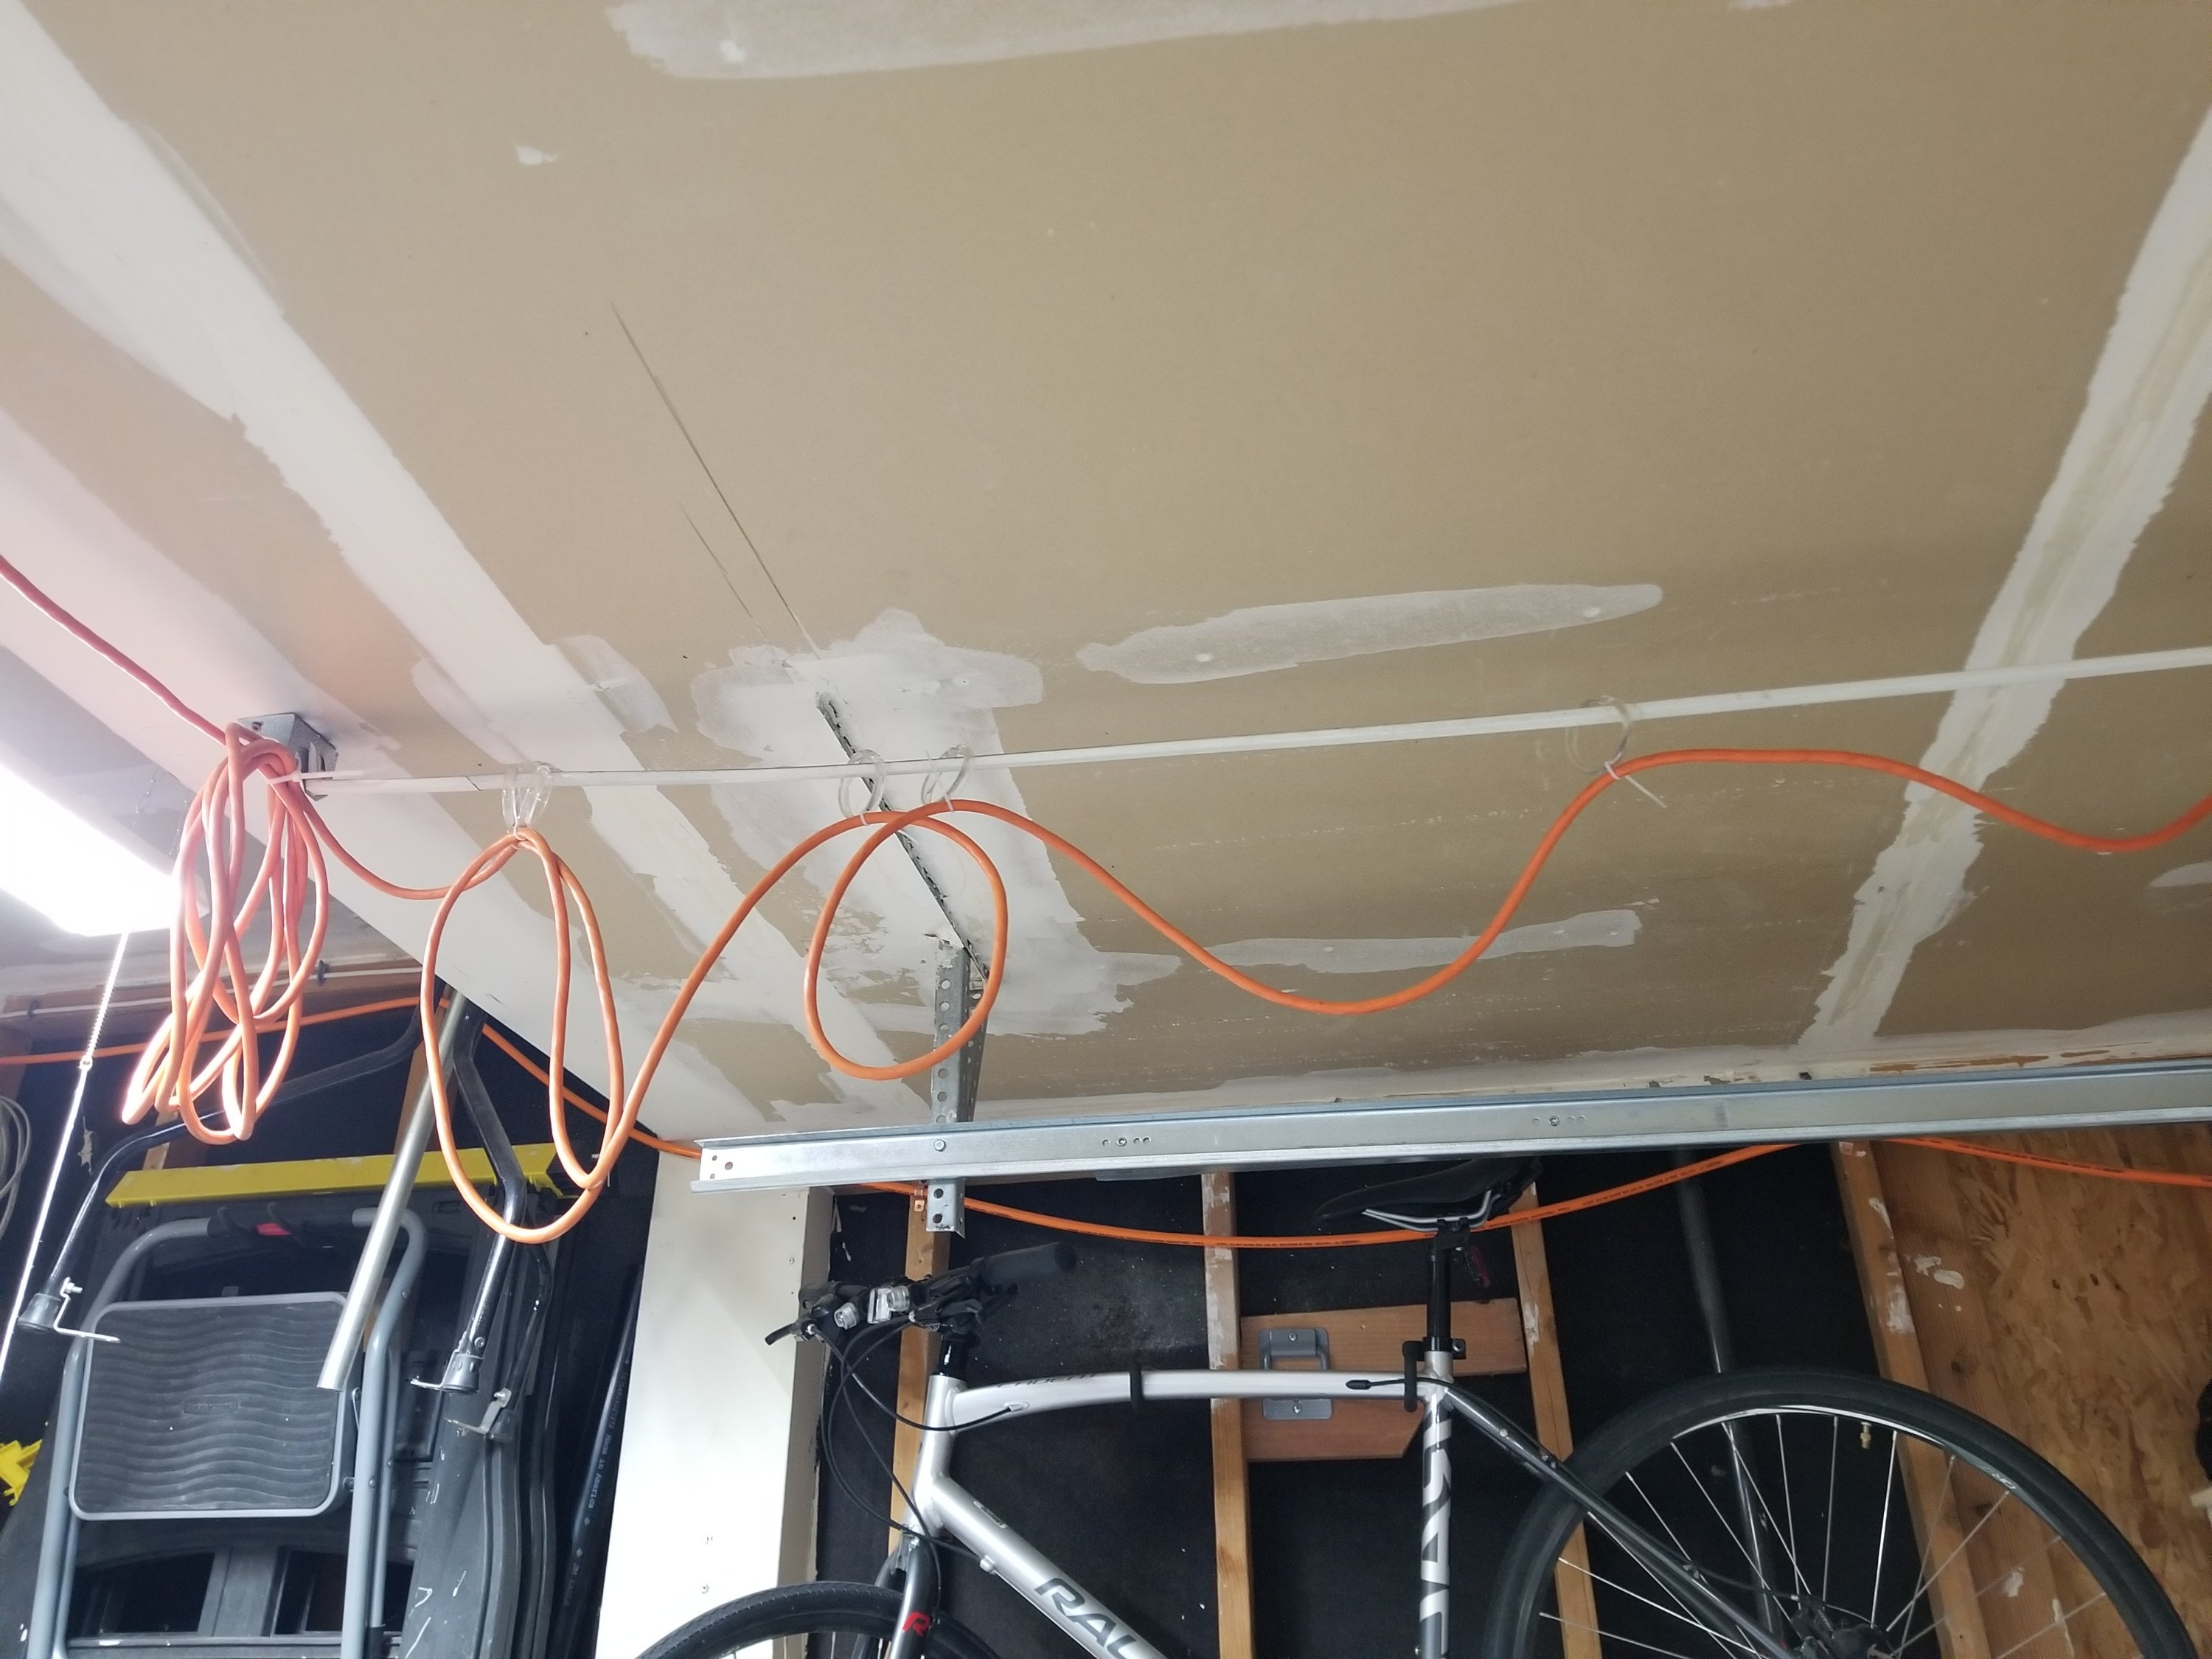
Power is supplied to the pixel screen via a 12V 30A Power Supply. An extension cord runs from an outlet on the ceiling of the garage and hangs from some shower curtain rings on a curtain rod mounted to the ceiling. This allows the cord to move along with the garage door as it opens and shuts.
Controlling the Lights
The entire pixel screen is controlled by a single ESPixelStick Pixel Controller that is also mounted on the back side of the garage door (more just dangling there, actually). Each of the two panels has 304 pixels (912 channels). Since a DMX universe can only handle 512 channels, it takes 2 universes of DMX data for each panel and 4 universes for the entire pixel screen. Fortunately, the ESPixelStick can handle up to 4 universes worth of pixels so only one controller is needed. We were initially concerned that the refresh rate for each pixel would be too low with 4 nearly full universes controlled serially from a single controller, but we have not seen any noticeable effects.
See Channel Output Mapping for more details on how all of our channels are mapped to controllers.
Programming the Pixel Screen
Vixen makes programming a grid of pixels very easy. It has built-in support for scrolling text, displaying images, and even video. Our biggest issue has been with static text displaying properly, given the low resolution of a 38 x 16 screen. If letters are not large (or thick) enough, it’s possible for some of the strokes that make up a letter to fall in the void space between pixels and thus not get rendered. Using big block characters helps prevent this, as does making text scroll so that no part of a character is stuck in the void for long and the human eye does an amazing job of filling in the missing information without the viewer even realizing it is happening.
