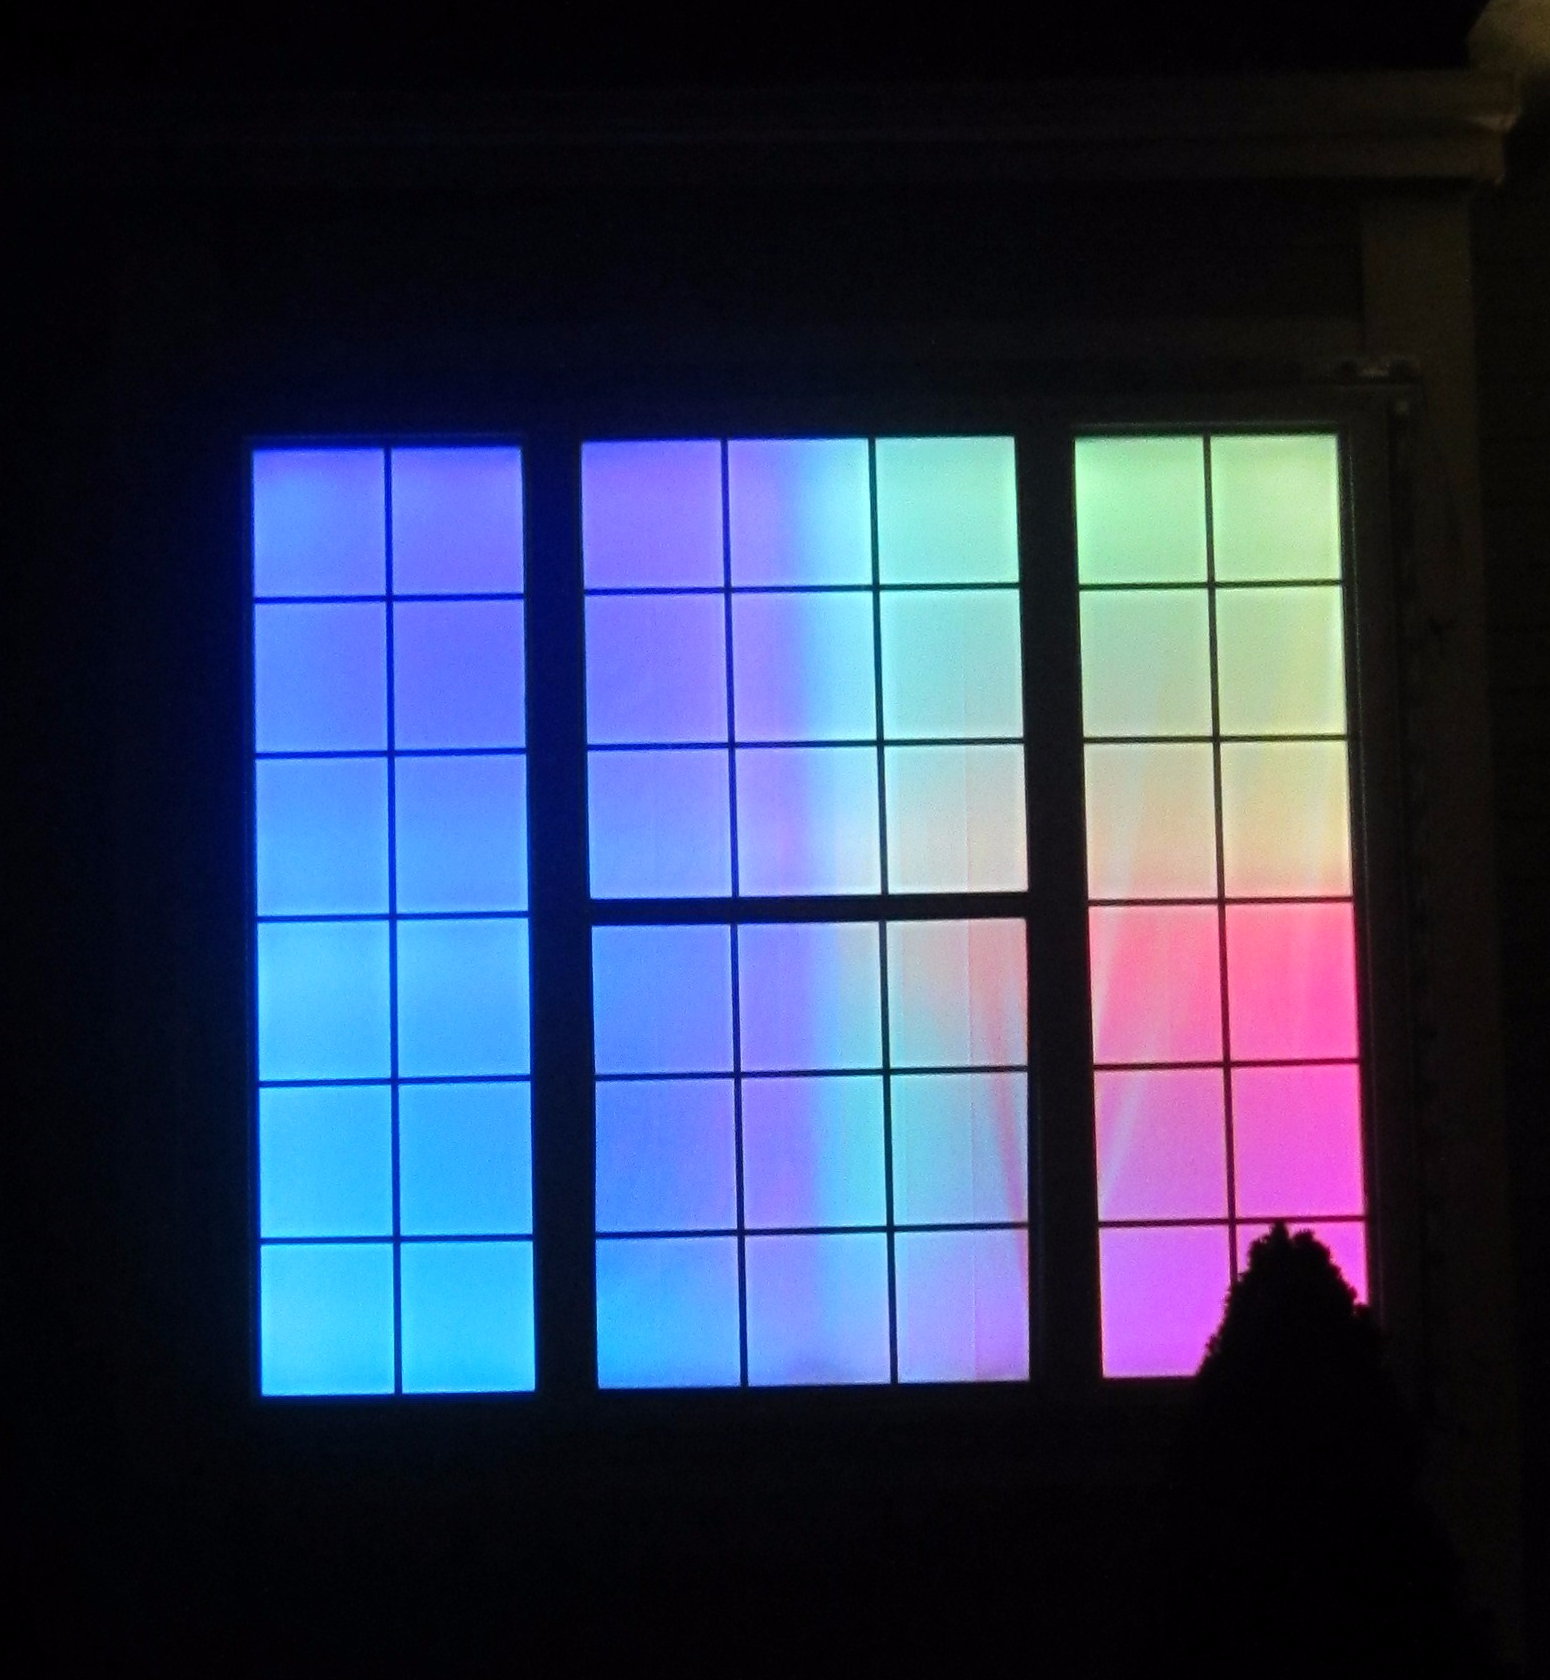
In 2017, we said farewell to the RGB par cans for backlighting our three front windows and replaced them instead with some window light boxes. These light boxes sit on the window sills and thus take up very little space in the room. This allows us to retain usage of several rooms in our house during December, something that just wasn’t realistic when we had the par cans.
Frame Construction
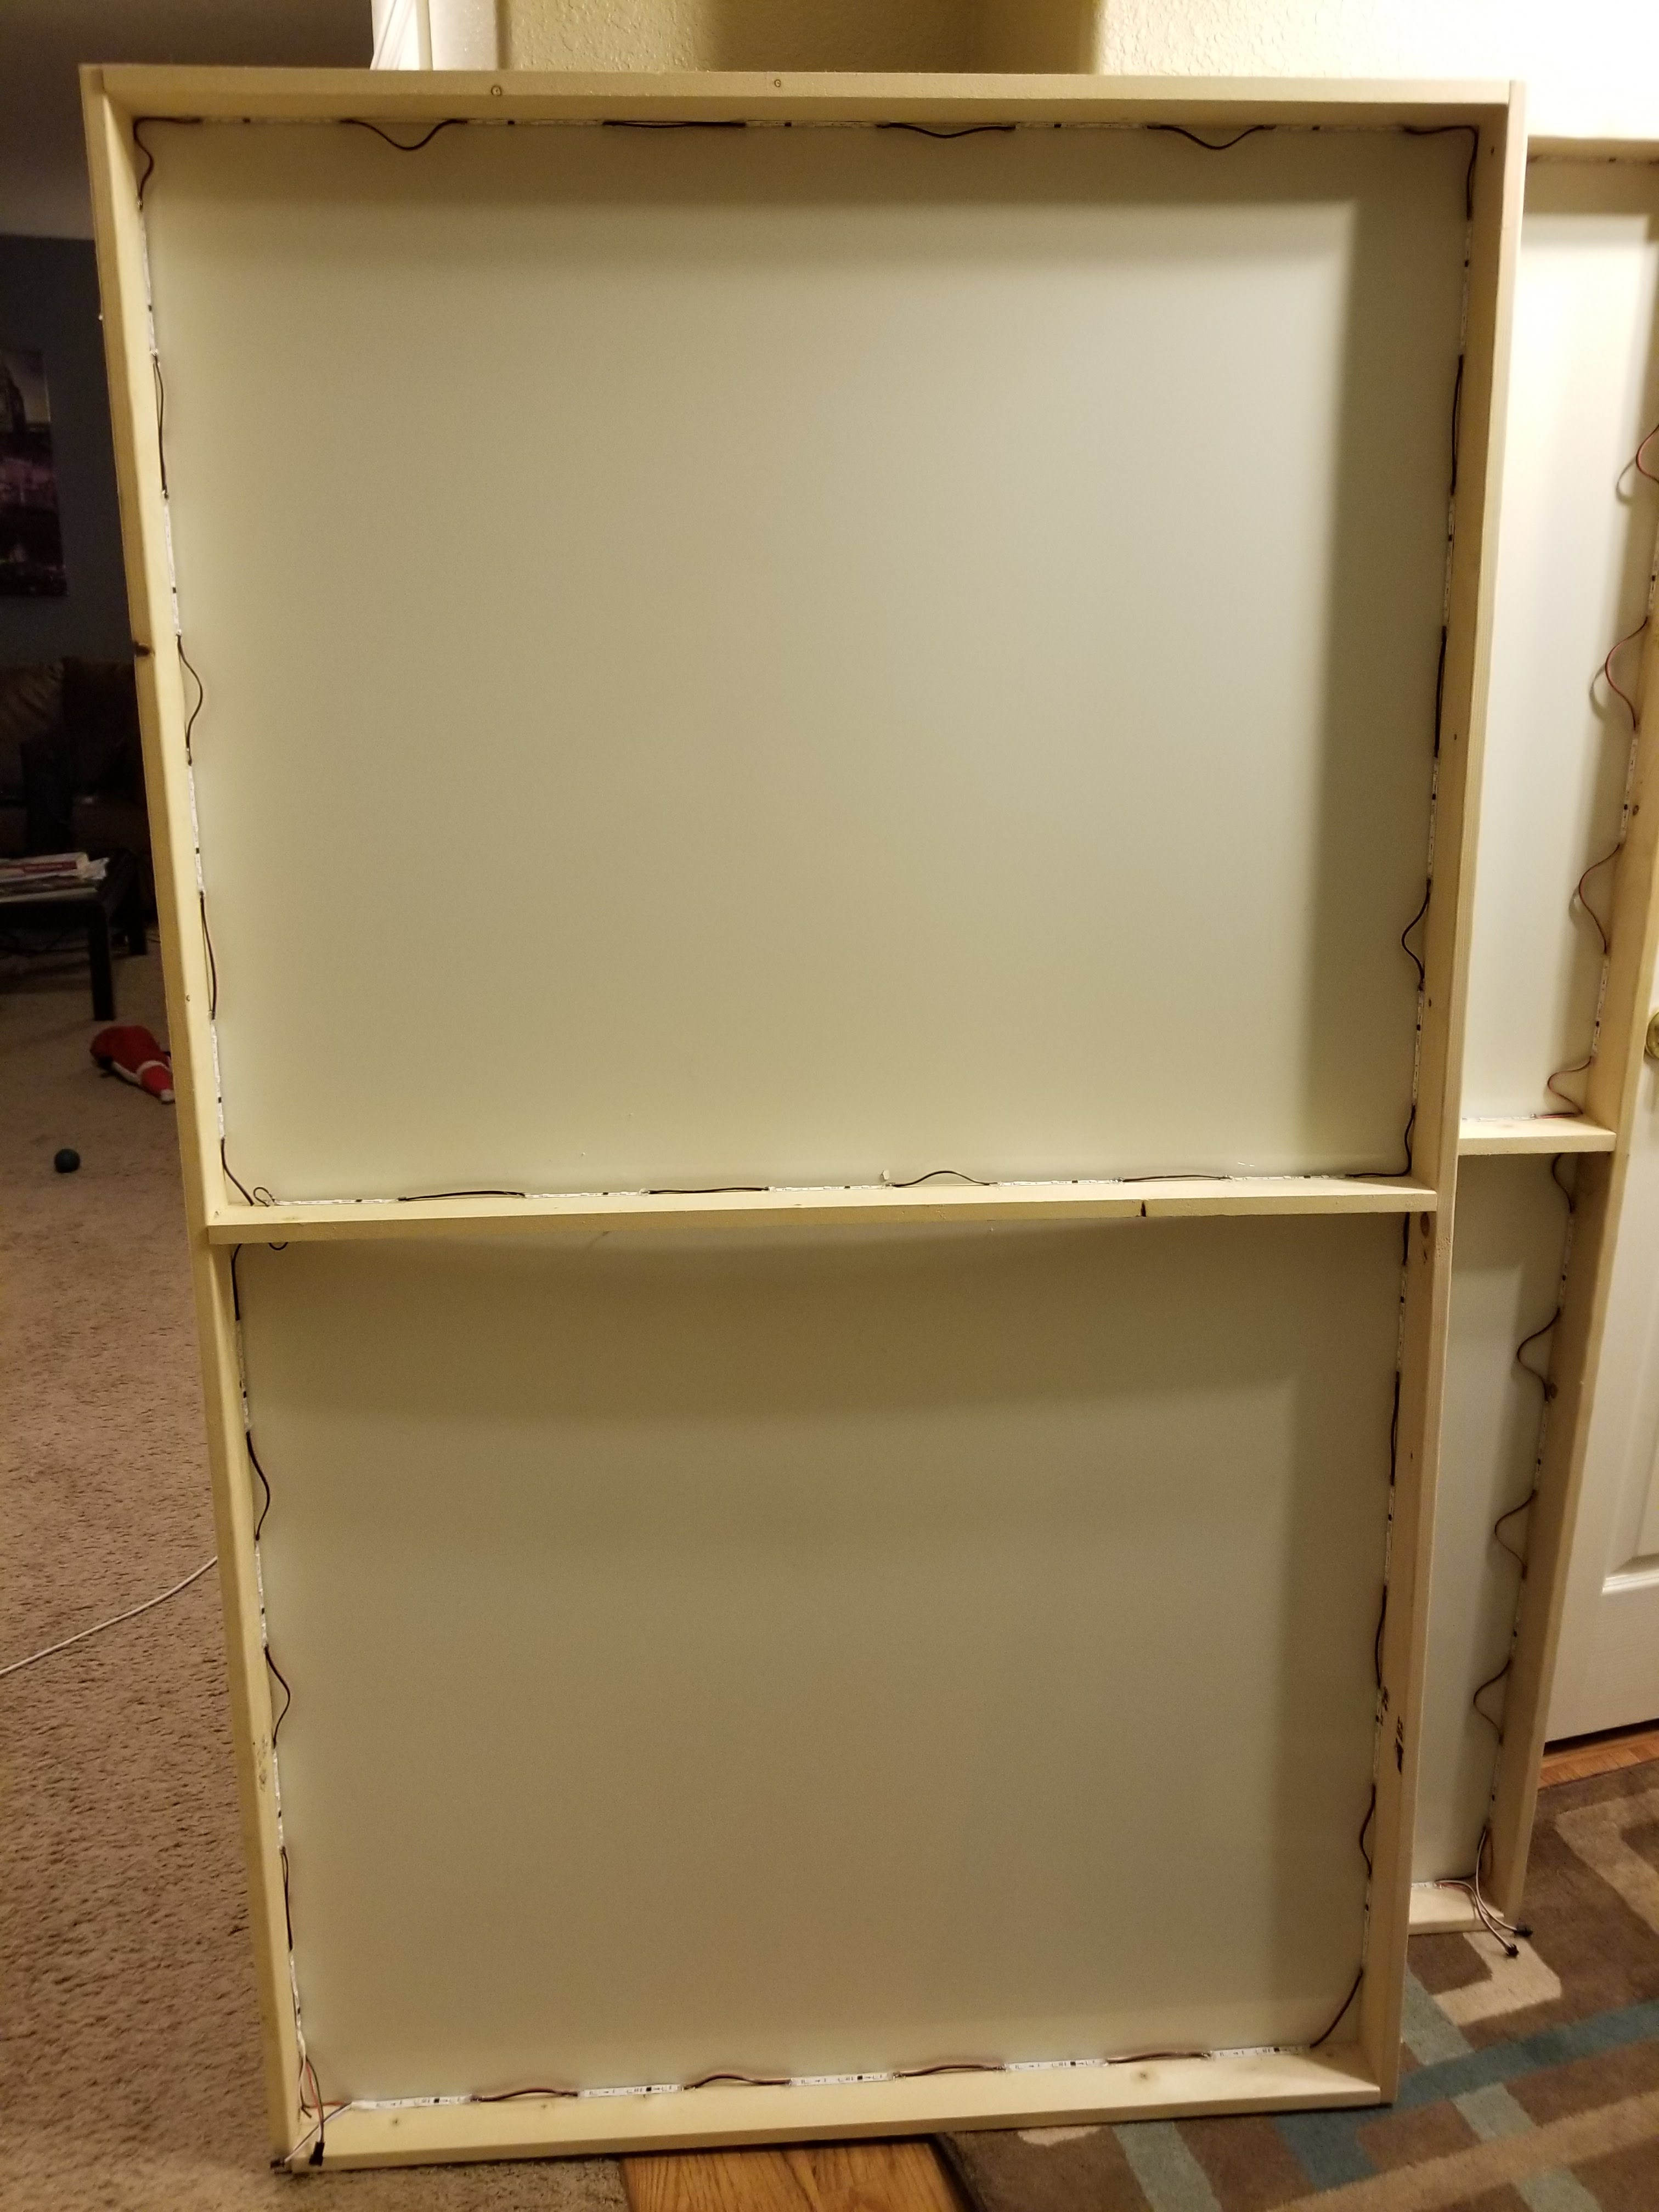
The boxes are built out of cheap 1×4 wood from Home Depot held together by deck screws. Each window has two rectangular boxes standing side by side for a total of 6. The two upstairs windows are identical in size, but the downstairs living room window is larger so we made those boxes bigger. Each box has a center horizontal divider so there are a total of 4 roughly square sections illuminating each window
LEDs
We used 12V LED strips to illuminate each box. These are standard 30 led/meter (10 pixel/meter) strips and are only indoor rated. See LED Pixels for more details on all of the LEDs used in our show. Based on some informal testing, we determined the rough number of pixels needed to illuminate each box and then cut the strips at each pixel and spaced those pixels out around the perimeter.
This was A LOT of soldering…and took way more time than we had anticipated. Fortunately, we started working on these boxes in March and spaced it out over several months so the overall impact wasn’t too bad. In retrospect, it would have been much, much faster to just buy the sparsest LED strips possible (we didn’t really look into it but something like 15 led/meter would have been nice). Instead, Philip soldered a few inches of wire between each pixel, making a single long chain for each window box. We did our best to measure the correct wire lengths so we wouldn’t have extra loops of wire sticking up and possibly causing shadows.
Attaching the LEDs
We attempted to use just the adhesive backing of the LEDs to hold them in place, but this wasn’t sufficient on the relatively rough 1×4 wood surface. Some hot glue on each end of pixel at the solder joint solved the problem nicely.
There were two spots where the wires had to cross the horizontal center divider, which we accomplished by cutting two small notches in the wood with a hand saw and tucking the wire into it.
We took great care to wire up each box the same way and succeeded in that plan on 5 out of 6 boxes. Somehow, we wired one of the large living room boxes in reverse and didn’t realize it until after everything was assembled. Thankfully, our Vixen Light software can easily deal with this reversal in the output mapping (#TODO link) and with some careful counting, thinking, and trial/error we got it working correctly.
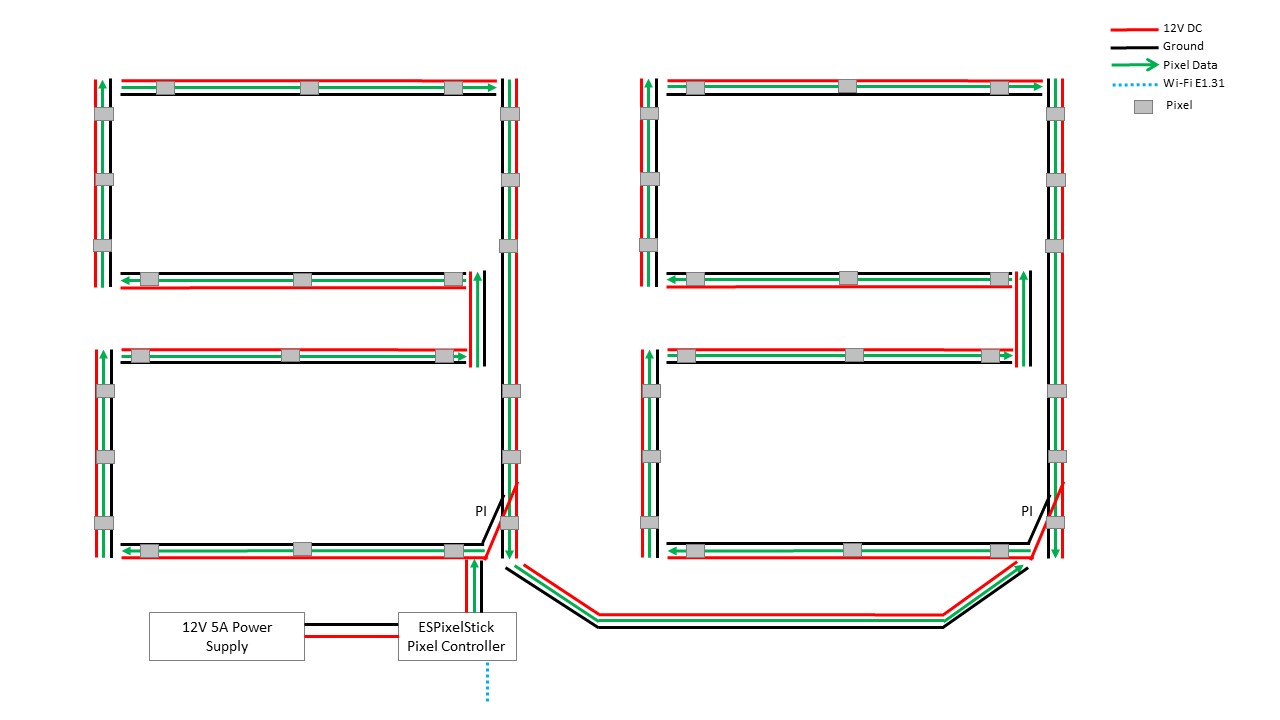
Power and Power Injection
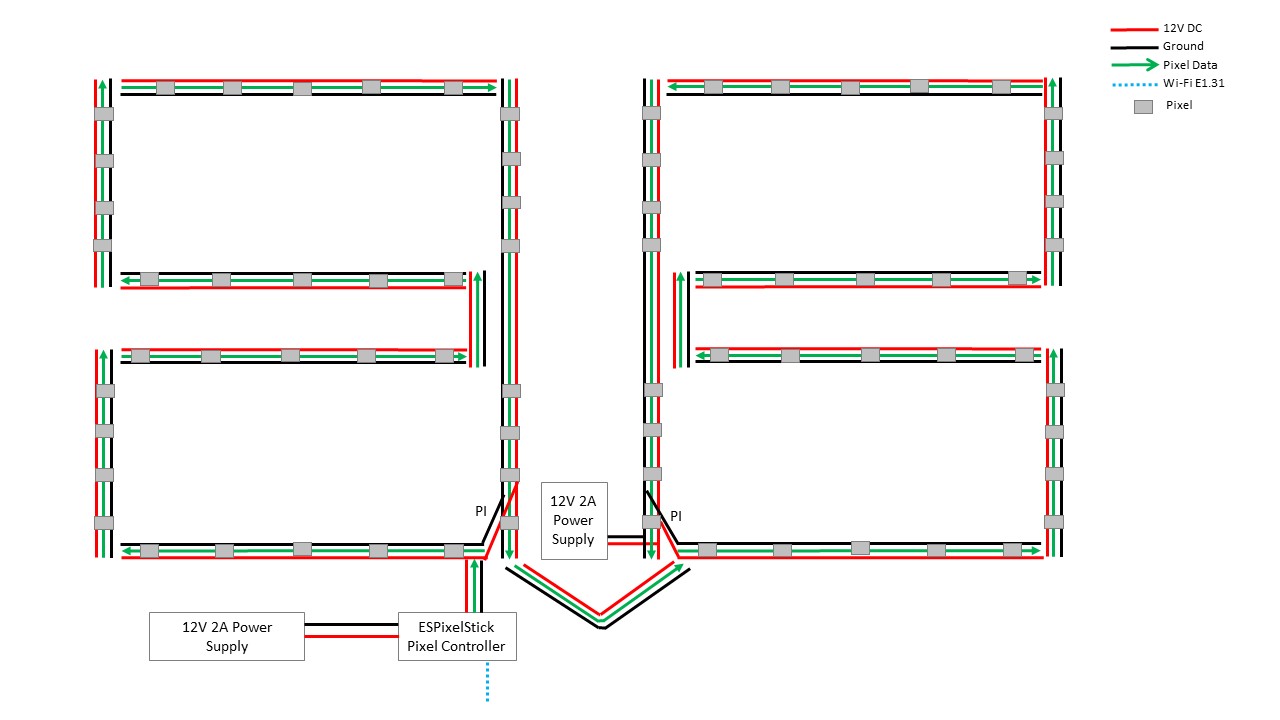
During our testing phase, we found that we just didn’t have enough power reaching all the LEDs. We solved some of this by getting some bigger power supplies. We use one 5 amp “box on a string” supply for each of the upstairs windows (yes, this is overkill but it wasn’t any more expensive than a lower rated supply). Since we already had them on hand, we use two 2 amp “wall wart” supplies for the larger downstairs window (upon further inspection, it seems that a single 2 amp supply is sufficient for the living room window…we struggle to explain this since our earlier testing showed we needed more power but if it ain’t broke, then don’t fix it).
To help distribute power more evenly, we wired in a power jumper in each box to tie the end of the LED string to the beginning. Remember, while the data line must travel serially, the power and ground lines flow independently and there isn’t technically any directionality to them.
Reflecting the Light
We tried a couple of different configurations when prototyping, but finally decided that mounting the LEDs at the back edge of the box and aiming across was the best. We even tried cutting some small wooden shims to aim the LEDs at an angle, but didn’t find this to be any better and it was significantly more work.
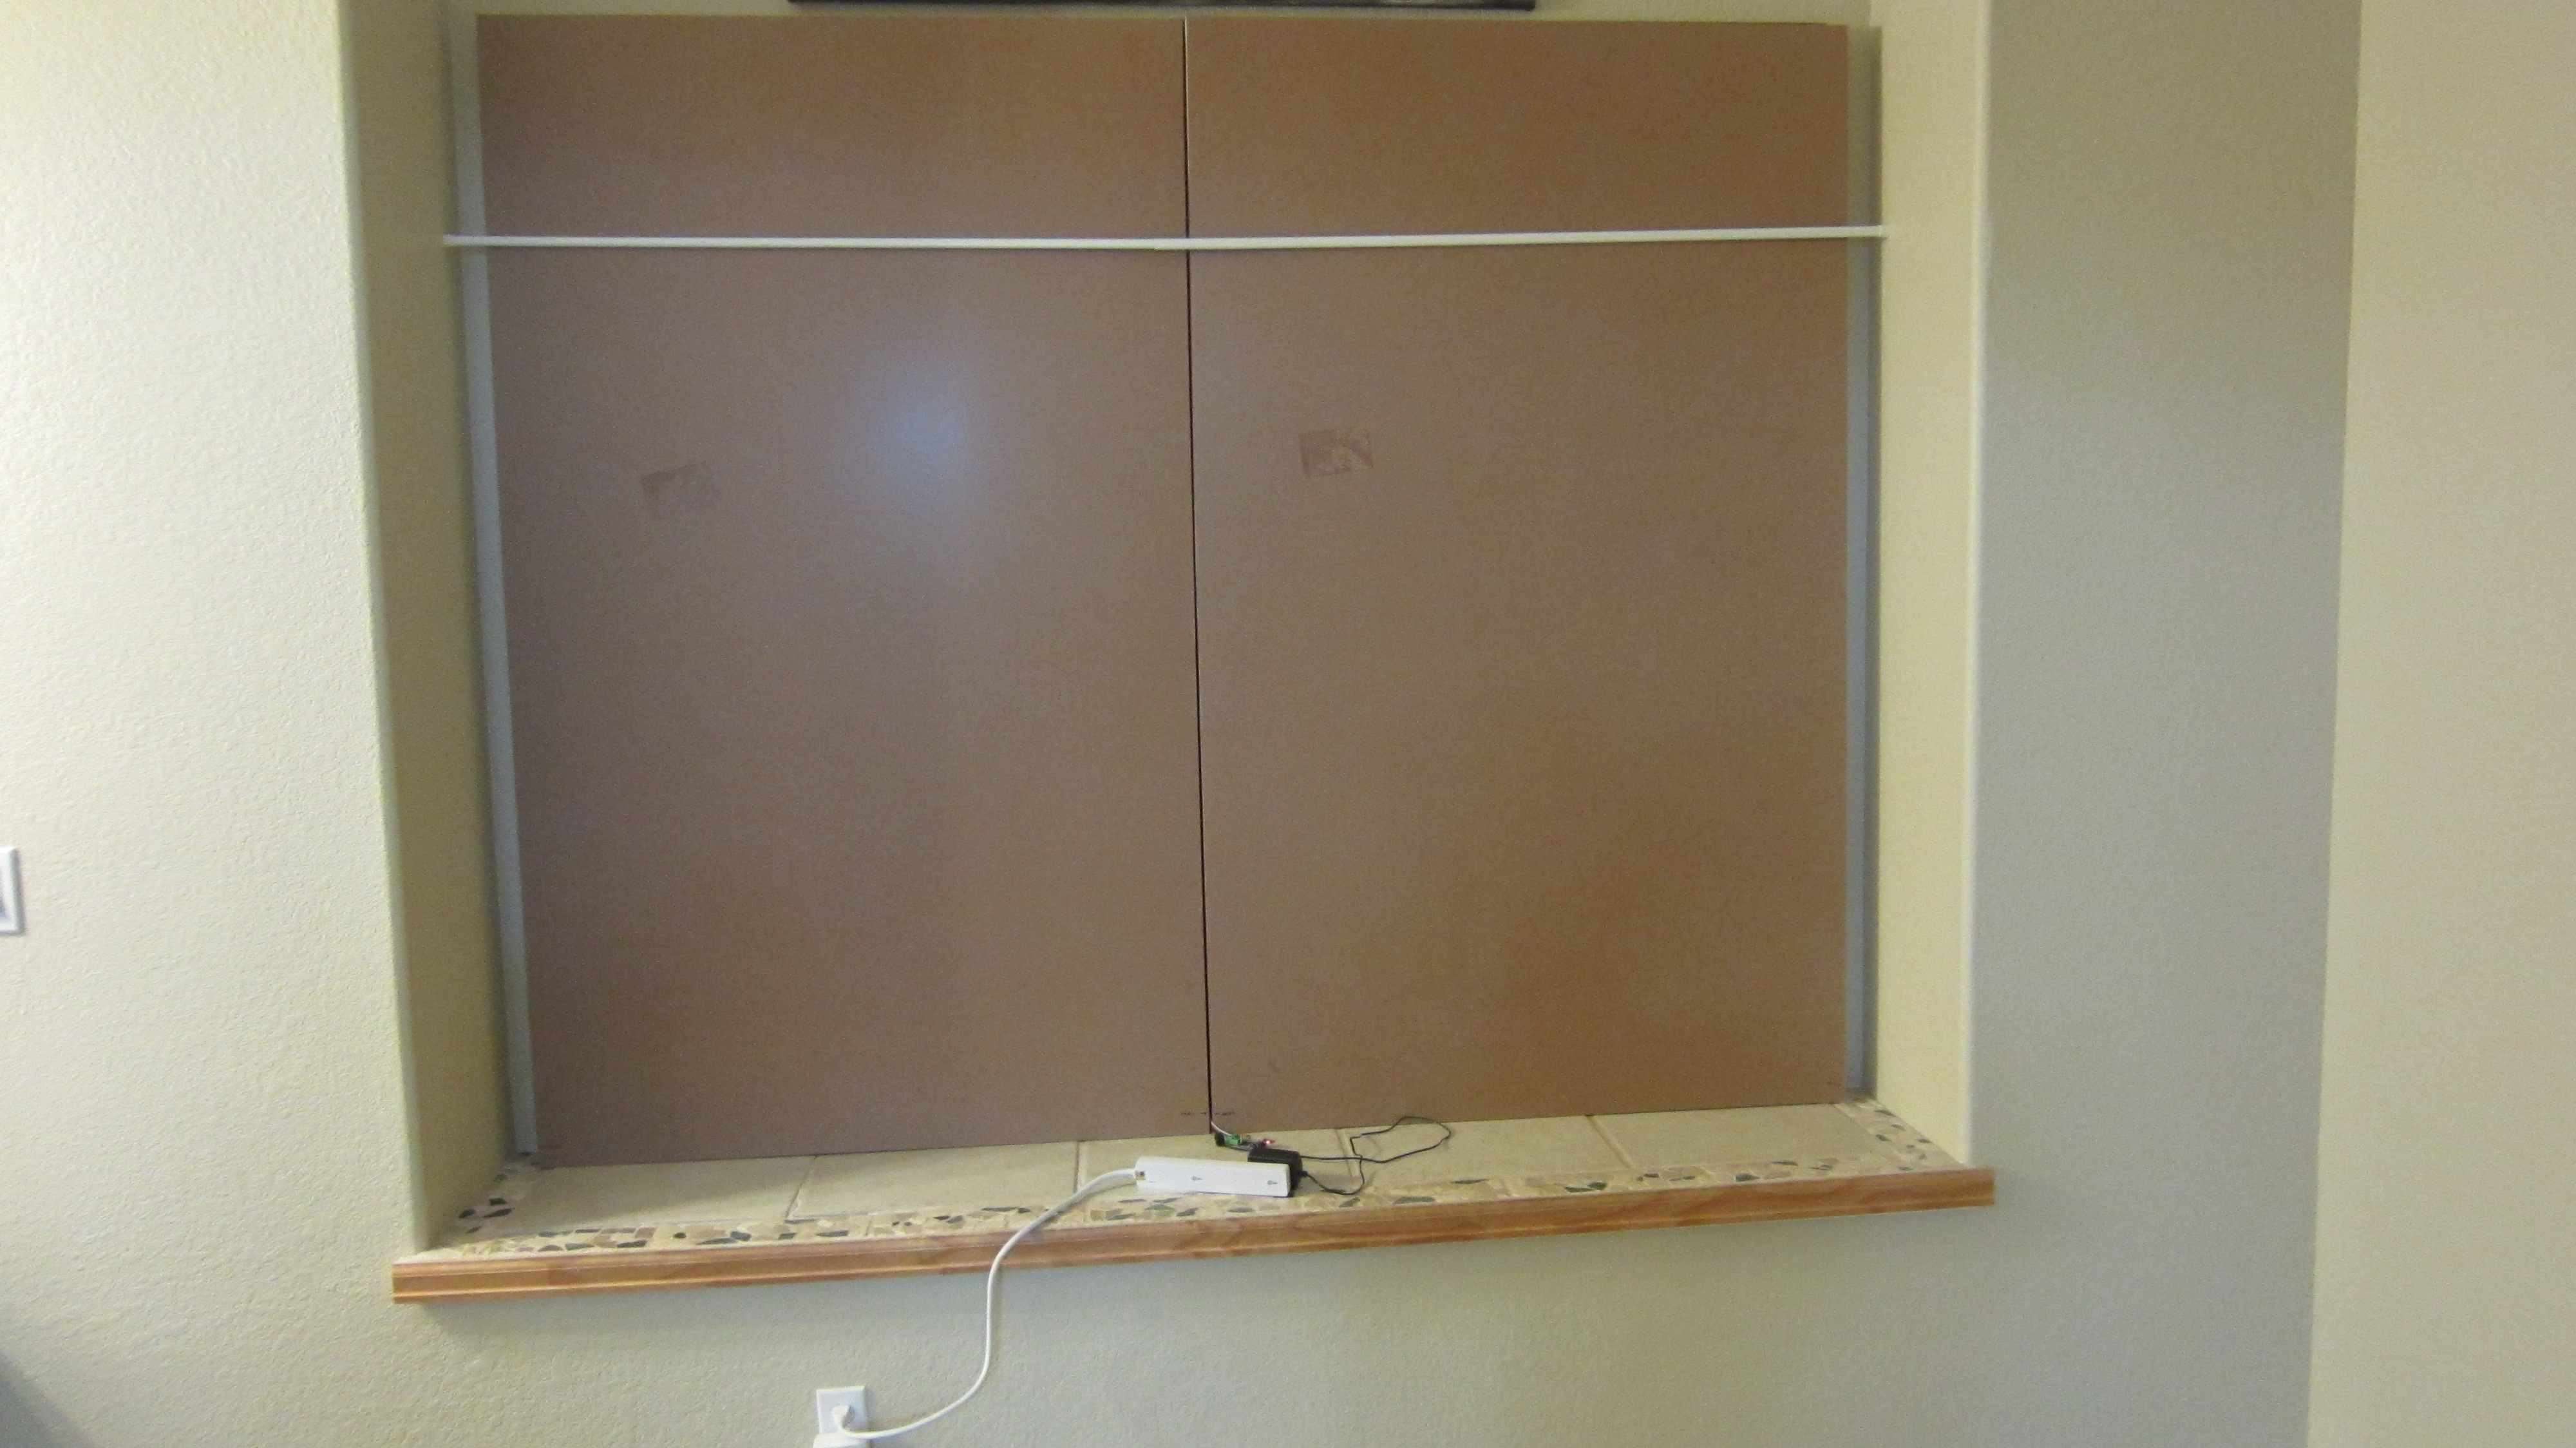
The back panel of each light box is made of a masonite like material we found at Home Depot for ~$13 per 4’x8′ sheet. One side is brown and the other side is a shiny, reflective white (kind of like the surface of a whiteboard). The white surface seems to do a decent job of reflecting the light around each box section. The panel is held in place by some brad nails into the 1x4s, though these are perhaps a bit too weak to hold and some small screws might be better.
Diffusing the Light
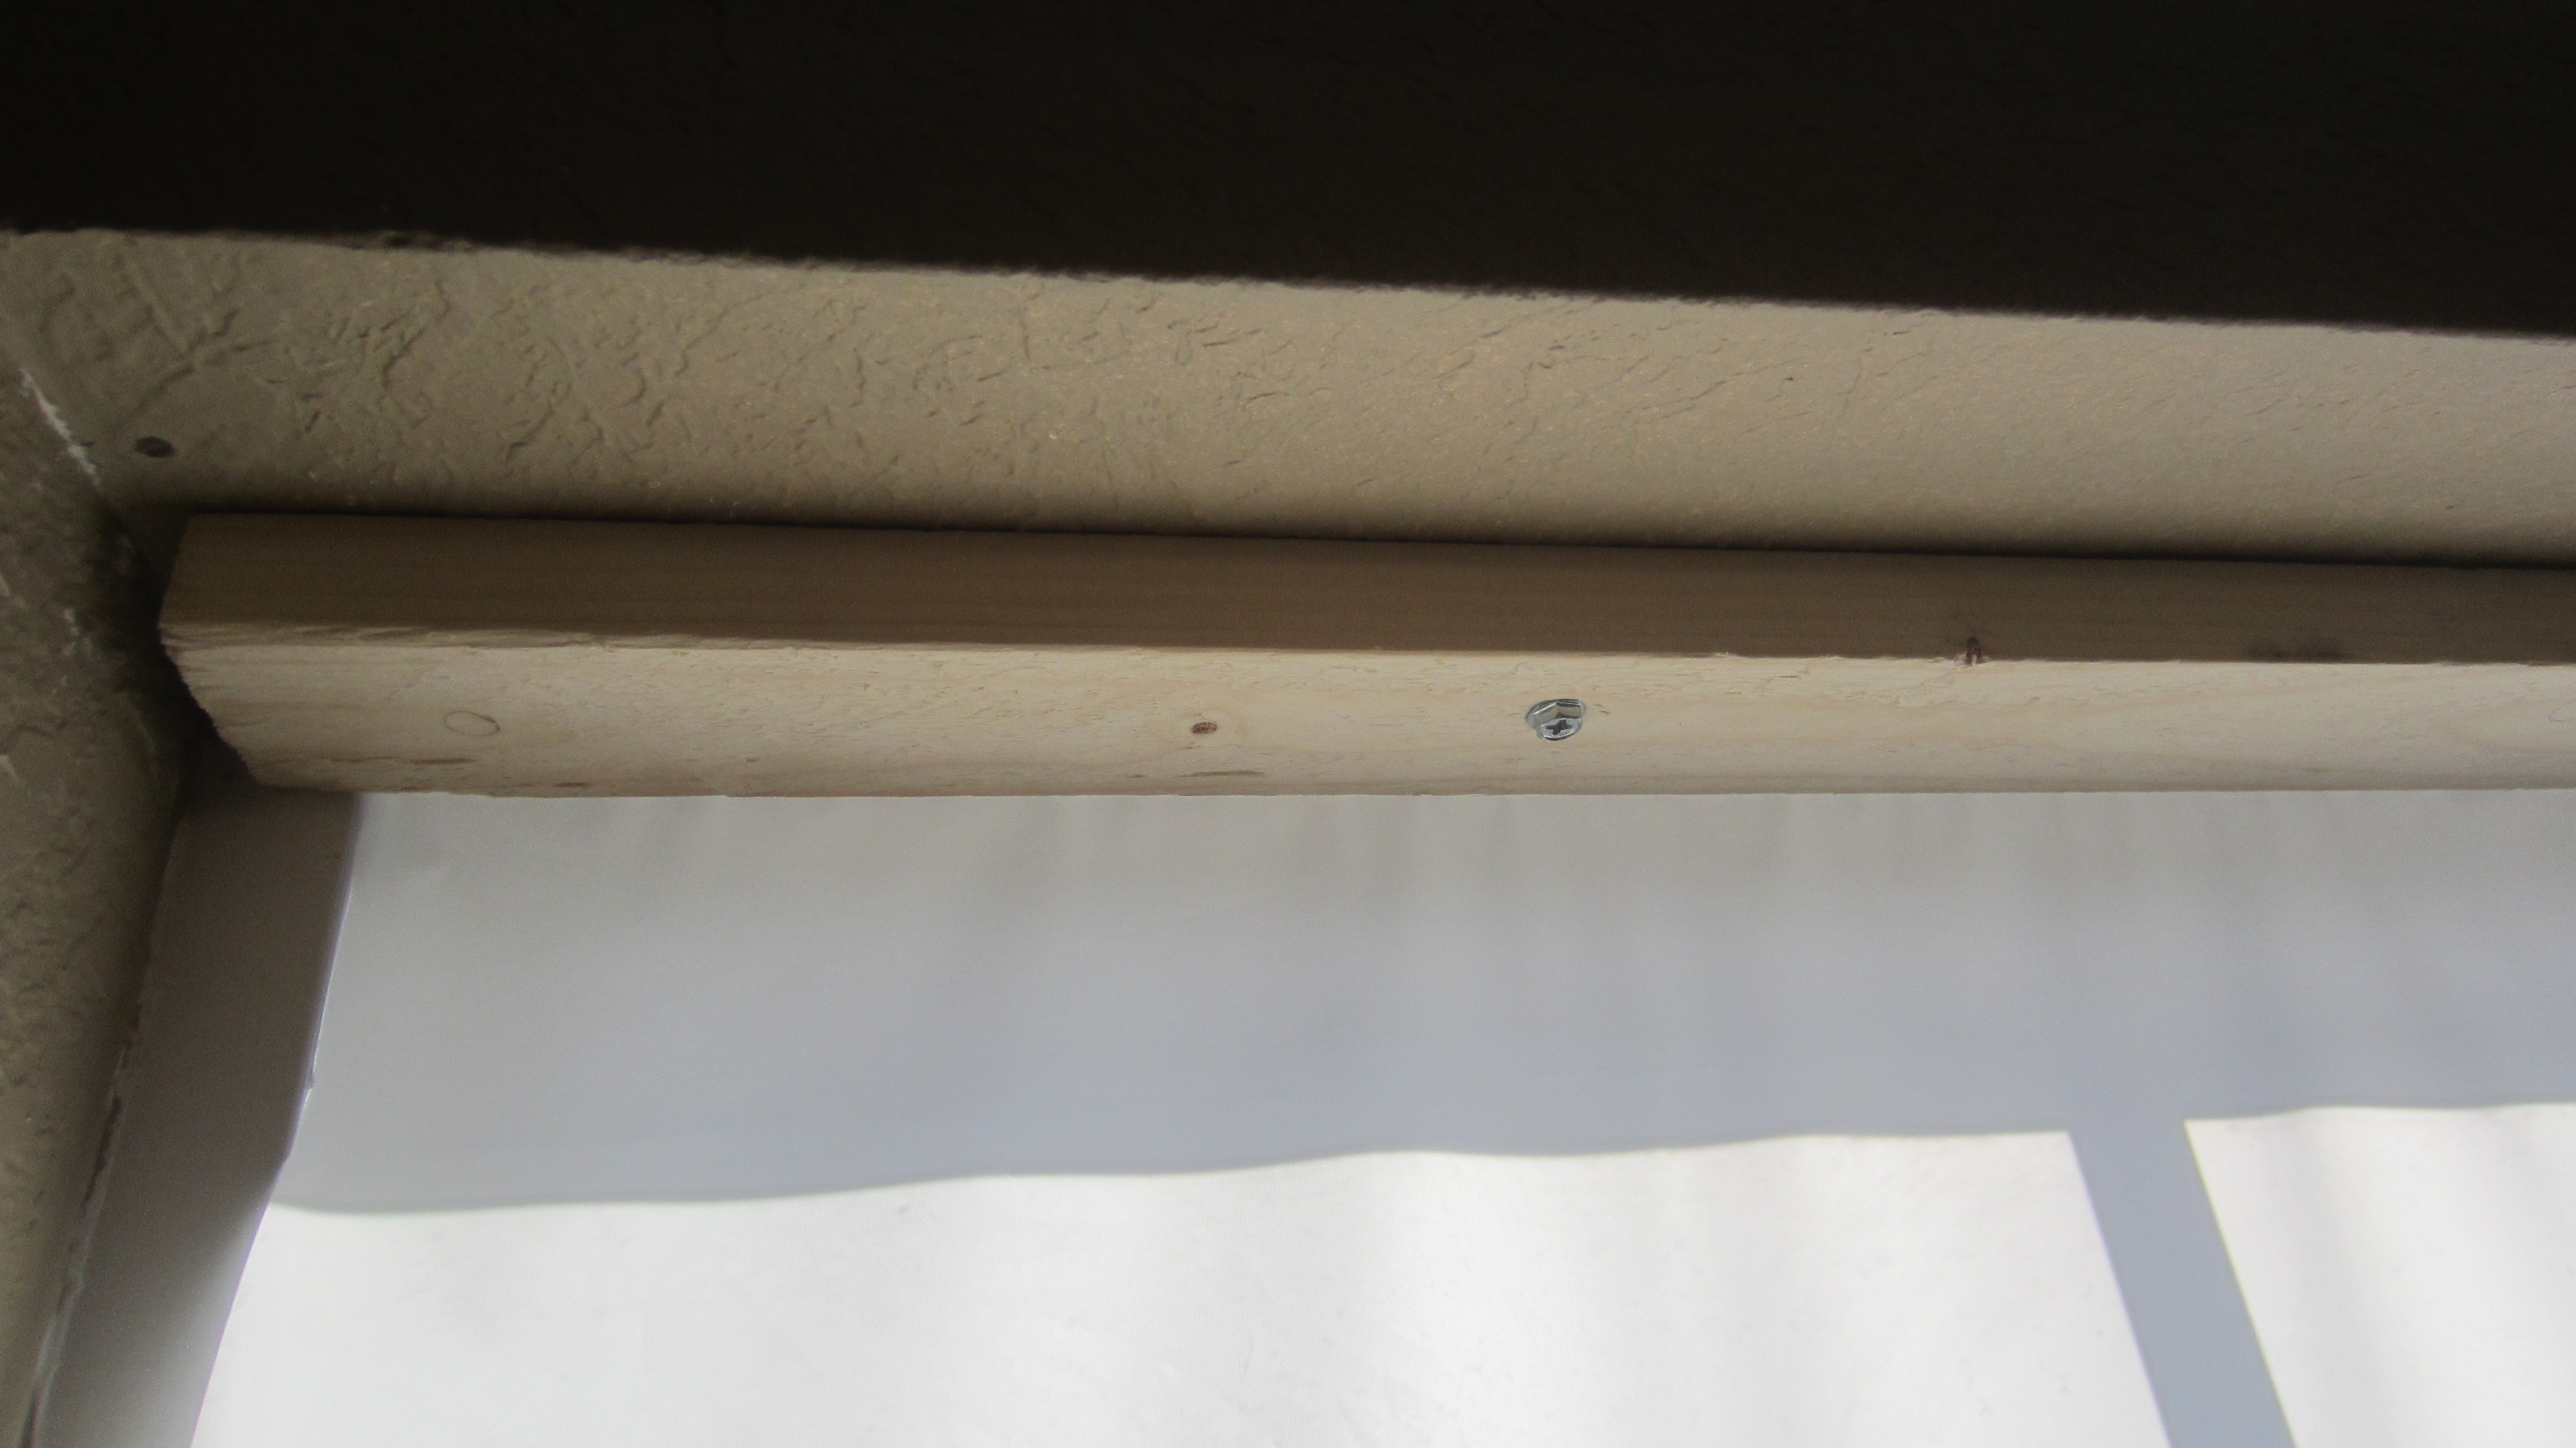
Our experience with the RGB par cans taught us that $2 translucent shower curtains from Wal-Mart make fantastic light diffusers. For the upstairs windows, we mounted a curtain as far forward as possible in each windows, pinching the top edge of the curtain between a 1×2 and the head jamb (ceiling of the window frame). The 1×2 is held up by three small screws, just enough to hold the lightweight curtain in place. The curtain is held taught and wrinkle-free (as much as possible) by another 1×2 just sitting on the window sill. A single curtain is just large enough for each of the upstairs windows.
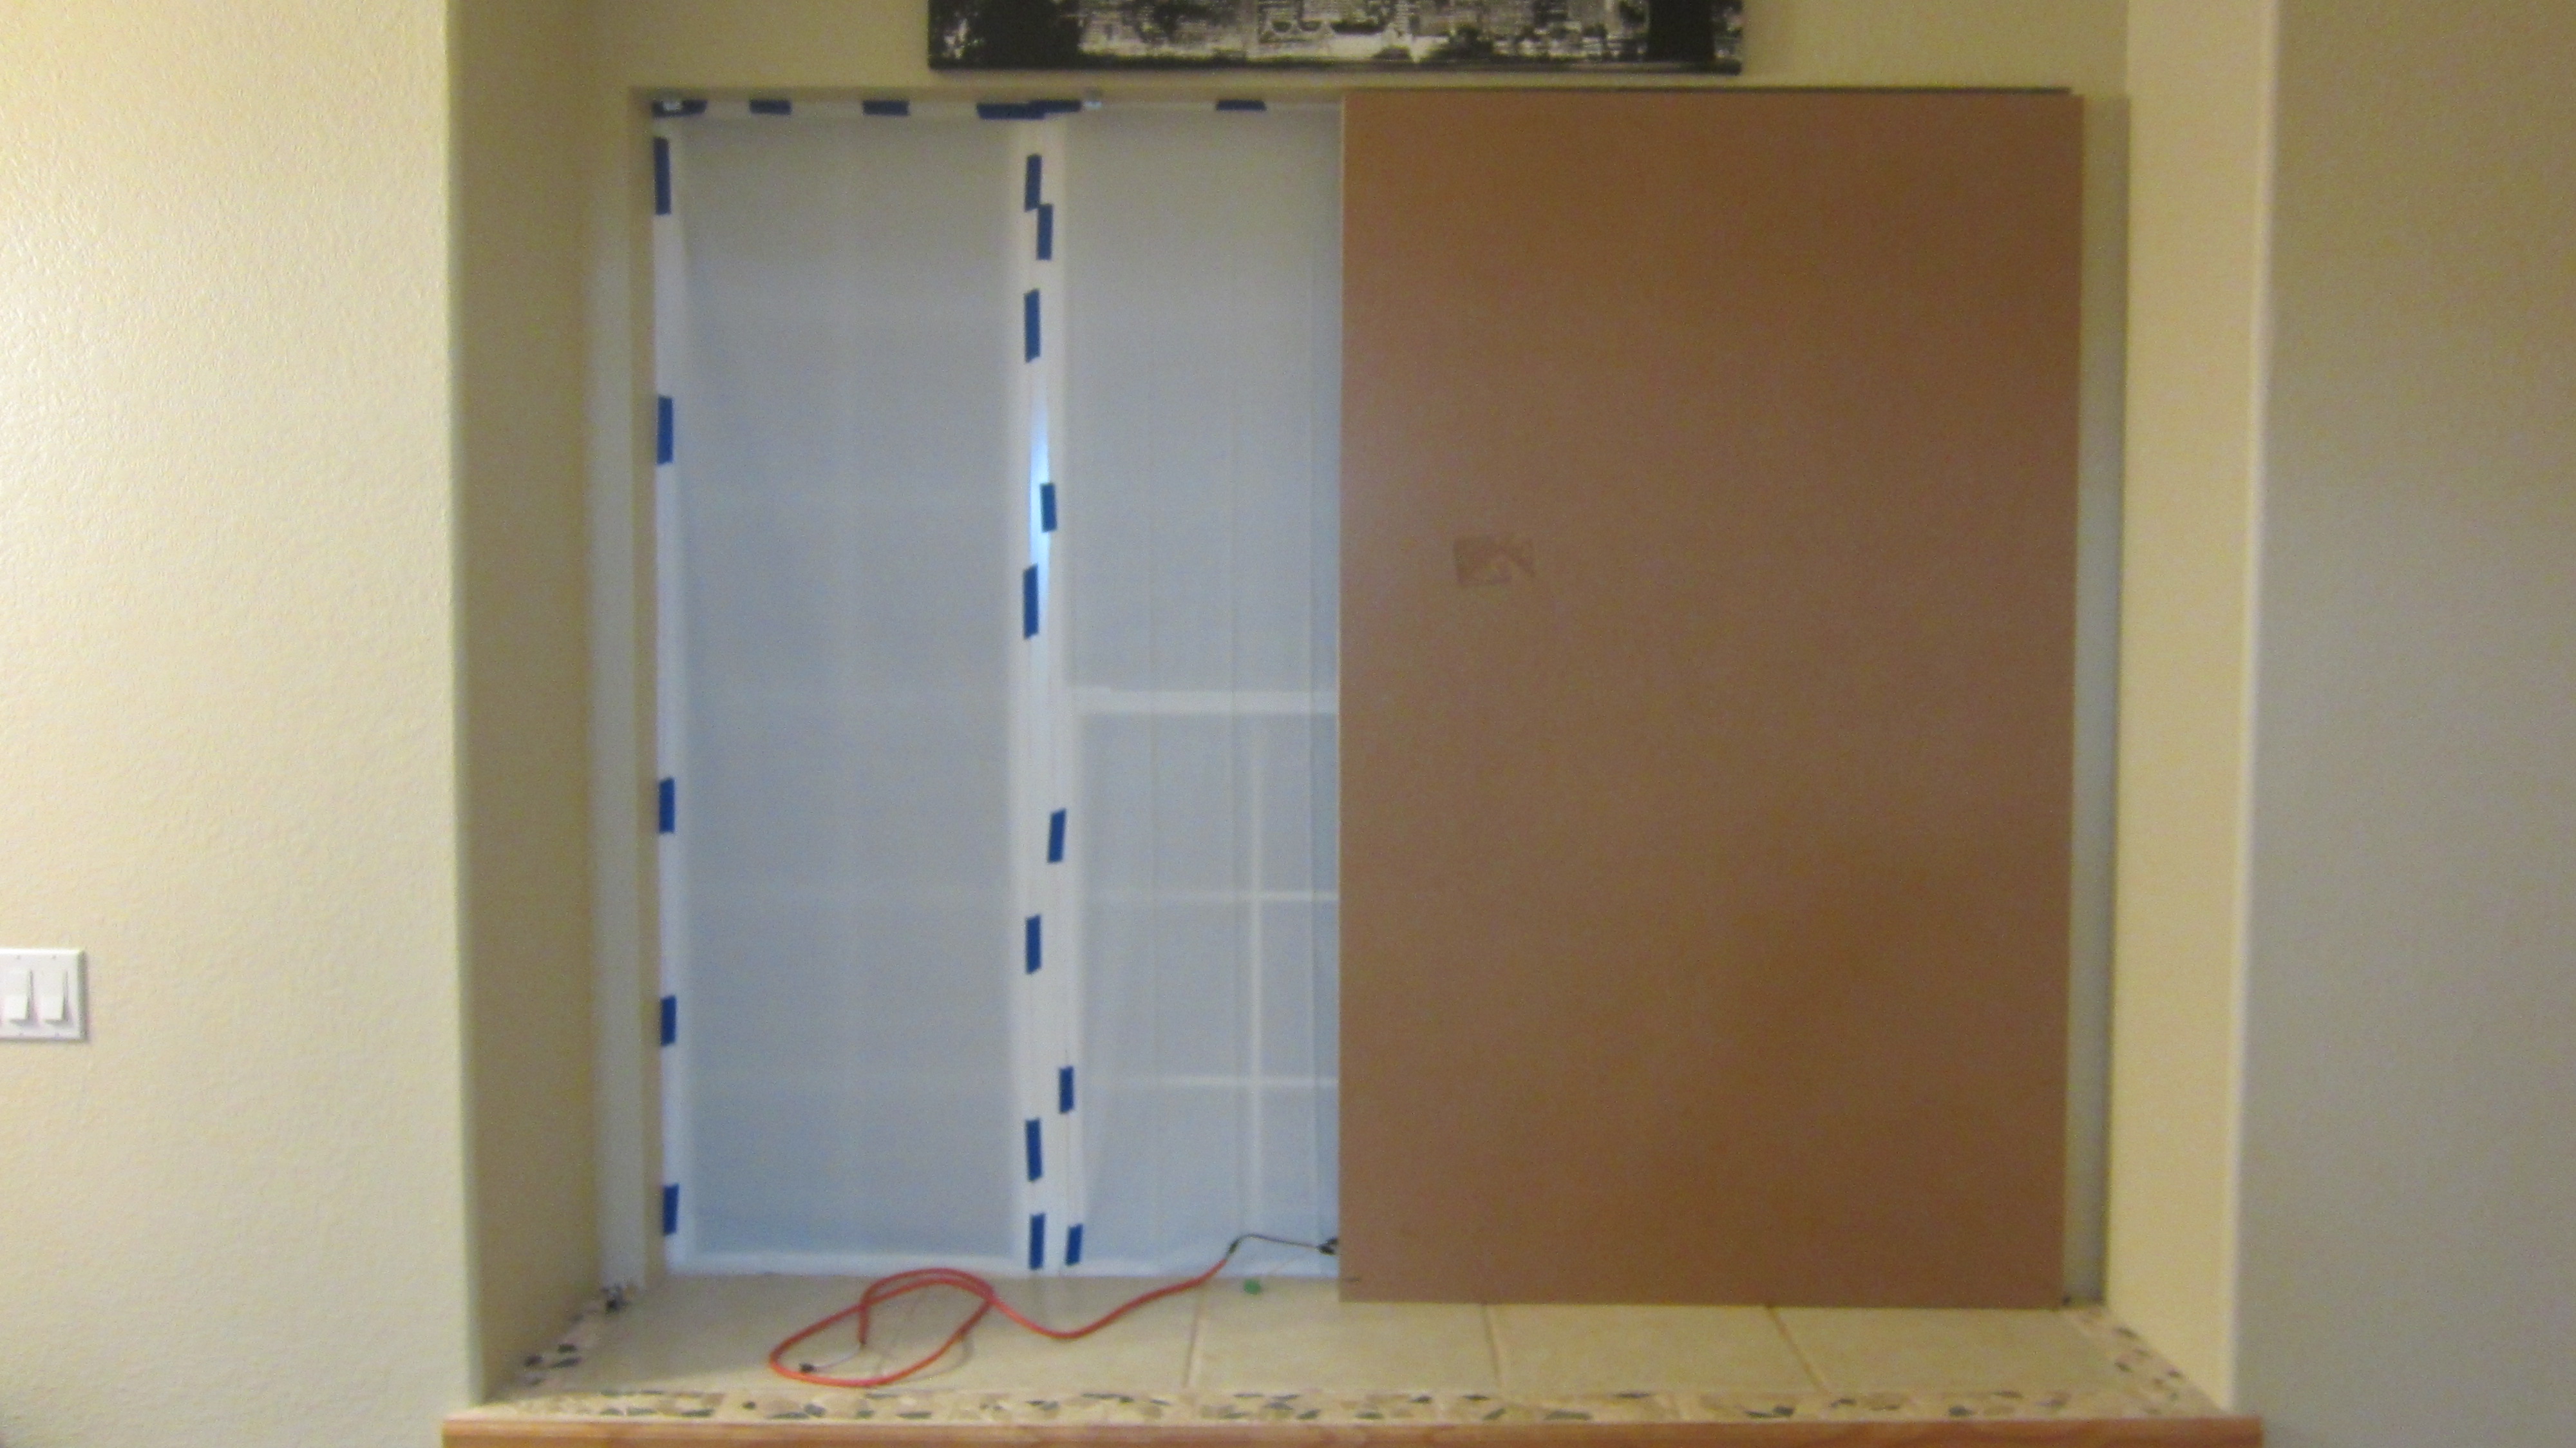
For the living room window, we switched in 2020 to using a panel made of the same material as the Snowmen Army and held it up using the same method as the upstairs windows. We had to sew two panels of the fabric together, but were able to put the seam behind the window frame between two window panels so it isn’t visible from outside. To prevent tearing, we also sewed button holes using the sewing machine in the spots at the top of the panel where the screws holding the 1×2 pass through. This single panel is significantly easier and less frustrating to put up than our previous method using smaller panels for each window pane held up by painter’s tape.
For the living room window, we needed two curtains. Due to the different layout of the window panes, we decided to cut the curtain into smaller sections and used blue painters tape to hold it against the window frame. This is a little more effort but works very well to form a nice consistent surface for consistent diffusion.

Safety
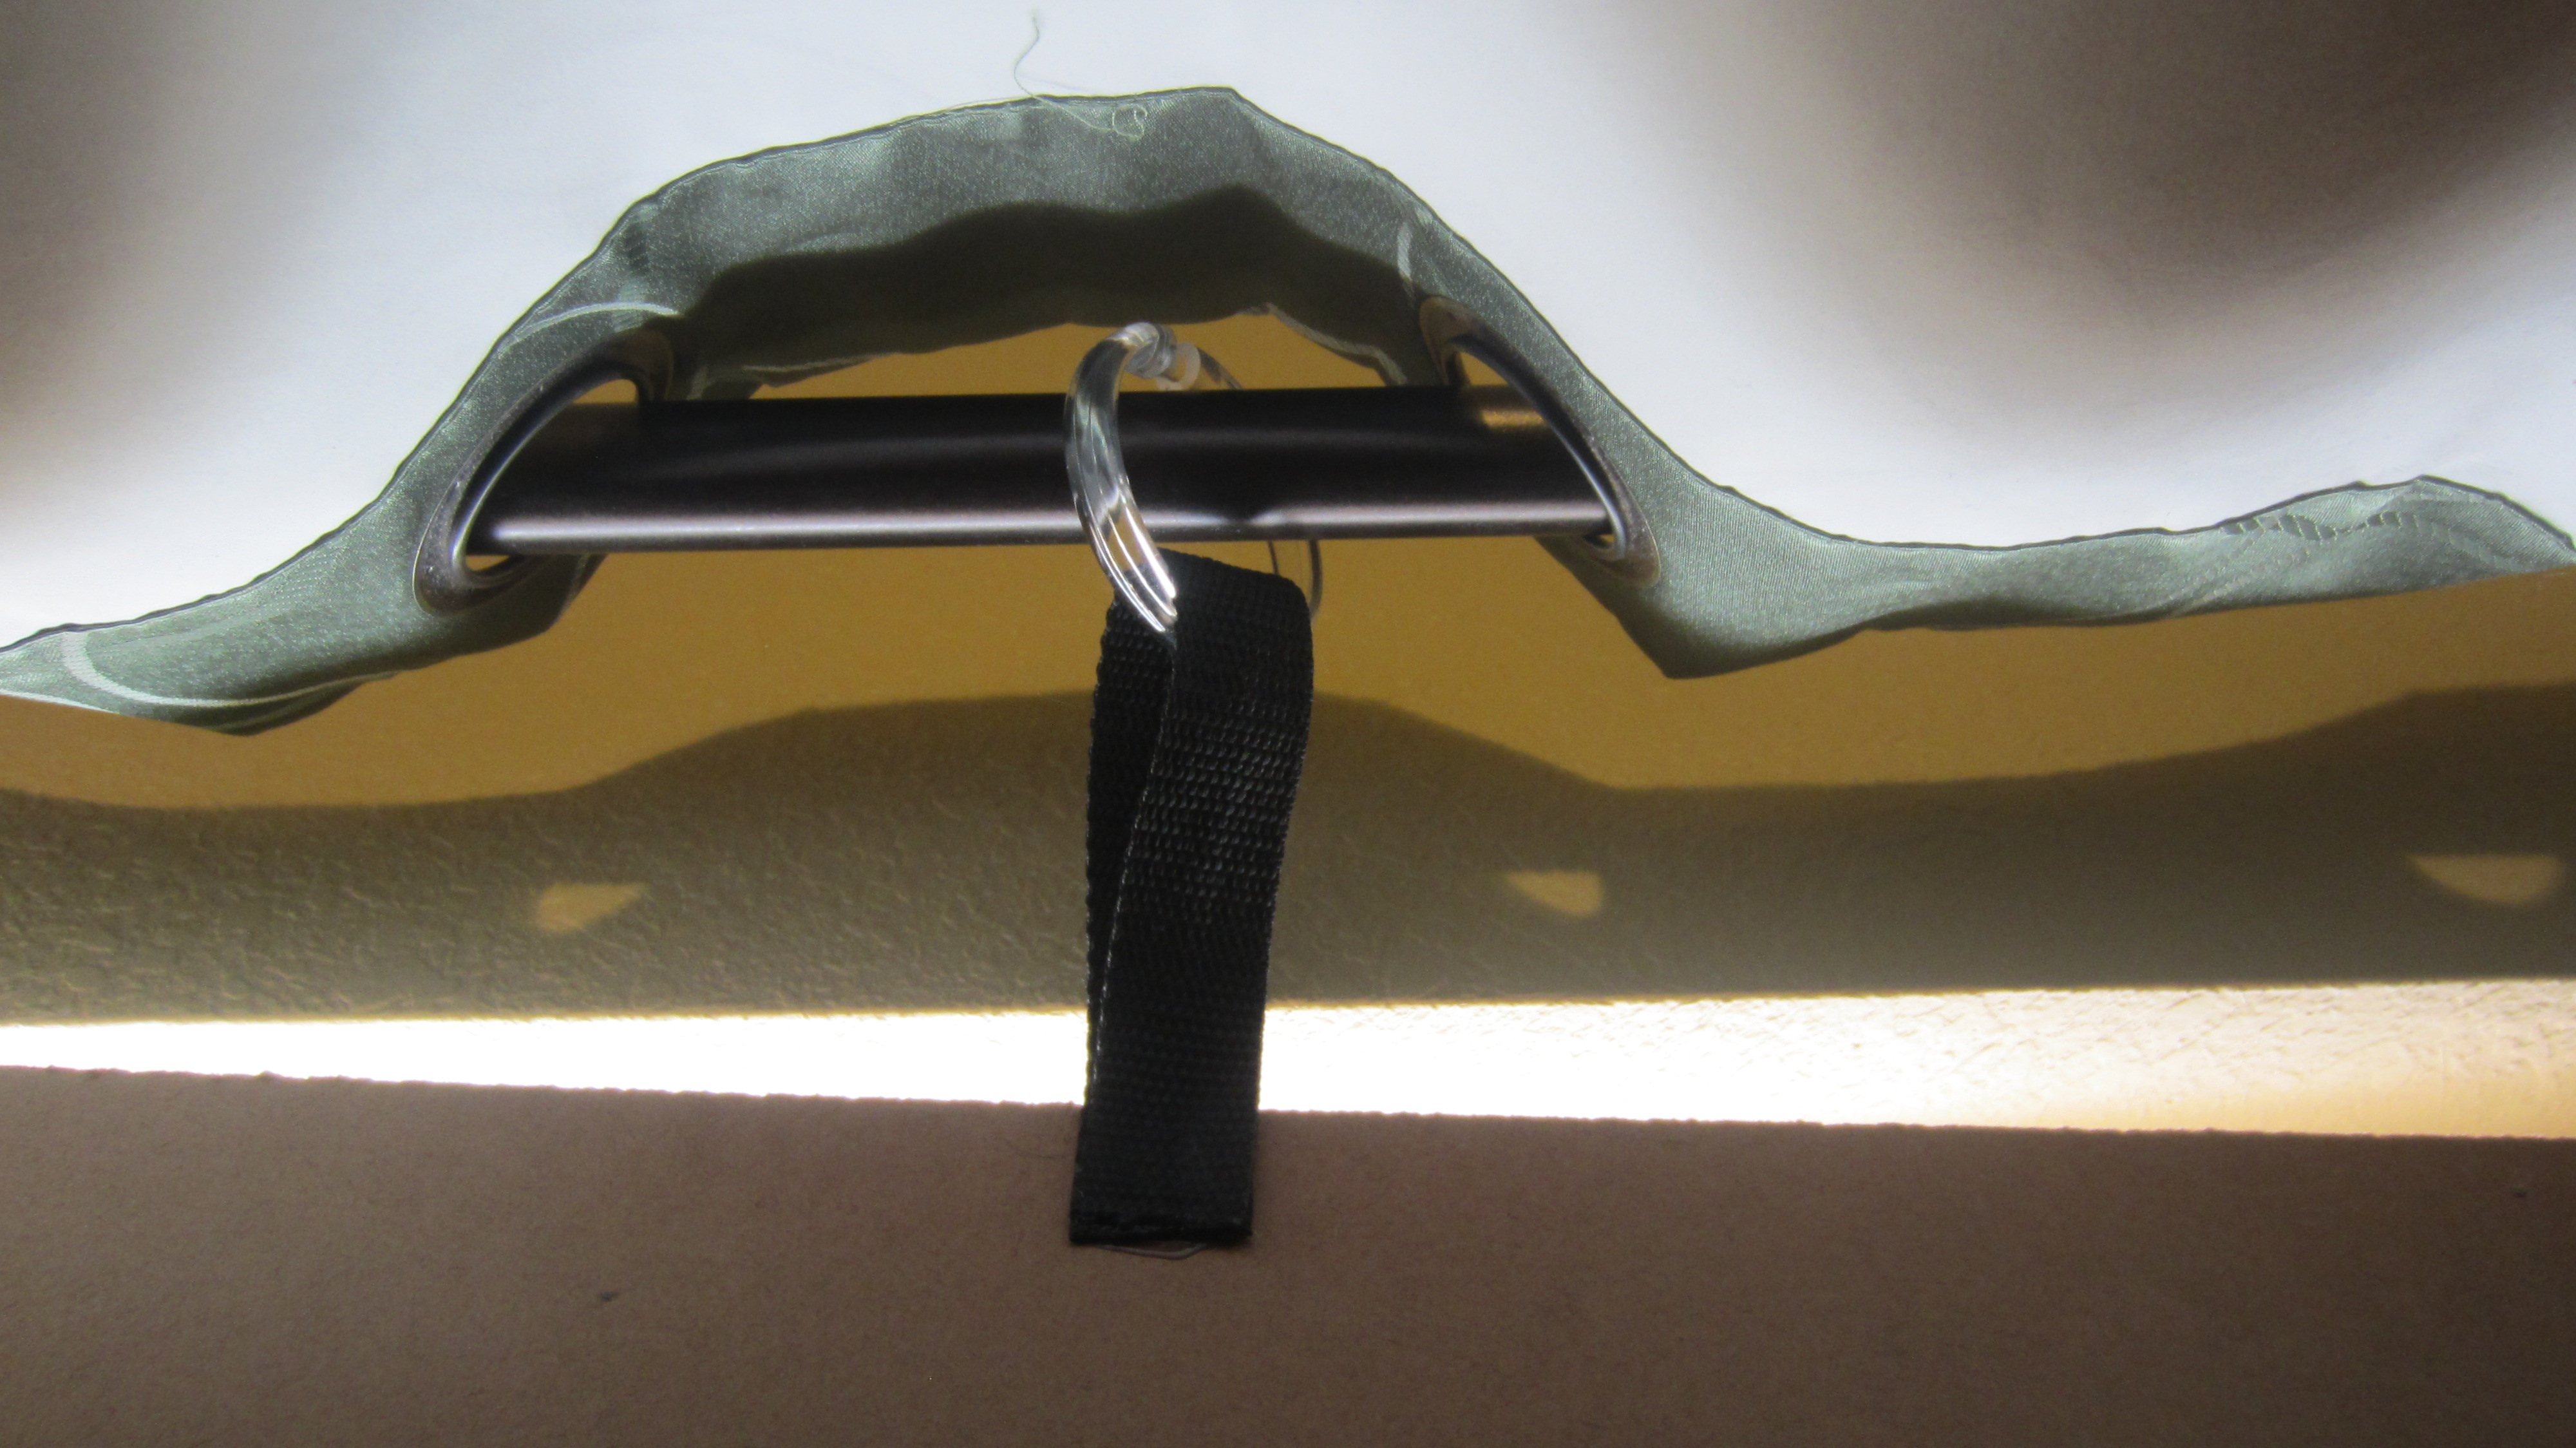
The window boxes are not the most stable things we’ve ever built, so for the upstairs boxes we attached a small loop of strapping with some glue at the top of the back of each box through which we can slide a shower curtain ring for attaching to the curtain rod. The rod doesn’t have to actually hold up the weight of the box, but just keeps it from tipping backwards into the room.
For the living room window, we don’t have a curtain rod so there isn’t anything to which we can attach the safety straps. Instead, we were able to use a cheap tension rod positioned behind the panels that serves the same purpose to keep them from tipping backwards.
Blocking Ambient Light
The boxes are well sized for their windows so they do a pretty good job of blocking any ambient light from the room. For added protection in the upstairs rooms (and because it was easy to do), we slide our normal blackout curtains around the back of the light boxes. This not only blocks light but also make the room look better since you don’t see the brown back of the masonite.

Controlling the Lights
Each window box has a dedicated ESPixelStick Pixel Controller for controlling the lights. They are each mapped to their own universe.
