IMPORTANT: The first snowmen army was just not as resilient as we had first hoped. After only 2 years in service, we replaced them with a new and improved design in 2019 because the beach balls we used are just too brittle and fragile after spending so much time outdoors with ultraviolet exposure and freeze/thaw cycles. We suffered one catastrophic snowman head explosion (RIP snowman #7) and snowman #1 underwent 4 neck surgeries after he split open in a very hard to repair location. Several other snowmen had pinhole leaks that we were able to fix with a dab of caulk and snowman #4 most certainly still has a leak in his head but we have been unable to find the spot. All in all, we would currently not recommend anyone else build these the same way, unless perhaps you live in a warm climate.
Details on the design of our new and improved snowmen army are on Snowmen Army: Attempt #2.
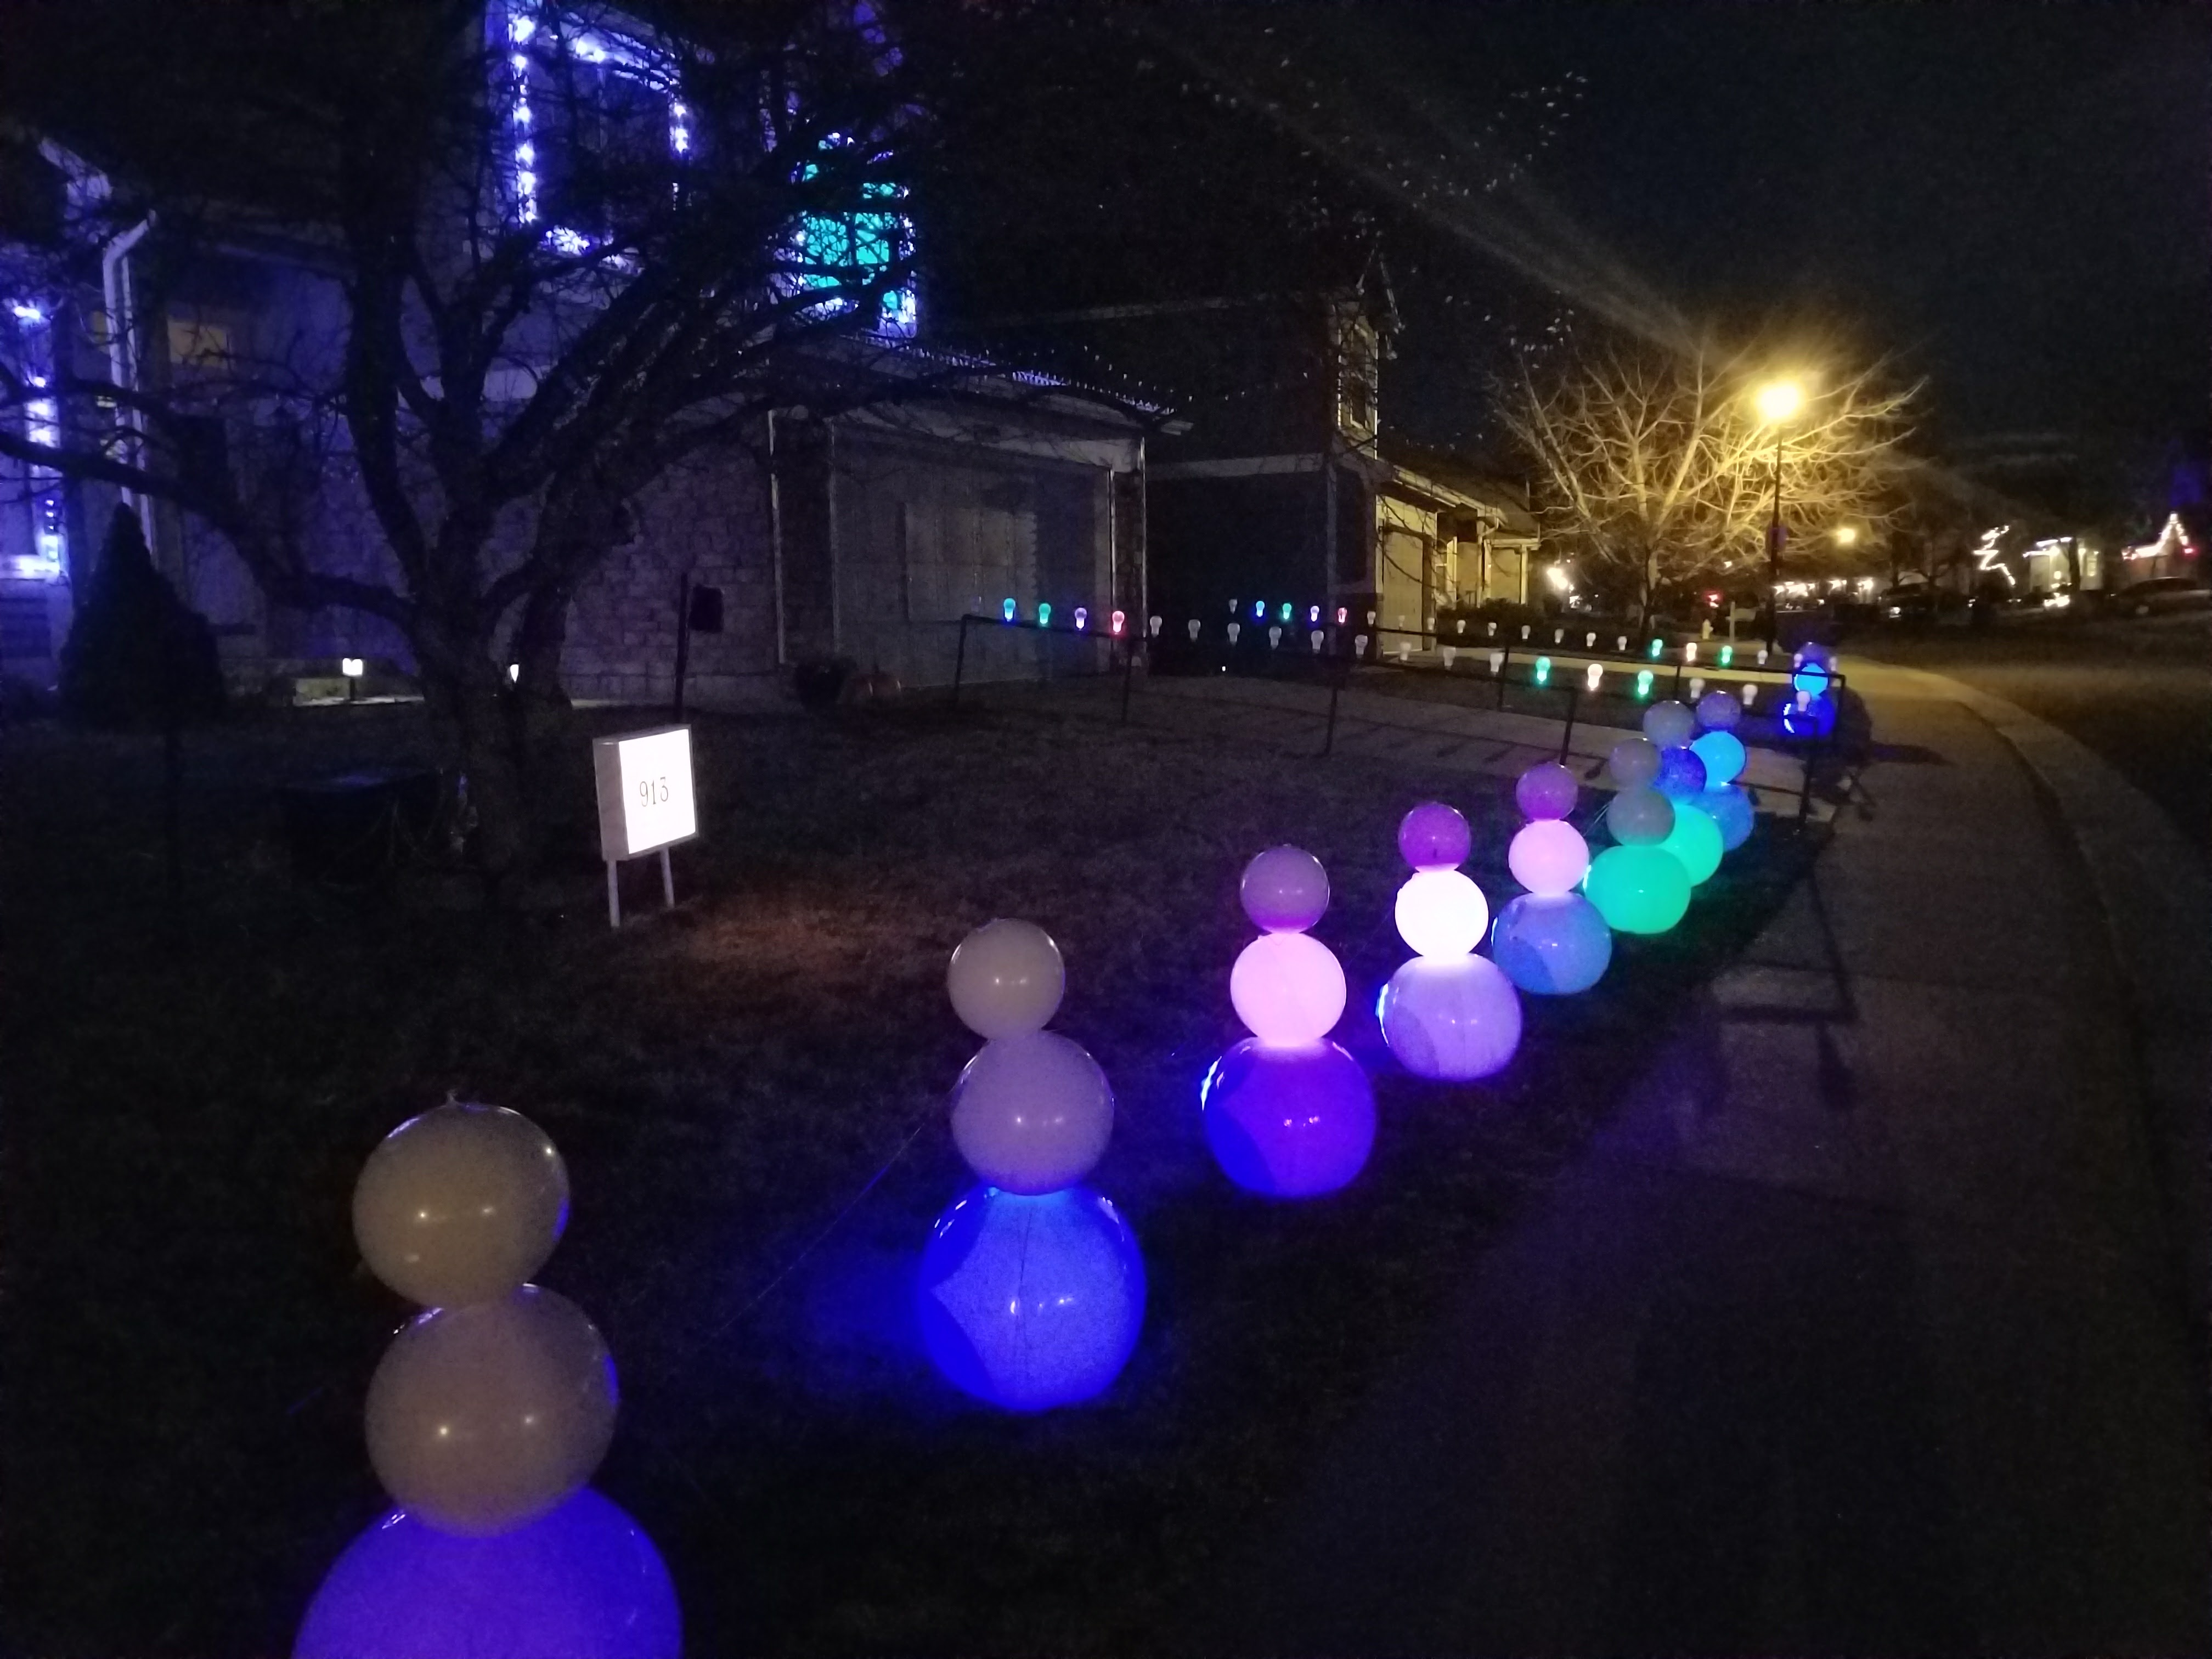
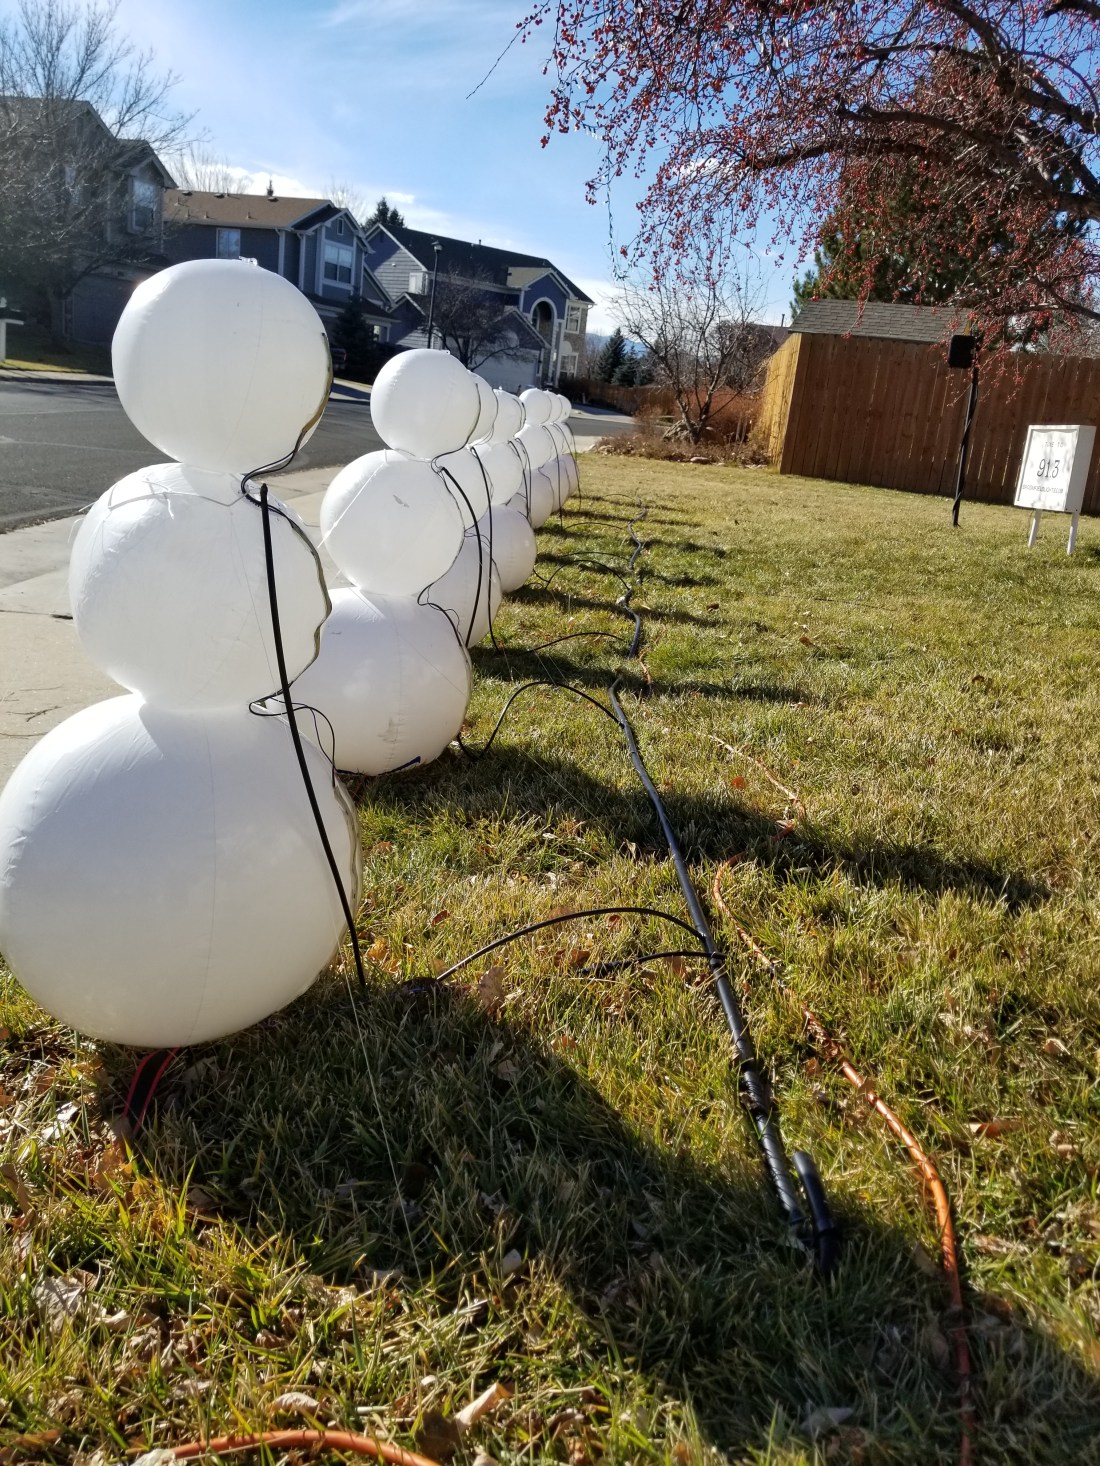
The most notable difference in our display starting in 2017 is the 12 light up snowmen lining the sidewalk every 4 feet. Being the DIY people we are, and hoping to keep things as inexpensive as possible, we decided to build our own snowmen from scratch rather than buying a prefabricated Christmas lawn ornament and retrofitting it with controllable LEDs.

The Construction
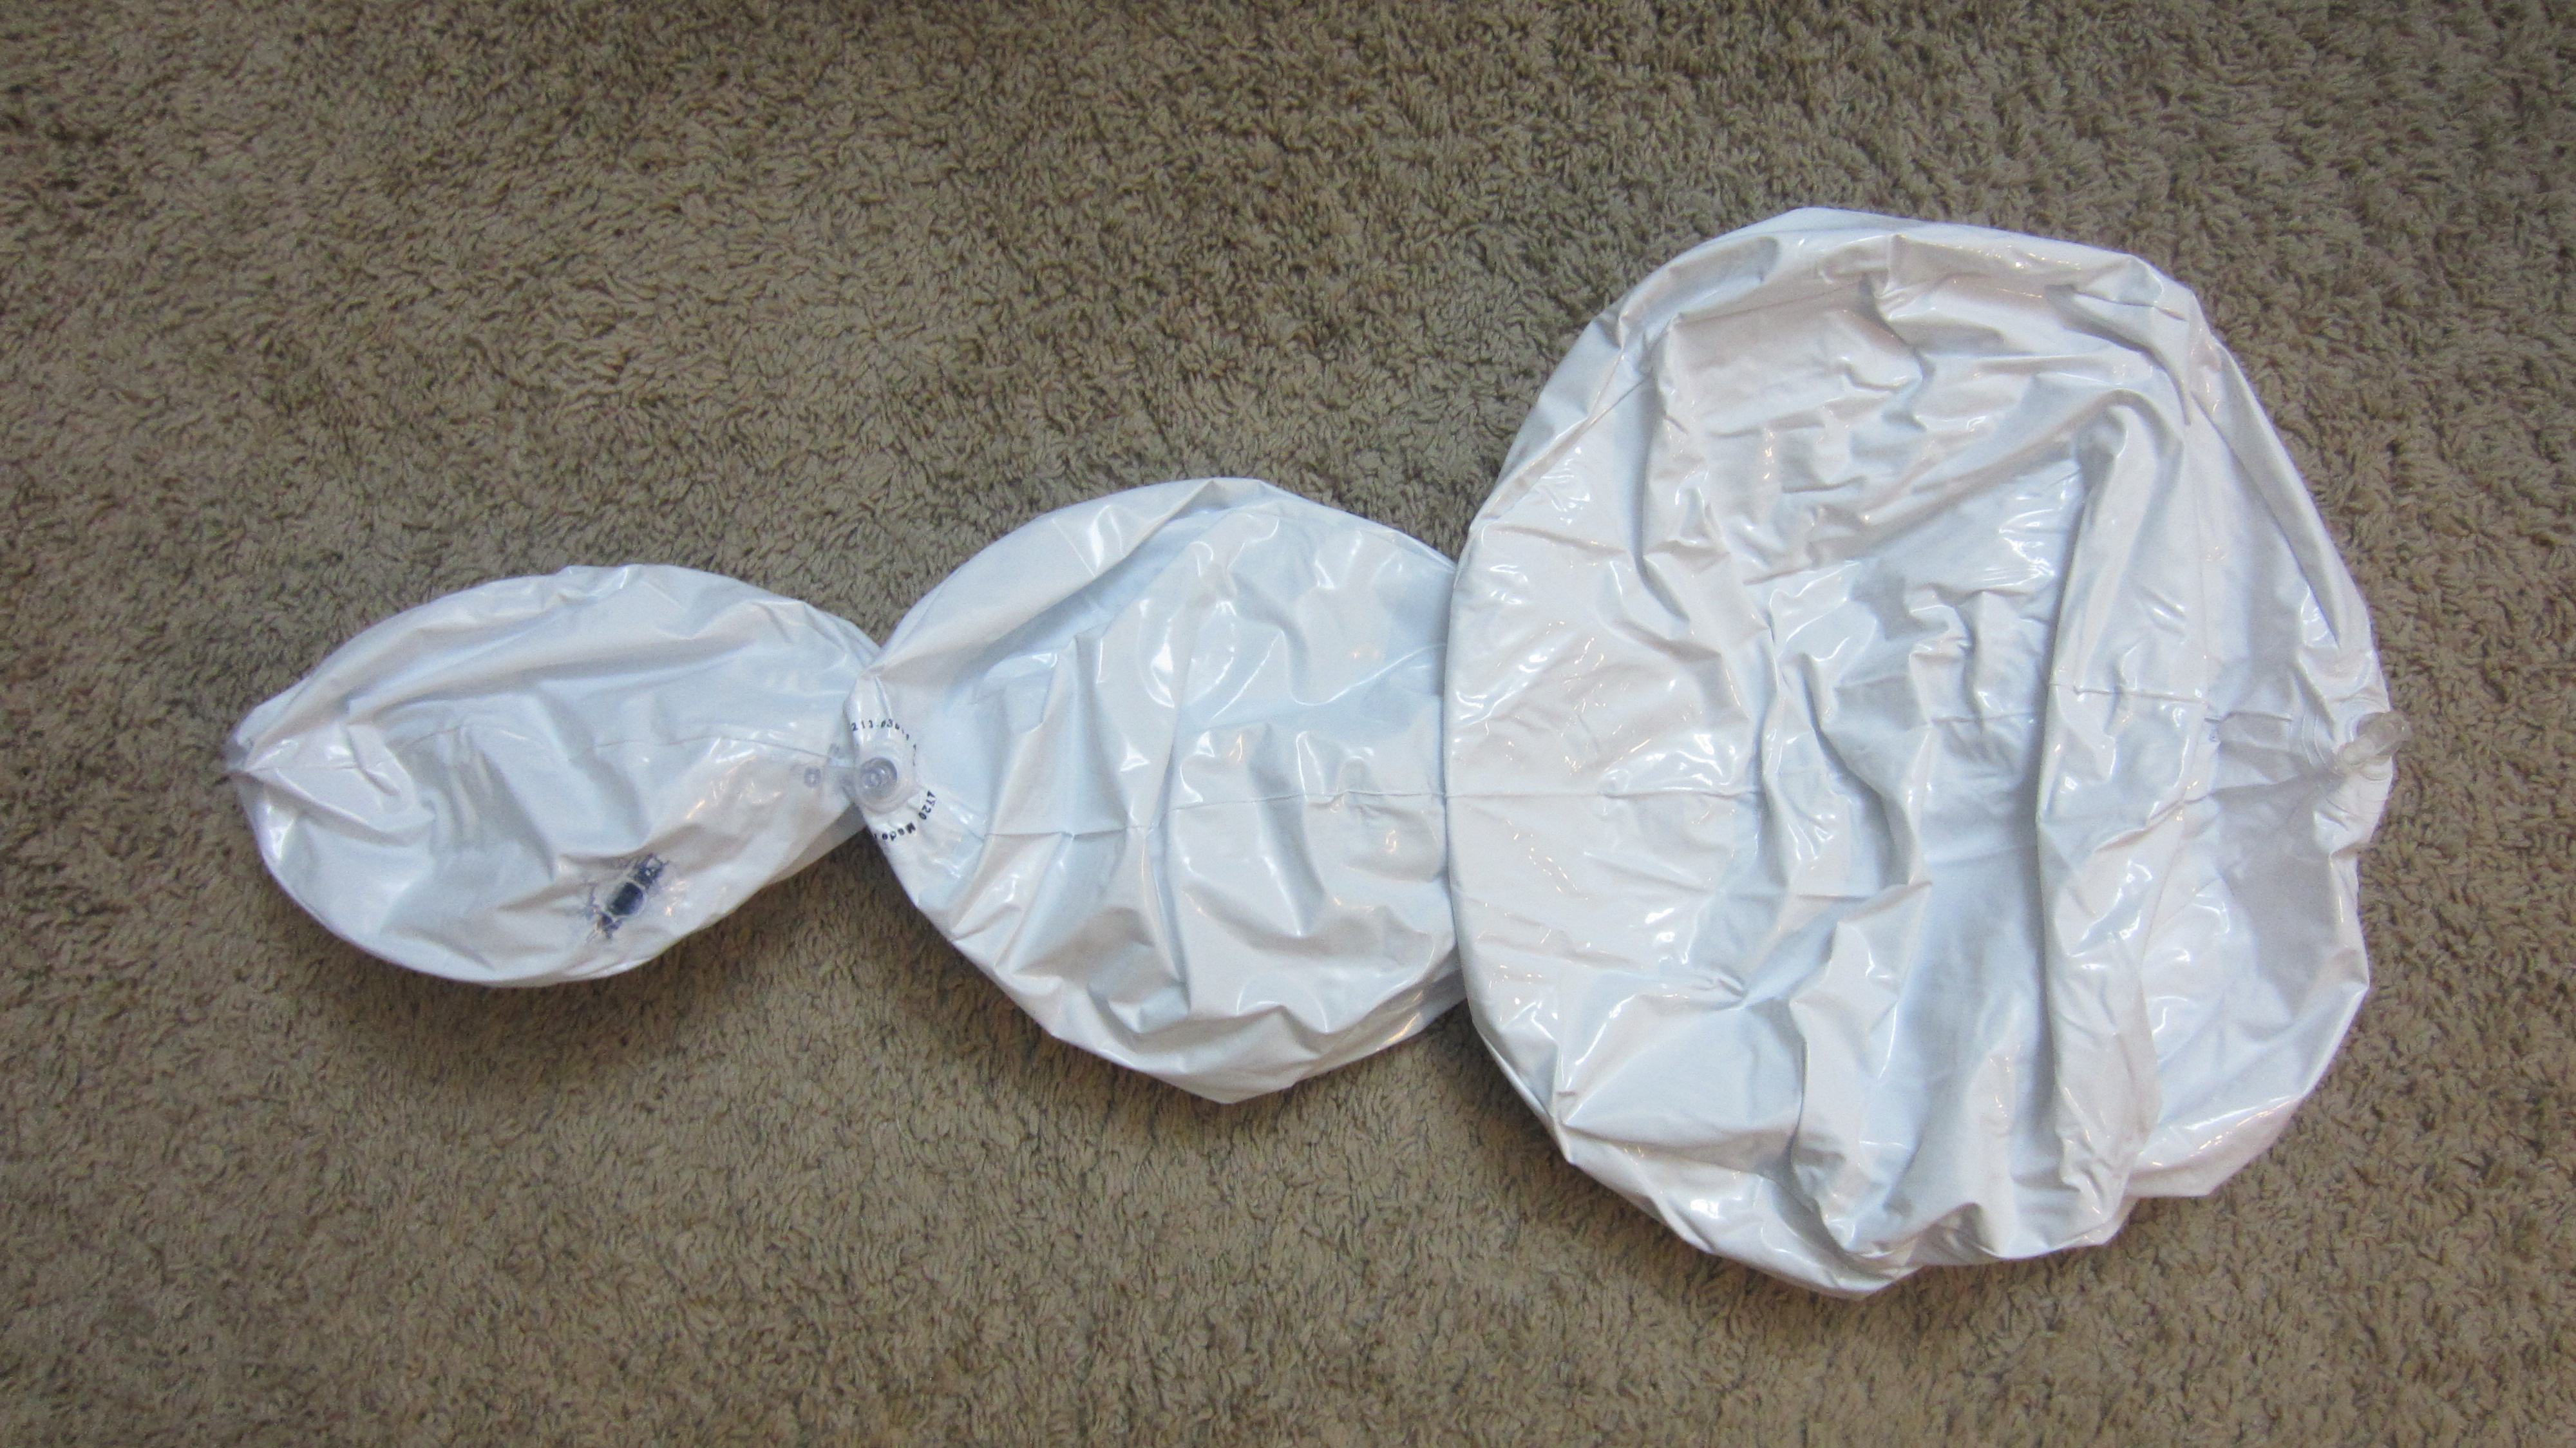
Each snowman is built from 3 white beach balls, glued together. From top to bottom, the balls are 12″, 16″, and 24″ sizes, all of which we purchased online either from amazon.com, or beachballs.com. It was a bit more than we hoped, but the beach ball cost per snowman worked out to about $8.60 including some shipping.
Before we move on, we must make an important note about buying beach balls online. Good luck and godspeed understanding how vendors measure the size of their beach balls. We found there to be no standard and two beach balls that were advertised as being the same size were in fact drastically different. Also, be prepared for sizes to be given not in a useful unit of measure such as inflated diameter, but rather in the far less useful measure of deflated length…because when I’m ordering a beach ball, what I really want to know is how big of a box is required to ship them! In the end, it took some trial and error to get sizes that would work for us.
We glued the beach balls together while deflated, using a flexible glue we found at Home Depot called E6000. We applied the glue in a small circle, placed the two beach balls together, put a 1.75 inch diameter PVC end cap on top to apply localized pressure to the joint, and then stacked a handful of old textbooks on top. After about 24 hours, the joint is solid enough to move the textbooks. The glue instructions say to wait 72 hours for full strength so we didn’t inflate the balls until at least that much time had passed.
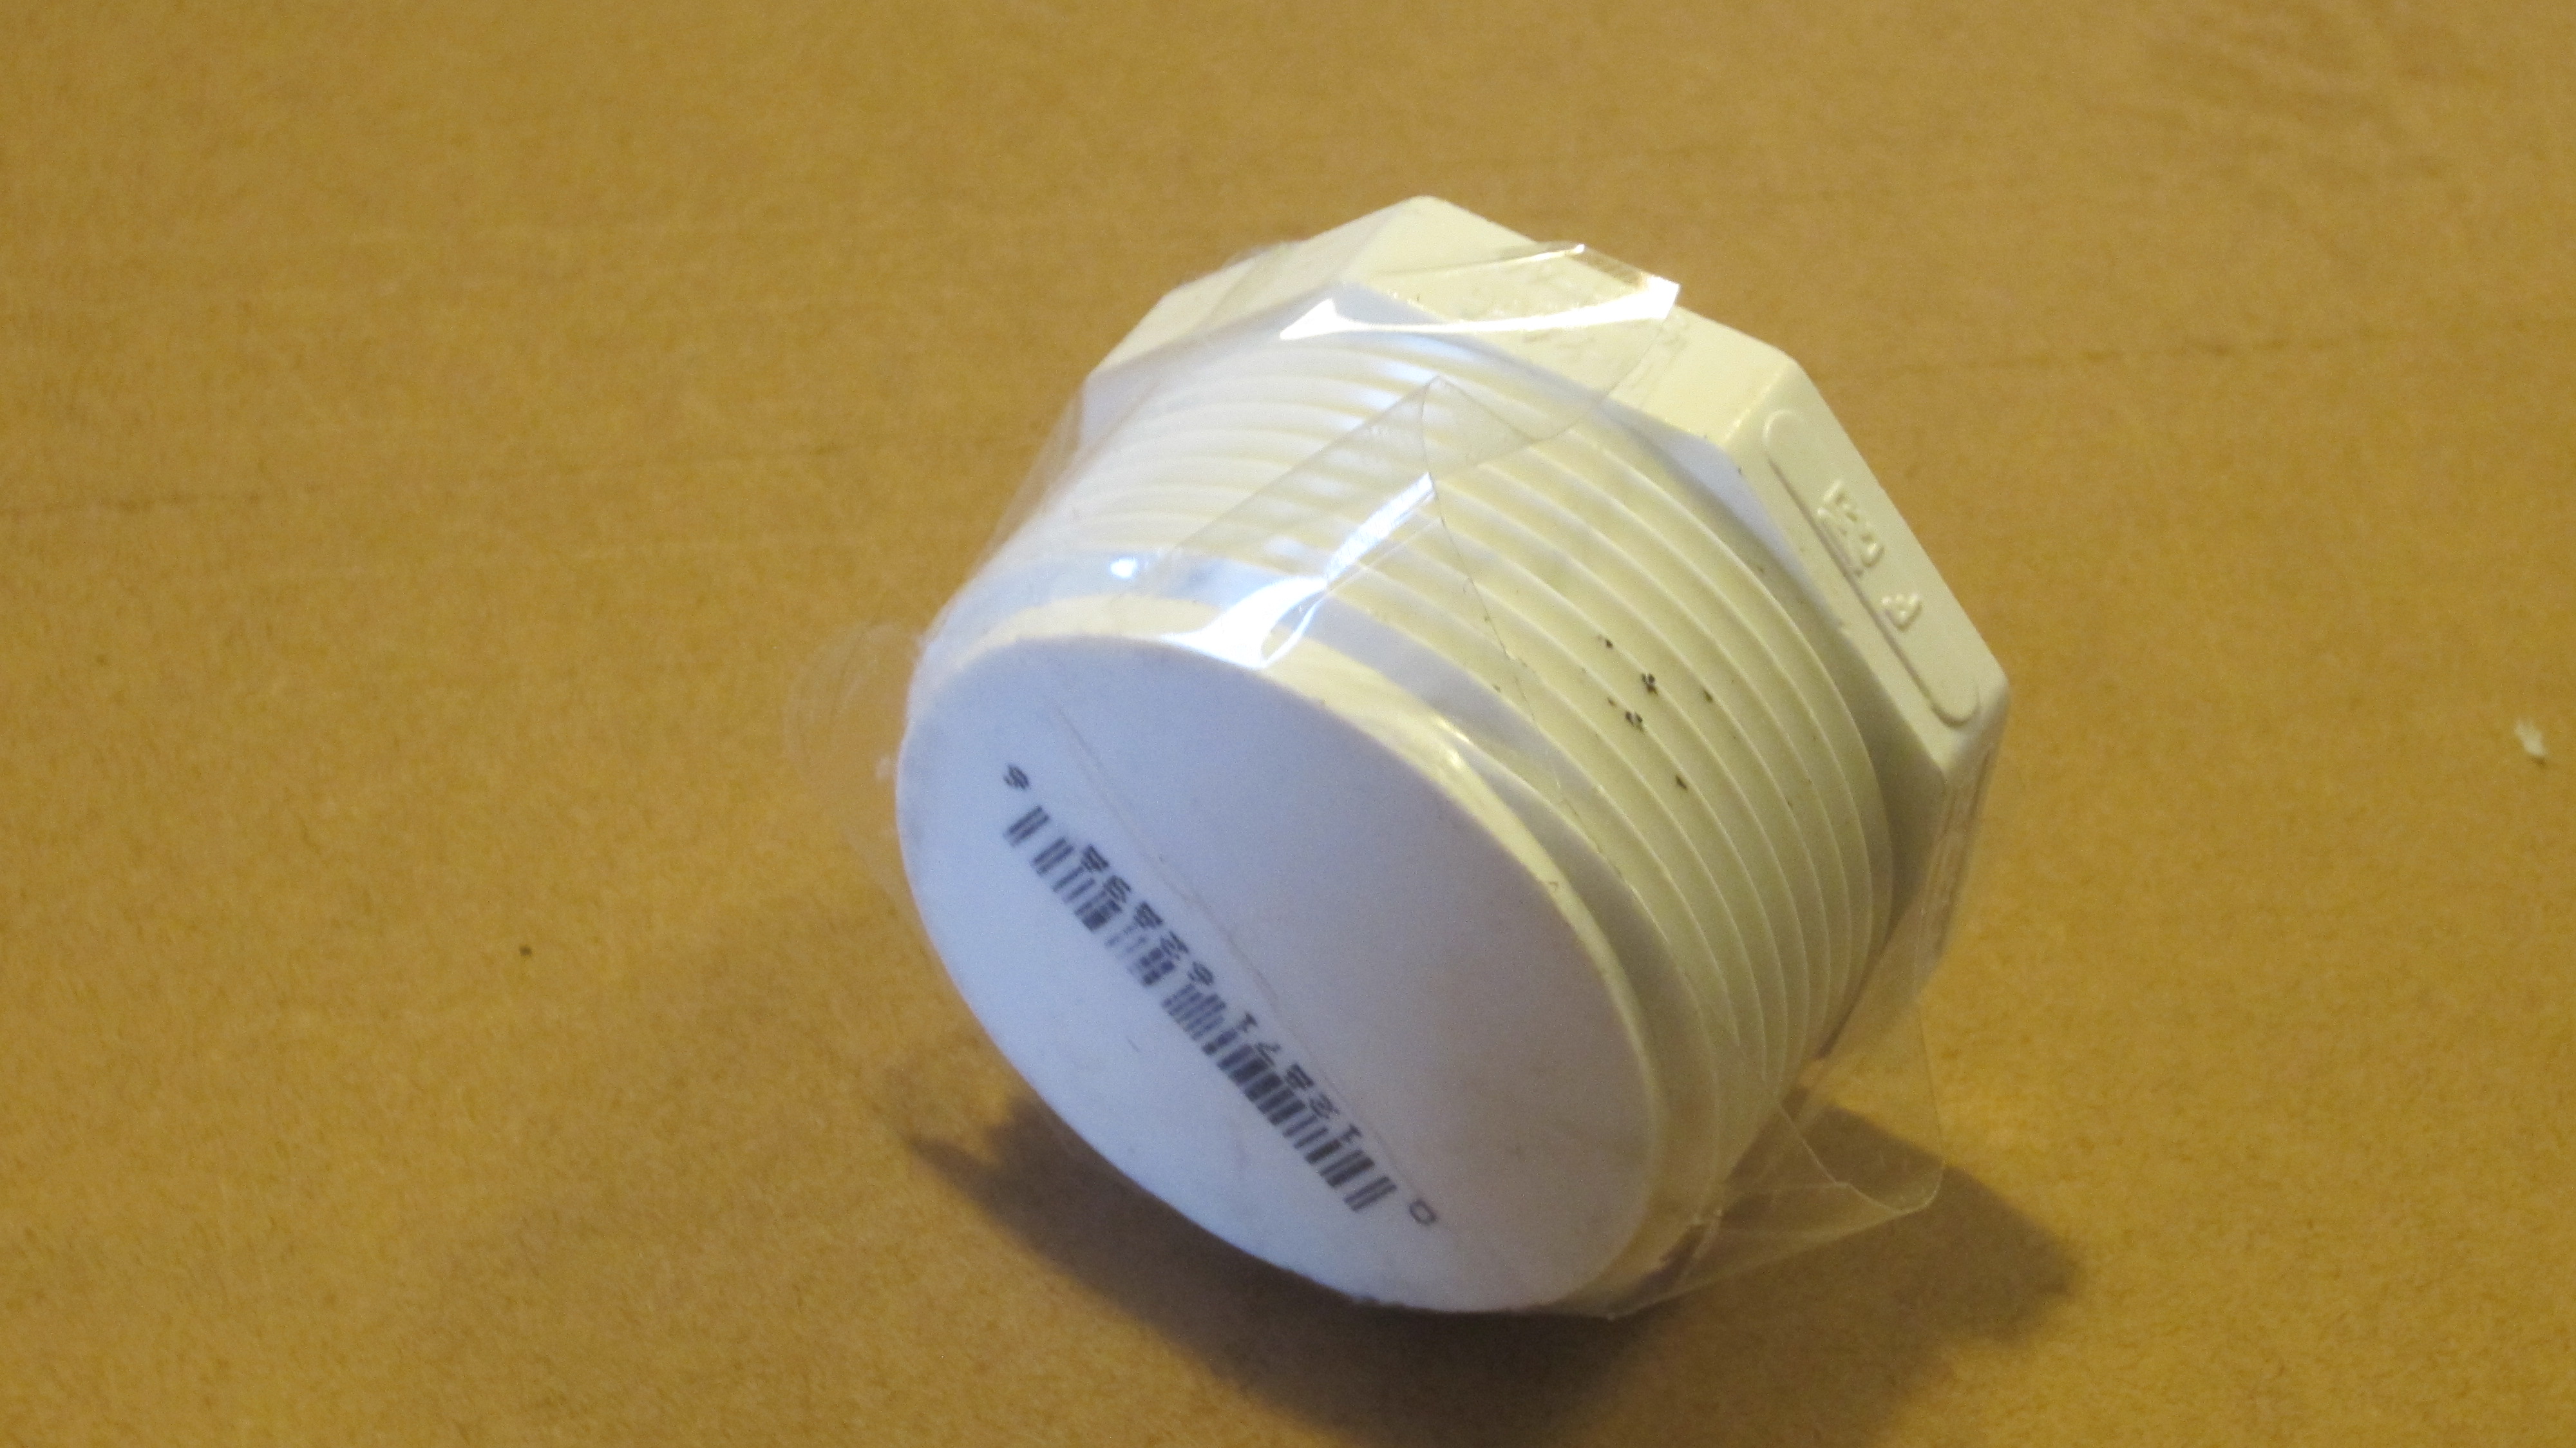
We tried to be very careful in our orientation of the beach balls so that the inflating valves are accessible but not visible from the front. The top and bottom of the balls often have some black printed ink so we aimed to hide those either in the glue joint or angled fairly severely towards the ground. While gluing one round of beach balls, we discovered that the PVC end cap somehow pressure-transferred its own ink onto our beach balls and we could not remove it despite trying 6 different cleansers. Fortunately, we realized that the locations were not too noticeable and would mostly be facing away from the street when fully assembled. To prevent this from happening again, we put a strip of clear plastic packing tape on the end of our PVC end caps.

After two gluing sessions, we had our three beach balls attached to each other and could move on to inflating them.
Inflating the Snowmen
While our little pancake air compressor from Home Depot is a bit small for effectively blowing out the sprinkler system, it is perfect for inflating beach balls! We have a nozzle on the end that fits perfectly into the inflate valve and it takes no time at all to blow up the balls. We can also inflate them much more with the compressor than we would ever be able to by our mouths alone. In general, we strive to overinflate a bit so that the seams in the beach balls are less noticeable. This also gives us some margin if cold weather causes the air inside to contract.
UPDATE: We have come to learn that cold weather causes significant contraction. There is a reason most Christmas inflatables contain a fan that continuously inflates the item. The challenge with the snowmen is finding the right level of inflation such that they still look good in the cold weather at night without causing the beach balls to burst during the heat of the day. For extreme temperature swings, it may be necessary to actively manage the amount of air in the beach balls and release some pressure if abnormally high temperatures are expected.
Lighting Them Up
We debated for a while on the best way to light up our snowmen. Ideally, we would have placed some LEDs truly inside the beach balls, but the logistics of doing this were just too much to overcome. It is very doubtful that we could have inserted LEDs and resealed the ball to be airtight when inflated, particularly for an entire month of being outside in the snow and cold weather.

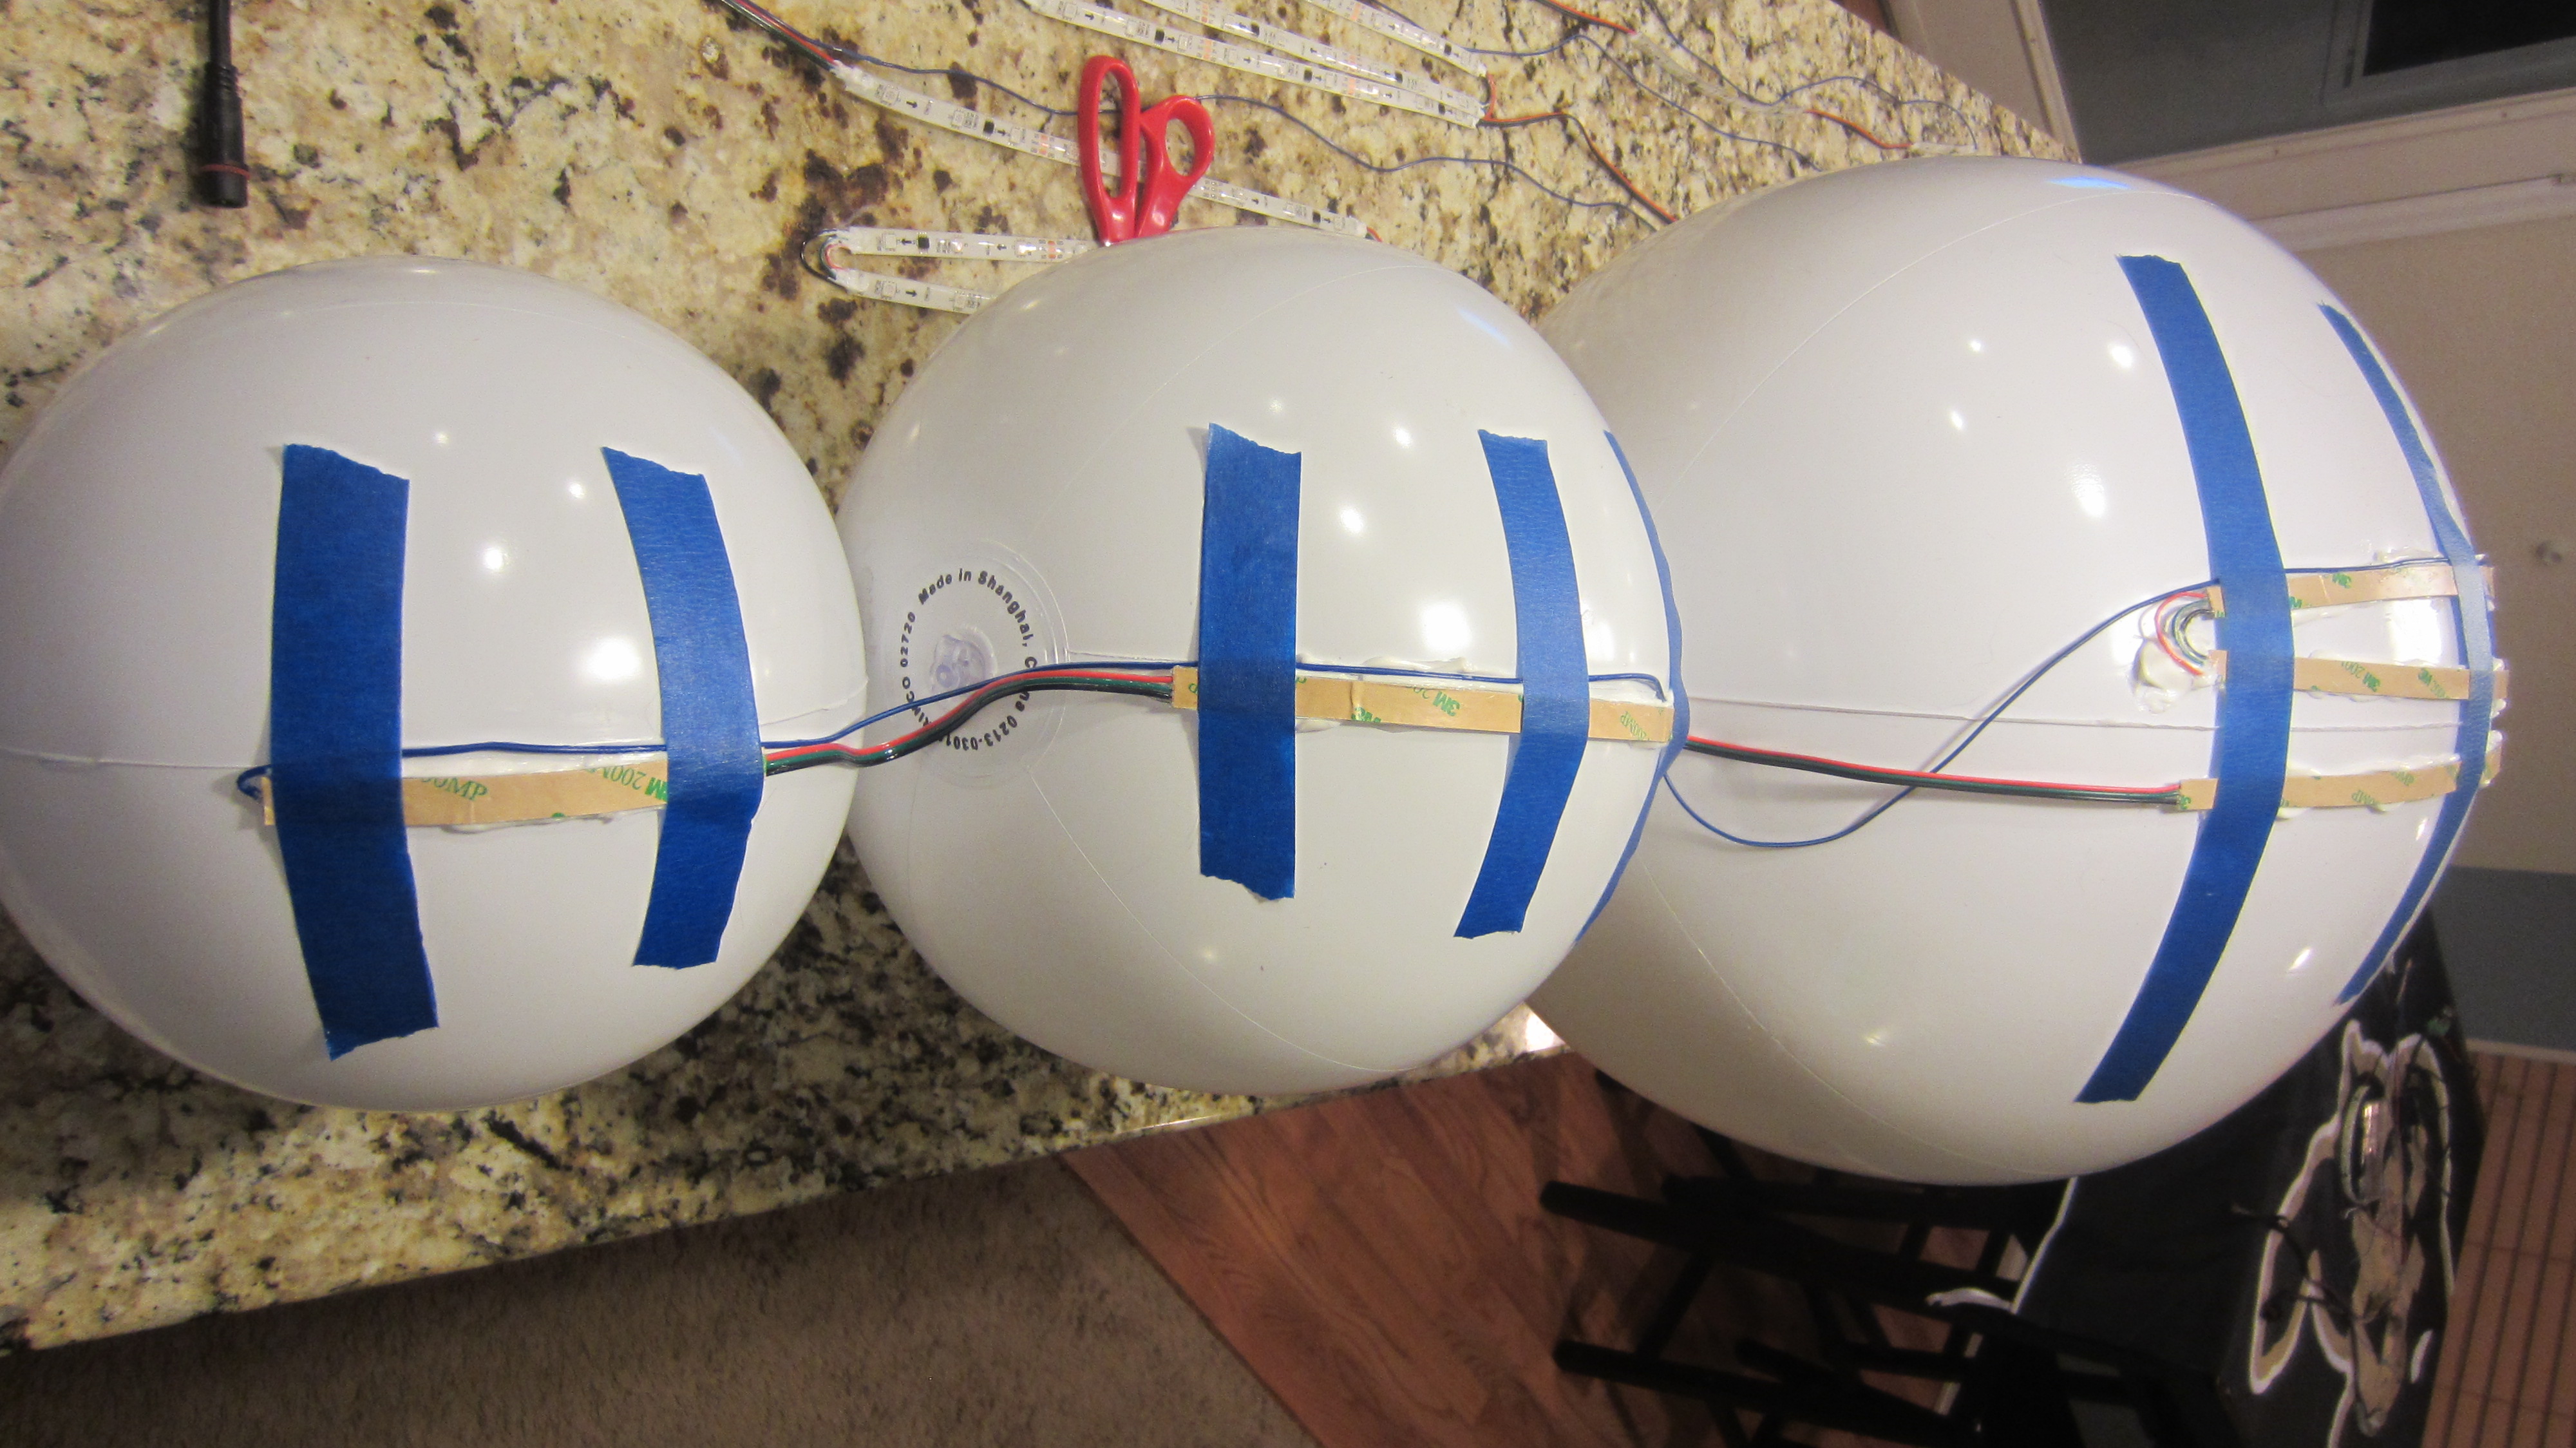
We finally settled on attaching 12V LED pixel strips to the outside of the snowmen on the side away from the street. It isn’t ideal, but it seems like the only realistic way to get the effect we desire. The snowmen use IP65-rated 30 led/meter (10 pixels/meter) strips, with 9 pixels illuminating the large ball, 2 pixels lighting up the middle ball, and a single pixel lighting the top ball. See LED Pixels for more information on the different types of pixels used in our display.
We built the 12-pixel strings for each snowman and attached them to the snowmen using clear caulk. We used the same clear caulk to waterproof the solder joints where we had scraped away the silicone coating.
Wiring Logistics
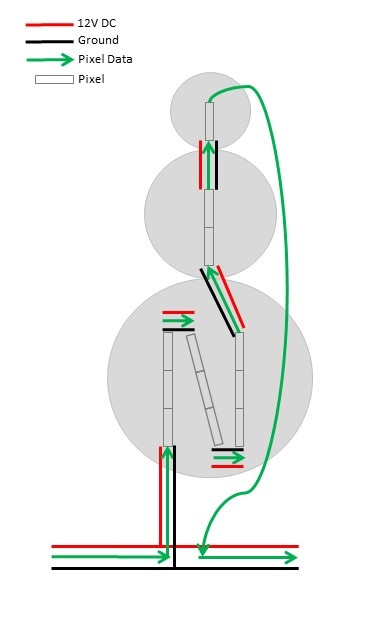
The trickiest part of wiring the snowmen is dealing with the return data line. The data path runs up the snowmen to the top pixel and then a long line has to return that signal back down to go to the next snowman. We took a bus approach for this with a main cable carrying power and data running along the ground at the front of our yard and each snowman plugging into that cable with a 4 pin connector. 3 pins are for the standard 12V power, ground, and data line to the snowman, and the 4th pin connects the return data line back to the bus for delivery to the next snowman.


The 9 snowmen to the left of the driveway are powered by a single 12V 30A power supply that lives in the bomb box in the front yard. We have one point on the snowman bus for doing power injection so that snowmen at the end of the line get enough power. This same power supply also powers the light bulb rail on the same side of the driveway.

The 3 snowmen to the right of the driveway are powered by a different 12V 30A power supply that lives in the garage. Similarly, this supply powers the light bulb rail on that side of the driveway. Due to fewer pixels on this side, we found that no power injection was required.

Securing the Snowmen and Related Challenges
We were very concerned about how our snowmen would hold up against the extremely gusty Colorado winds. Each snowman has 4 guy wires made from fishing line connecting it to the ground with tent stakes. Four wires originate from the junction between the top and middle beach balls. In order to prevent the fishing line from cutting into the glue joint, we have a ring of string around the joint to which all of the guy lines attach.

We quickly learned that the guy lines are not sufficient, not because of wind but because of physics. We definitely underestimated the power of the PV=nRT equation and how significantly the volume of the air in the beach balls would shrink as the temperature went down. The end result was that the guy wires that had been under tension during the 70 degree afternoon became fairly slack at 8pm in the cold. Visually, the snowmen don’t look as good when under-inflated (their heads tend to tilt toward the side). Structurally, the lack of tension in the guy wires renders them mostly useless.
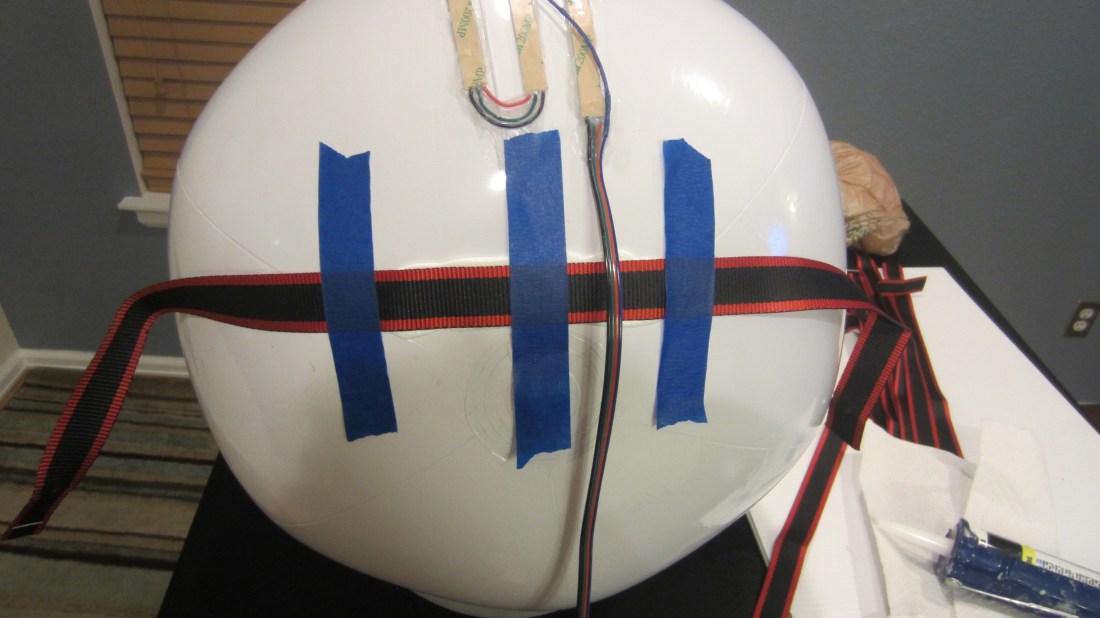
To solve this we purchased a pack of ratchet straps from Home Depot for 10 dollars and cut the strapping material into 2 foot sections. With a drill bit, we put a small hole the size of a tent stake in each end and used a lighter to prevent the strapping from fraying. We then caulked these into place near the bottom of each snowman and staked the straps into the ground to help secure the snowmen further.
Controlling the Snowmen
The light bulb rail and its corresponding snowmen on the tree side of the driveway are controlled by an ESPixelStick Pixel Controller. The mailbox side is controlled by a Sandevices E682 Pixel Controller. Each side of the driveway is its own universe.
Keeping the Snowmen Inflated
Our experience in 2017 with the snowmen was mostly positive. However, one challenge was keeping them looking good at all temperatures. Since each beach ball was its own closed system, we struggled constantly against physics and that pesky PV=nRT formula. For those unfamiliar with that equation, it basically says that as temperature decreases, pressure decreases as well for a fixed quantity of air. The net effect was the snowmen would look drunk much of the time at night as the air in them shrunk down.
To further complicate matters, since Colorado has such wide temperature swings, we were reluctant to add more air to the balls on cold nights because it might expand too much during the hottest part of the next day and possibly explode a beach ball. Furthermore, dragging the compressor around to all 36 beach balls was a major pain, particularly for the largest bottom balls because the fill valve is on the bottom. Adding air to those balls required untethering the snowman, a task which was no fun at all in cold weather.
So, in 2018, we knew an improvement was needed and we designed an air system to keep the snowmen looking great.
The Snowman Plumbing
Step 1 was to connect all of the snowmen together into one single air system rather than having 36 separate ones. We decided that the snowman heads (the smallest beach balls) looked fine regardless of temperature so we left those as their own individual pressure vessels. However, we connected the remaining 24 beach balls together with a network of tubes that all run back to the garage where they can connect into compressed air from our compressor.
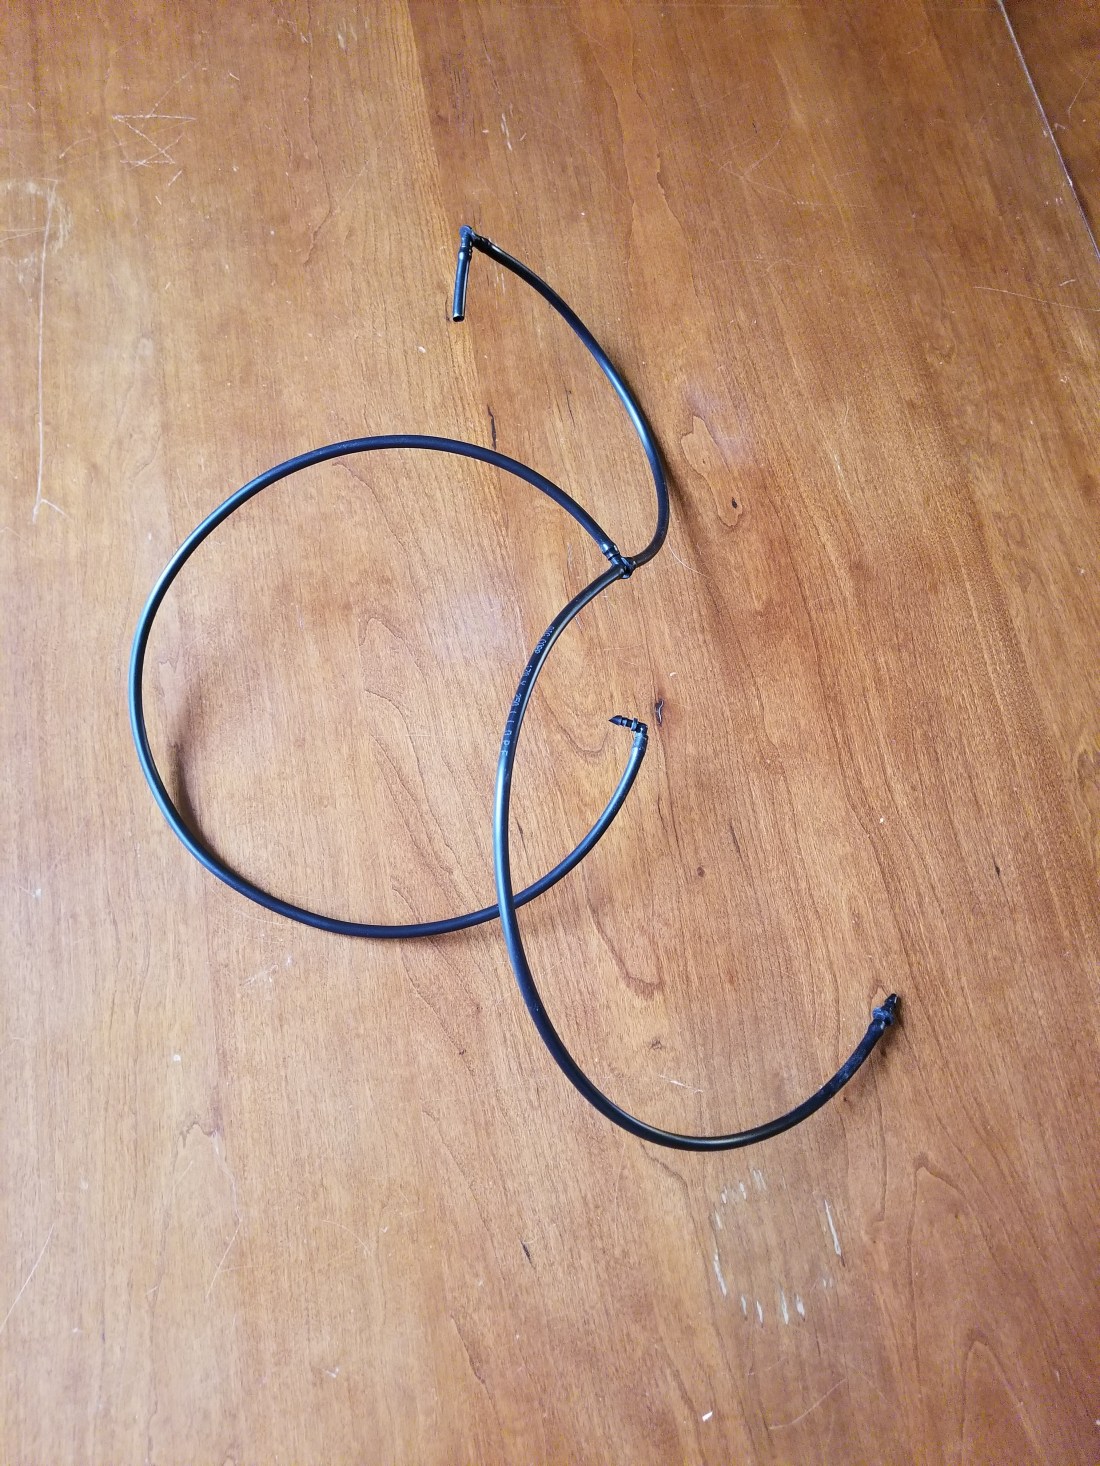
With a constant desire to keep things inexpensive, we decided to use 1/4″ irrigation drip tubing to interface with each beach ball. Each snowman has an identical “air harness” that inserts into the valves of the bottom two balls. This harness then connects into a 1/2″ irrigation drip tubing “bus” that connects the snowmen together. More 1/4″ tubing comes off the back of the bus and runs to the garage. We used standard drip tubing tees and elbows and couplers to make the connections, and used a heat gun to help get the tubing pushed all the way onto those fittings.
Because of the layout of our yard, we actually have two separate systems, one for the three snowmen on the mailbox side of the yard and another one for the snowmen on the tree side of the yard.
Automating the Air
The tubing from each set of snowmen meet at the corner of the garage where the compressor used to live. We actually moved the compressor to the basement and ran an air hose out to the garage in order to lessen the noise that can be heard from the outside when it runs. It’s a little louder in certain parts of the house than before, but overall is a better experience for those watching the show and for those in the bedrooms above the garage.
At first, we just used manual squeeze handles (like what you would use to blow crumbs out of a cup holder) shoved into the edge of the tubing to maintain the snowman air levels, but this quickly proved to be unsustainable, especially given the amounts of leakage in our system. We believe the leaks were mostly in the snowmen themselves (see 2018 update at top of page) but it is possible that the irrigation tubing joints also have some leaks. The main consideration when adding air to the system (whether manually or automated) is to do it slowly and in pulses. This gives time for air to distribute and balance the pressures in each ball in the system. If you add air too quickly, it will localize and may explode one of the beach balls, even if they system as a whole has enough capacity to handle the added air. Take it slow and things should work out well.
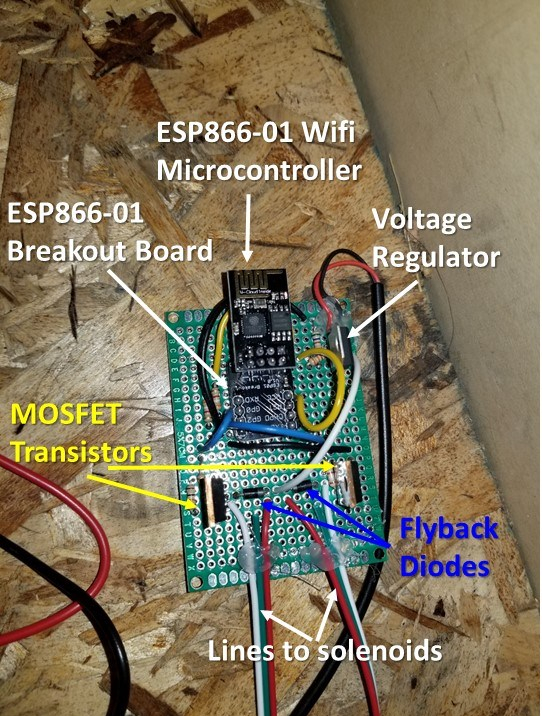
For automating the snowman air system, we used an ESP8266-01 wifi-enabled microcontroller (this is the same chip used in the ESPixelStick Pixel Controller and that we used in our controller for the original RGB Window Wash Lights). Originally, we had hoped to use an ESP8266-12 because it has more pins (including an analog input to read a pressure sensor) but Philip could not figure out how to get it to program in the time we had left so we switched back to something more familiar. It would have been nice to utilize the pressure sensor as part of the system, but we ended up with a system that works without that data so all is well.

The microcontroller only has two output pins, and each of those drives a MOSFET transistor, which in turn drive 12V solenoids that we purchased on Amazon for about $10 each. These solenoids have their input connected to a compressed air splitter and their output connected to the drip tubing for their respective snowmen.

Our initial software or controlling was very, very basic and was hardcoded to send pulses of air at a specific frequency to each set of snowmen. While this worked temporarily, it was a pain to maintain because anytime we wanted to change the schedule, we had to take the chip back inside and reprogram it. However, it did buy us a bit of time while we worked on the next revision.
The second version of the software is far cooler and allows for dynamically changing the schedule of air pulses as well as sending manual pulses on demand. We can even interact with it when away from home and ensure the snowmen stay healthy and happy. The current settings that seem to be working well to maintain snowman posture are a 1 second pulse of air every 600 seconds (10 minutes) for the left (tree) side snowmen and a 1 second pulse every 1200 seconds (20 minutes) for the right (mailbox) side snowmen.
All in all, the system is pretty slick and working well. Considering it only took Philip a few nights of work to get the automation running, it was time well spent, even if we do something different with the snowmen next year. If you listen carefully when standing by the snowmen, you can hear when a pulse of air comes and you might see the snowmen perk up just a bit. Most people will probably miss it even happening, but it makes us smile every time it works like it should. It is also a cool feeling to stand outside or be sitting in the car, pull out your phone, send some manual pulses of air, and watch the snowmen stand up taller in response.
